STEP 1 - Science
1. Evidence of hands-on investigation from each of the four curriculum strands:
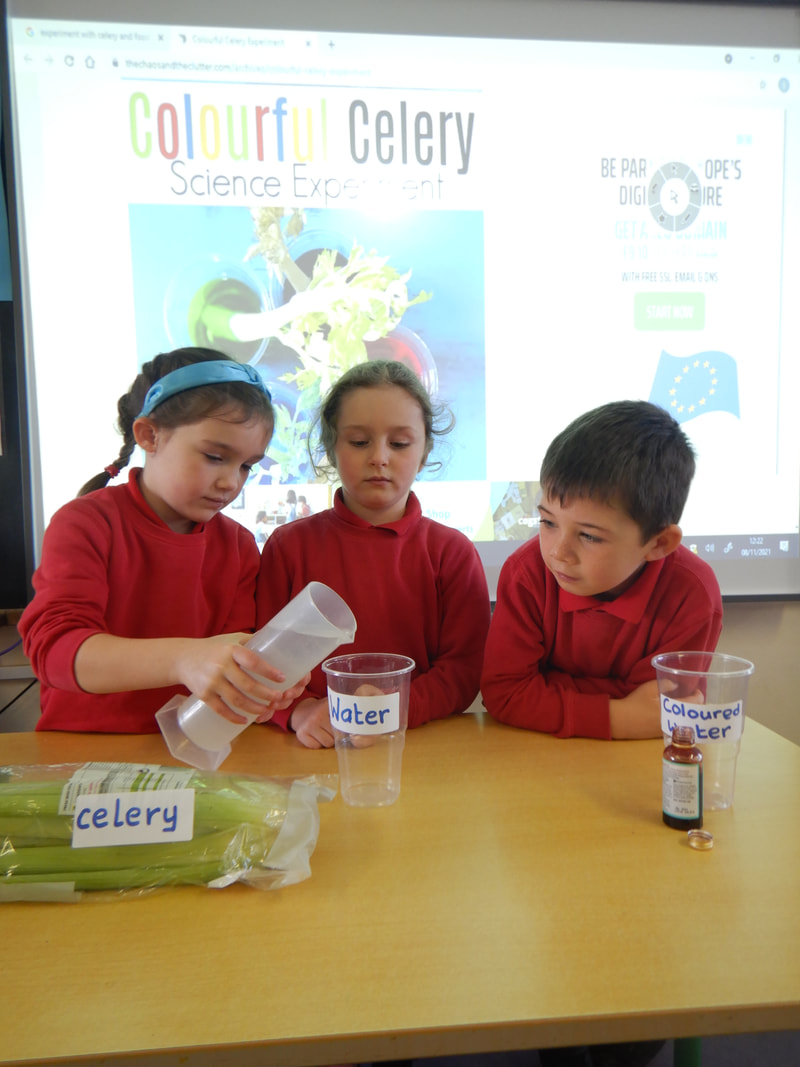
Living Things - Junior and Senior Infants: The pupils completed the following experiment:
Strand: Living Things
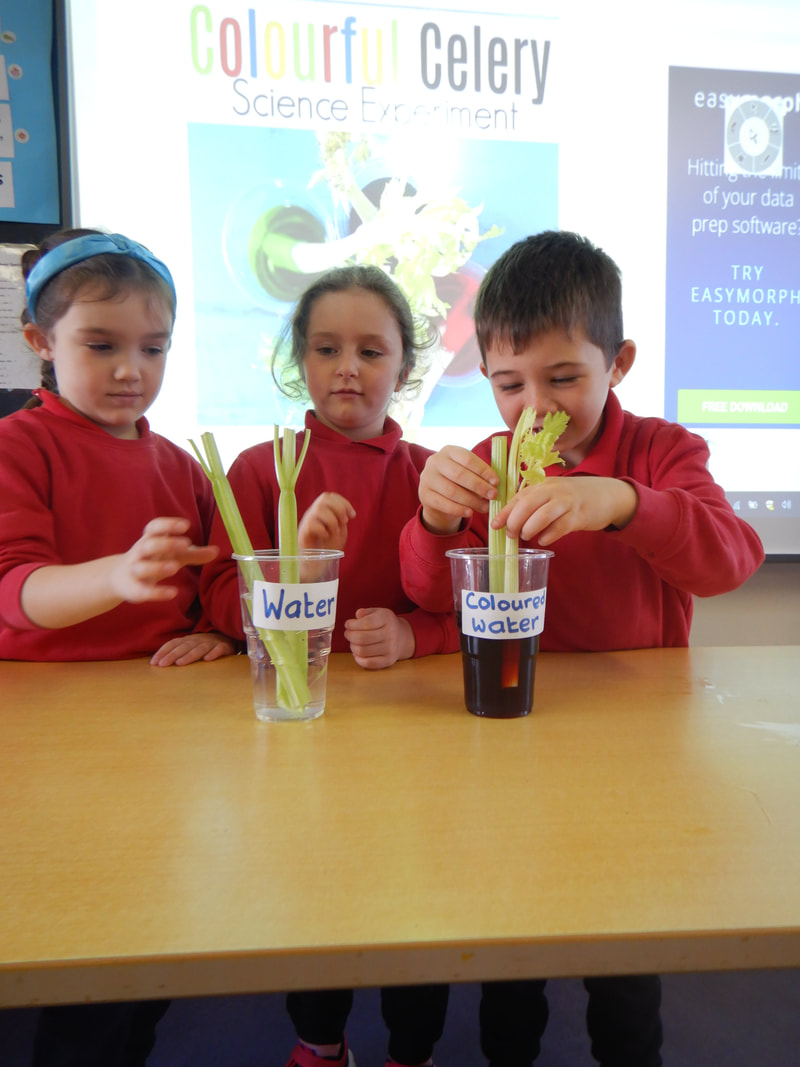
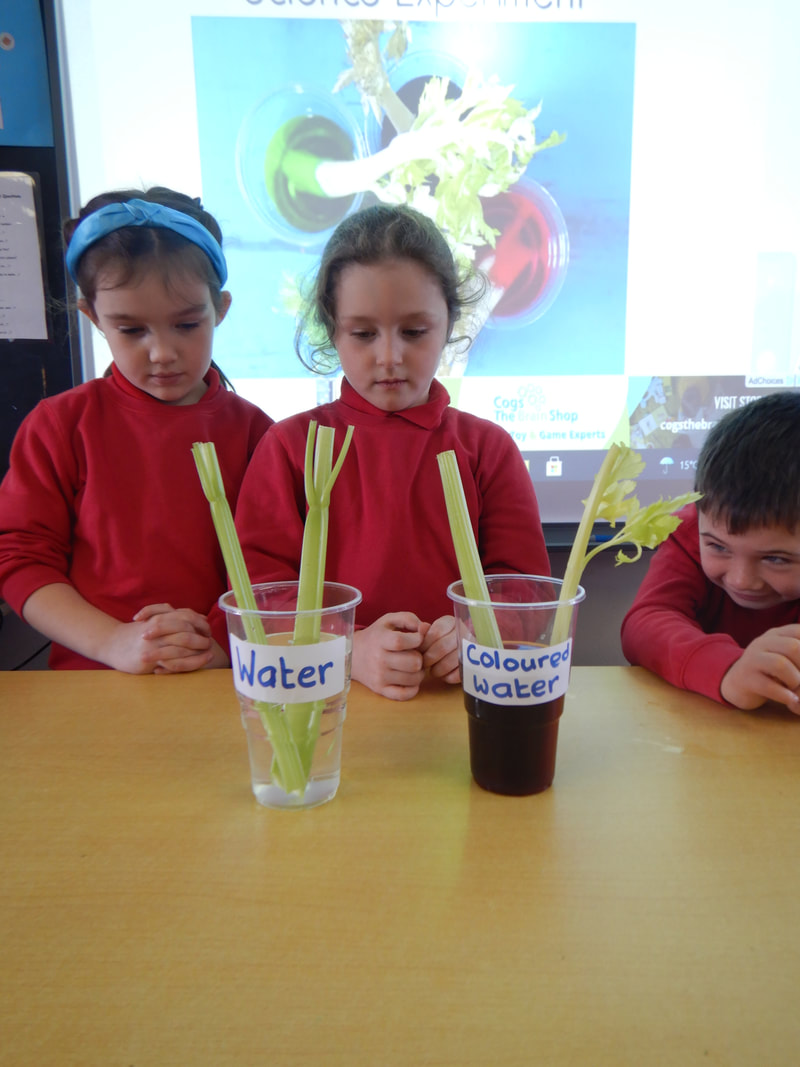
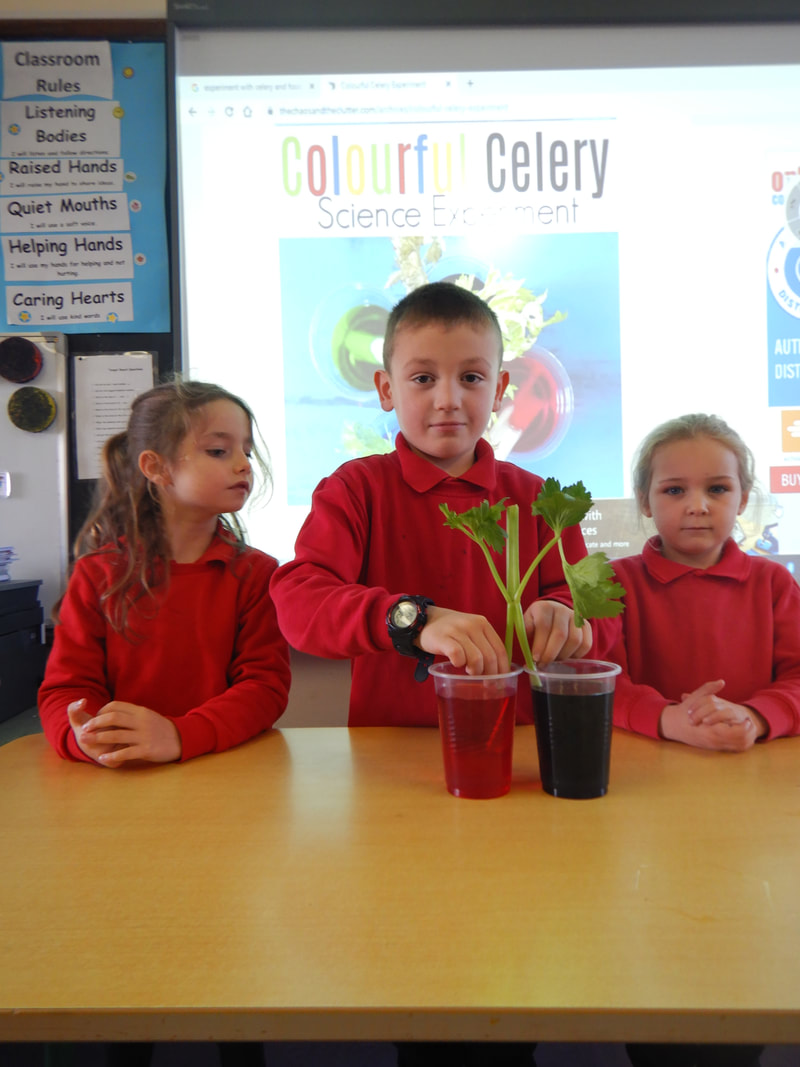
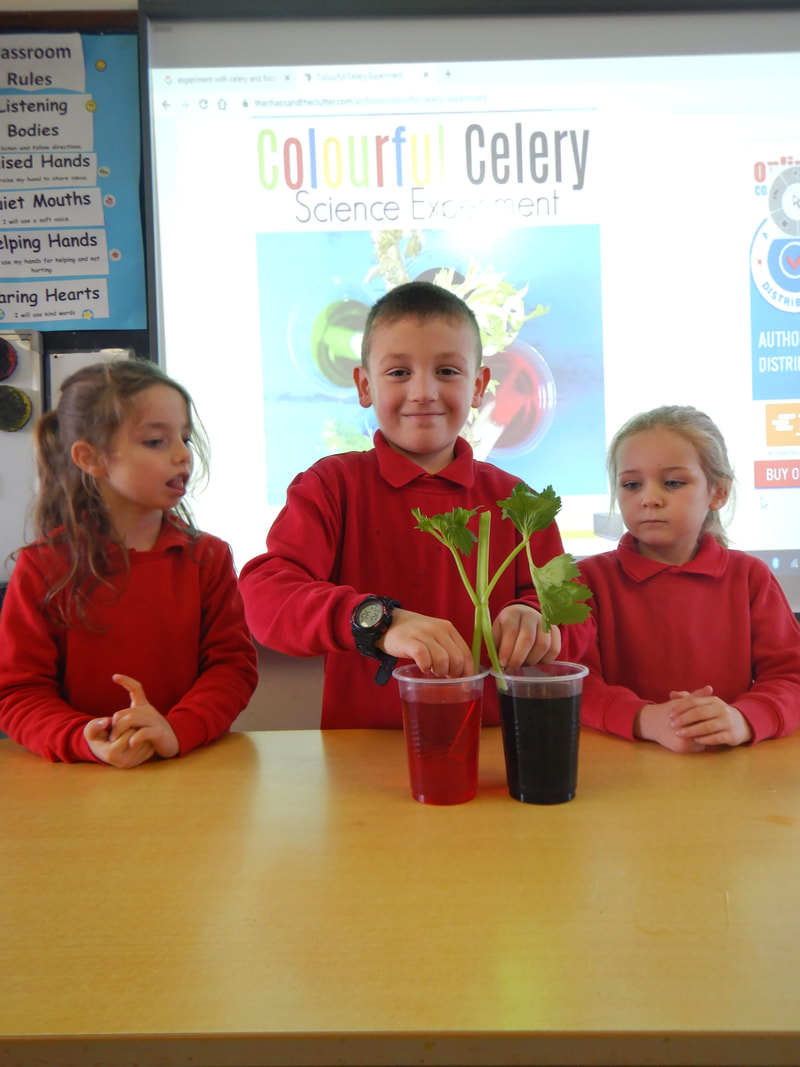
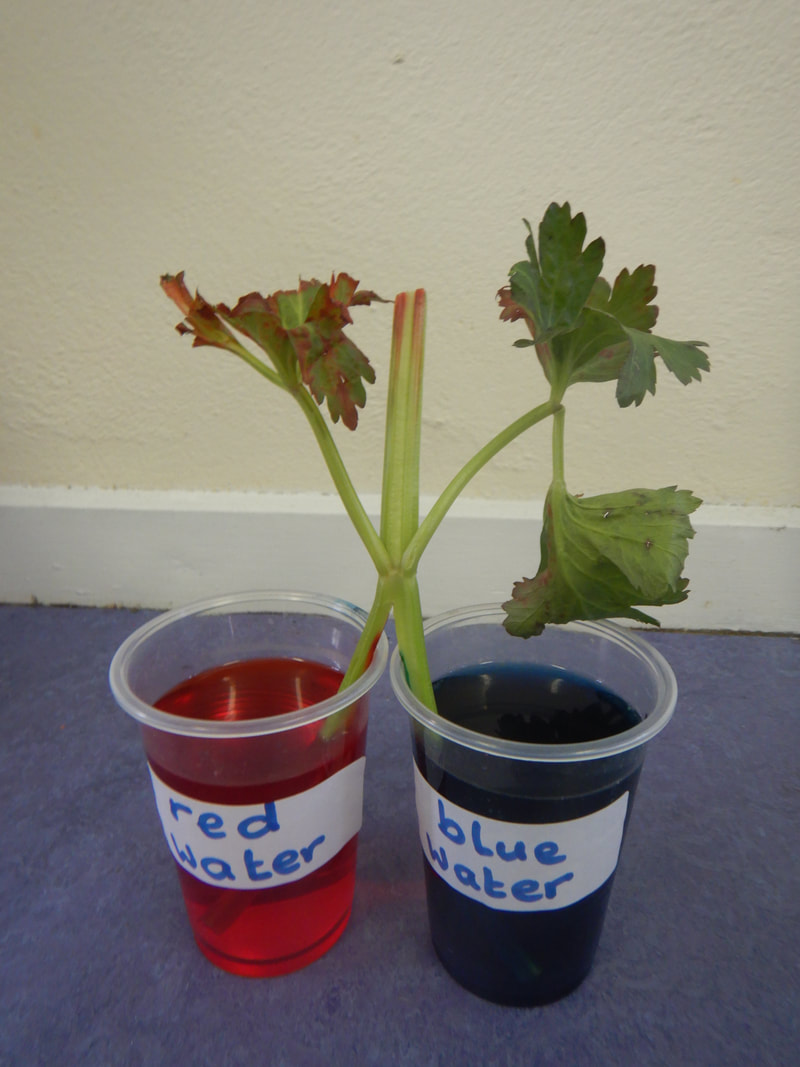
Title: Investigate How Plants Drink
Objective: To show that water moves in thin tubes up through plants.
Before the experiment we researched and learnt about what plants need to grow.
What we needed:
• 2 sticks of celery with leaves
• Red and blue food colouring
• 3 plastic glasses
• Water
Procedure:
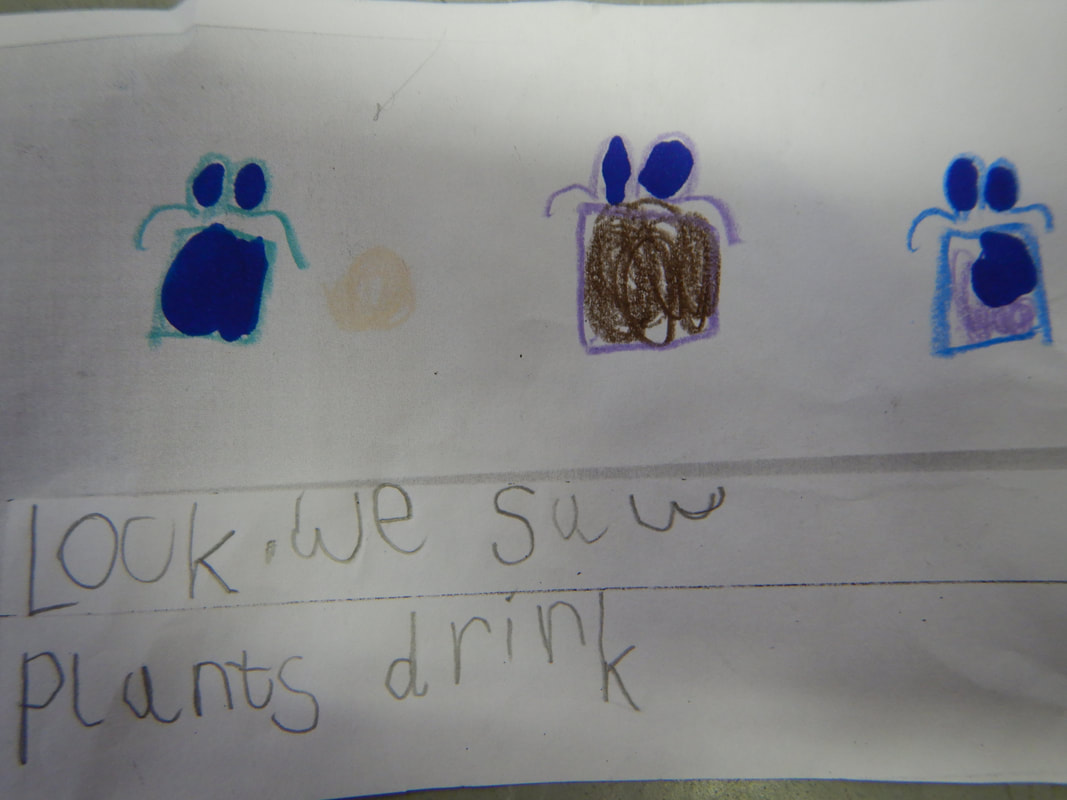
The level of water in the glasses had dropped. This means that the celery sticks had drank some of the water.
We saw thin blue lines running the length of the 1st celery stalk. We also saw also blue in the leaves of the celery. This is because the blue water from the glass has moved up through the thin tubes in the celery.
When we looked at the second celery stick we saw that its leaves were multi-coloured. They were red and blue because they had drank some red and some blue water
Scientific Skills
Living Things - Junior and Senior Infants: The pupils completed the following experiment:
Strand: Living Things
Title: Investigate How Plants Drink
Objective: To show that water moves in thin tubes up through plants.
Before the experiment we researched and learnt about what plants need to grow.
What we needed:
• 2 sticks of celery with leaves
• Red and blue food colouring
• 3 plastic glasses
• Water
Procedure:
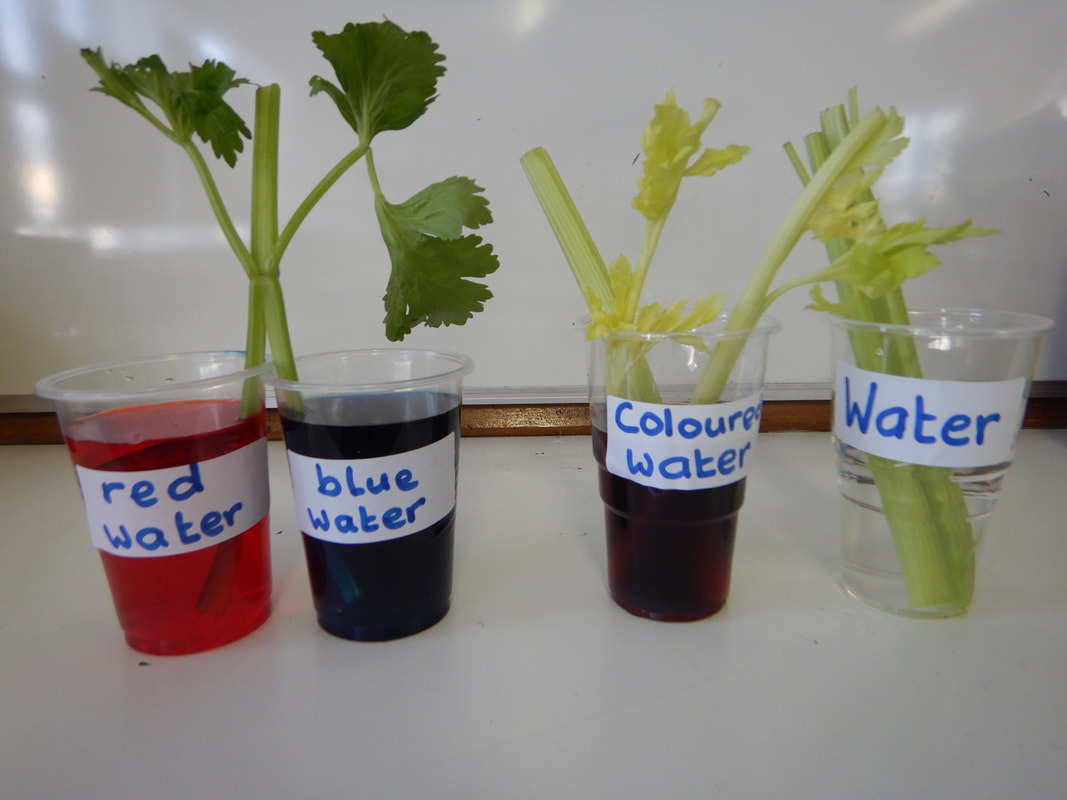
- We half-filled each glass with water.
- We added blue food colouring to the first glass of water
- We cut the stem off each plant about 1cm from the end.
- We placed the 1st celery stick with leaves in the blue coloured water.
- We added red food colouring to the second glass of water and blue food colouring to the third glass of water.
- We divided the stem of the 2nd celery stick placing one half of the celery in the red water and the other half in the blue water
- We marked the level of water in each glass with our marker and we left the three glasses for three days on a shelf in our classroom.
The level of water in the glasses had dropped. This means that the celery sticks had drank some of the water.
We saw thin blue lines running the length of the 1st celery stalk. We also saw also blue in the leaves of the celery. This is because the blue water from the glass has moved up through the thin tubes in the celery.
When we looked at the second celery stick we saw that its leaves were multi-coloured. They were red and blue because they had drank some red and some blue water
Scientific Skills
- Questioning
- Observing
- Predicting
- Investigating and experimenting
Living Things - First, Second, Third and Fourth Classes: The pupils completed the following experiment:
STRAND: Living things
Strand unit: Human life
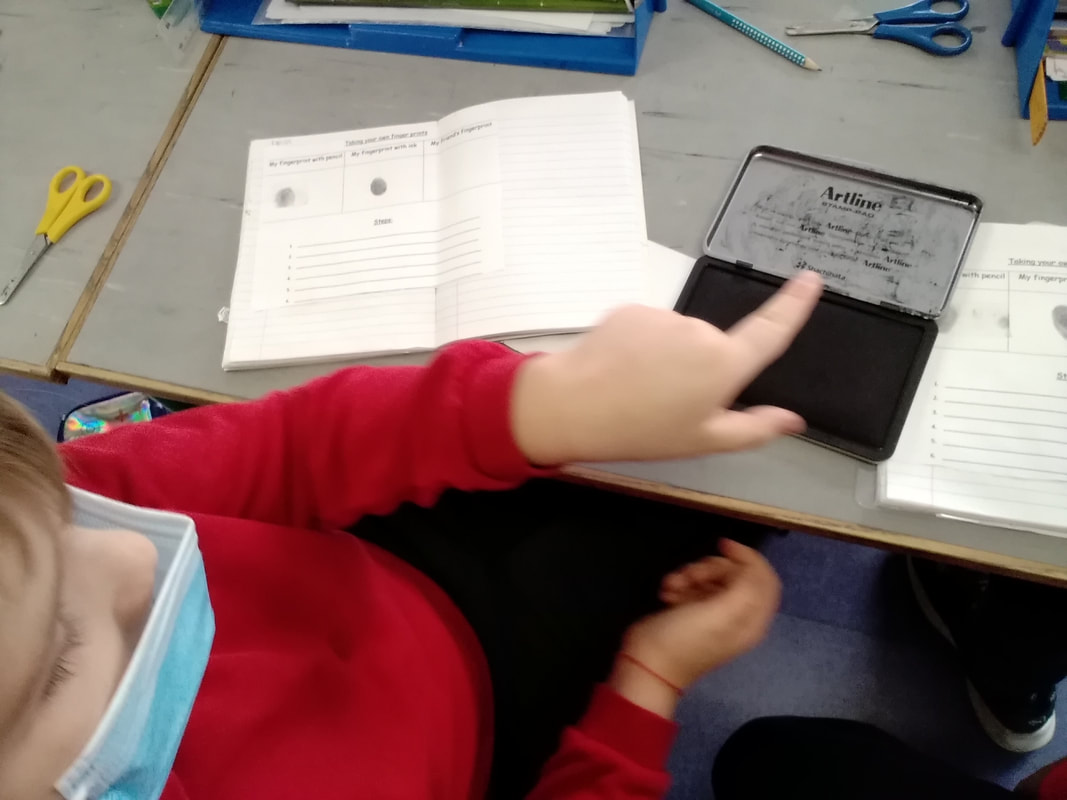
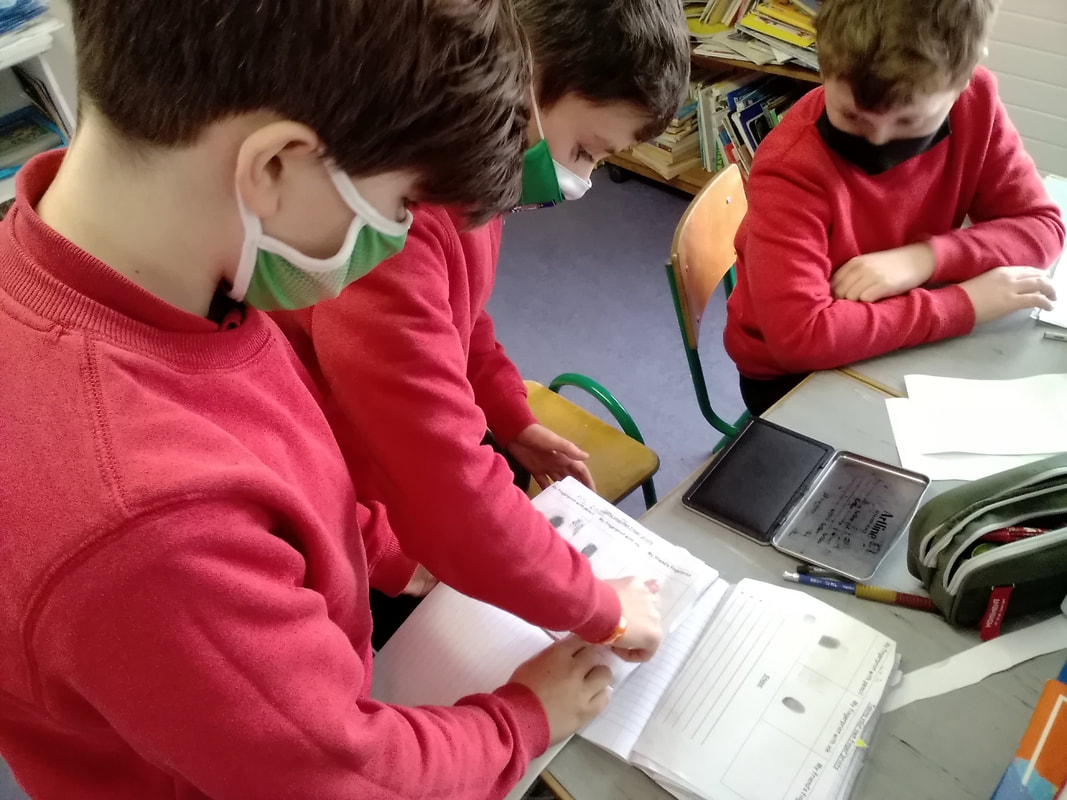
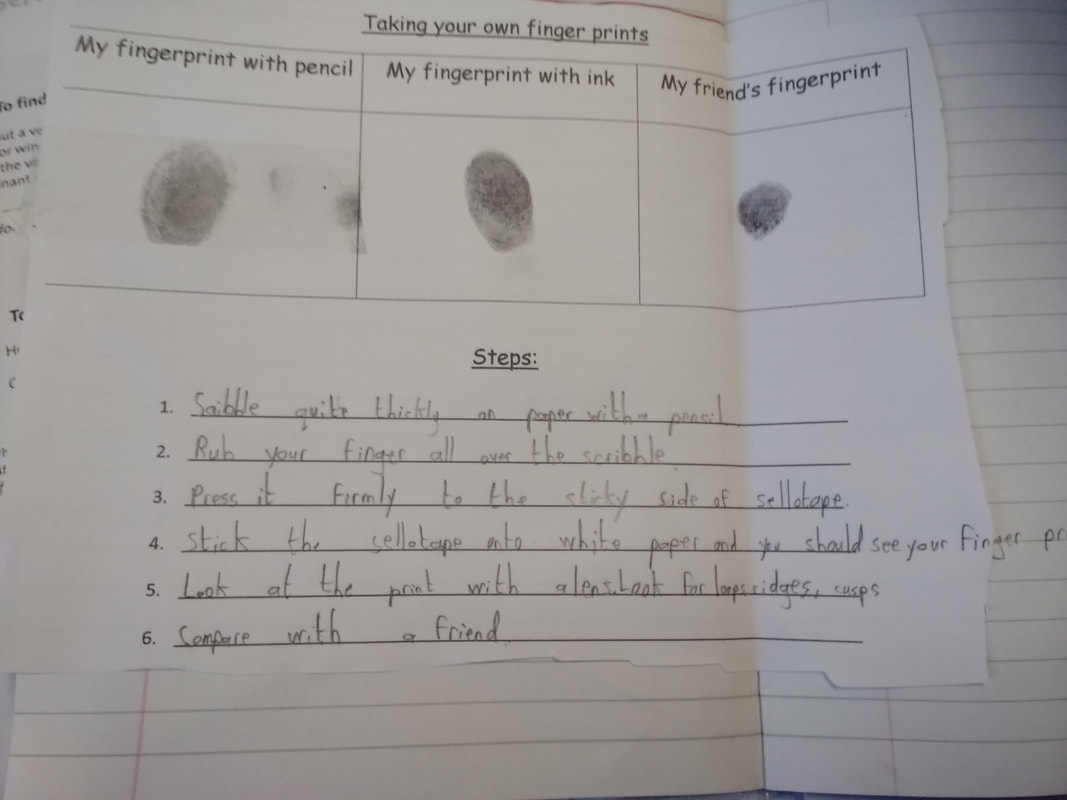
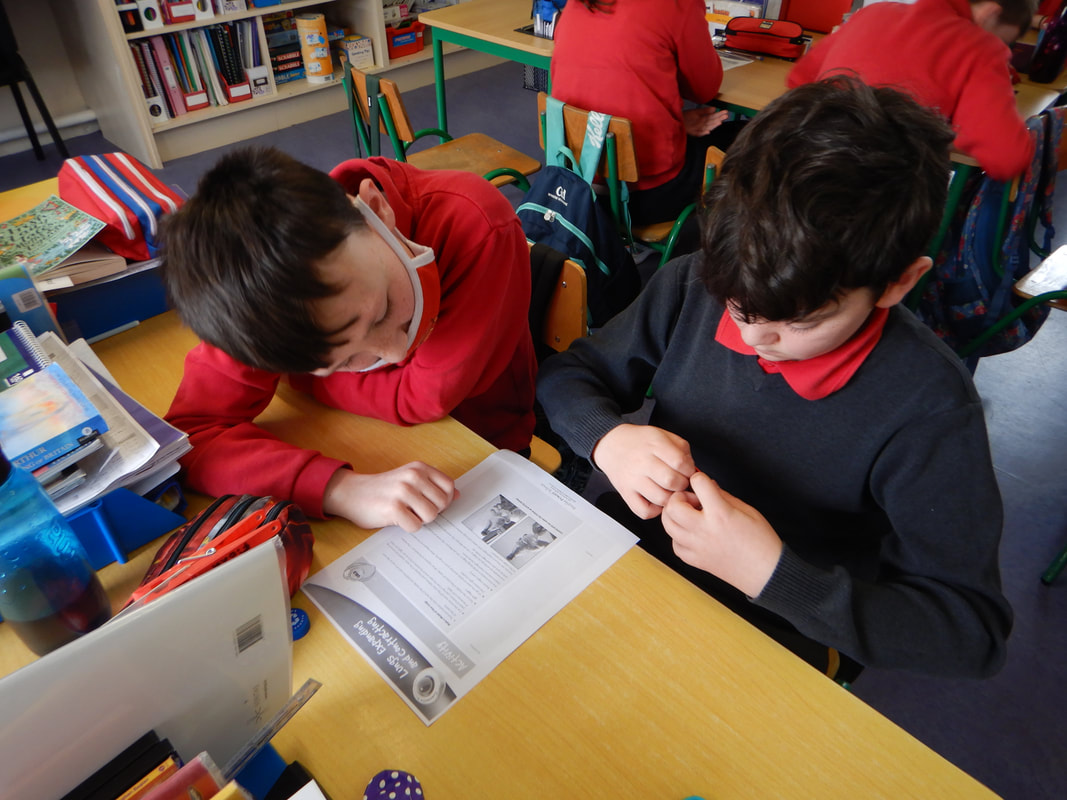
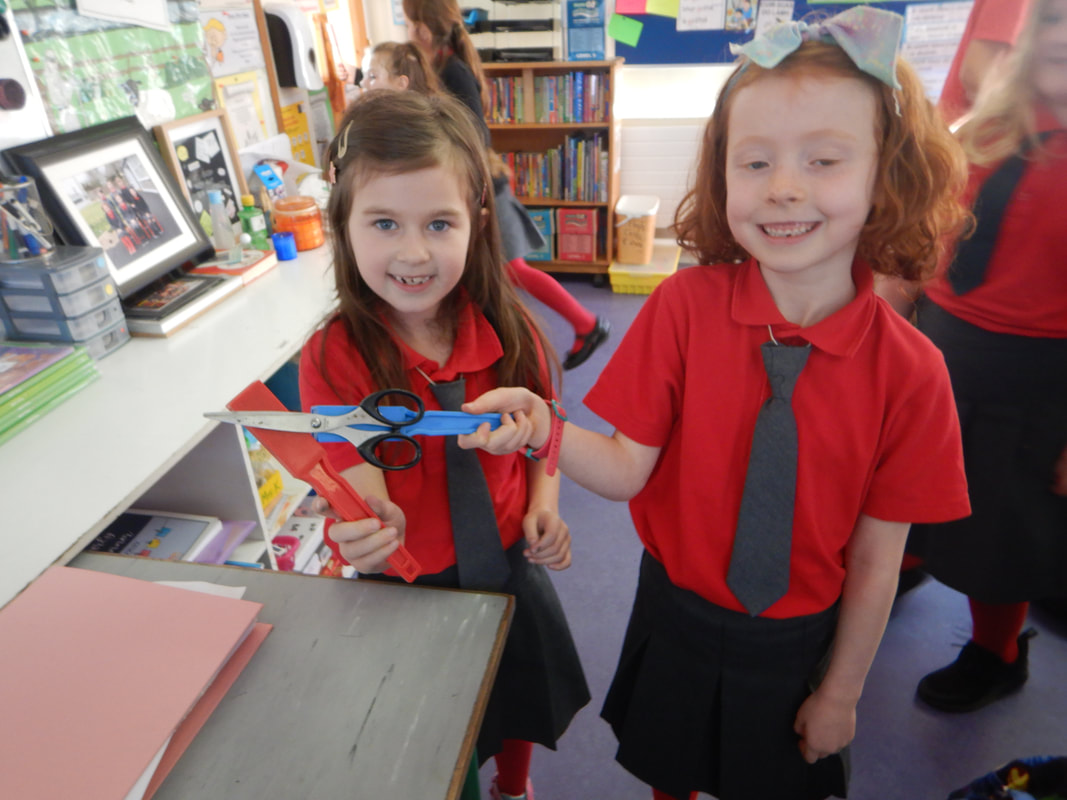
Title: Taking your own fingerprints
Objectives:
We discovered that everybody’s fingerprints are different. Each fingertip has a pattern of fine ridges that are slightly different for each person- even identical twins.
Scientific skills:
Investigating and Experimenting
STRAND: Living things
Strand unit: Human life
Title: Taking your own fingerprints
Objectives:
- To investigate some scientific facts about oneself
- ‘Lead’ pencils
- White paper
- Sellotape
- Hand lens
- Scribble quite thickly on white paper with a pencil.
- Rub your finger all over the scribble making it very smudgy.
- When the finger is black press it firmly to the sticky side of a piece of sellotape.
- Stick the sellotape onto white paper and you should see your finger print.
- Look at the print with a hand lens. Look for loops, ridges, cusps.
- Print the tip of your finger with ink and compare with the print on the sellotape.
- Compare with a friend.
We discovered that everybody’s fingerprints are different. Each fingertip has a pattern of fine ridges that are slightly different for each person- even identical twins.
Scientific skills:
Investigating and Experimenting
Living Things - Fifth and Sixth Class: The pupils completed the following experiment:
STRAND: Living things
Strand unit: Human life
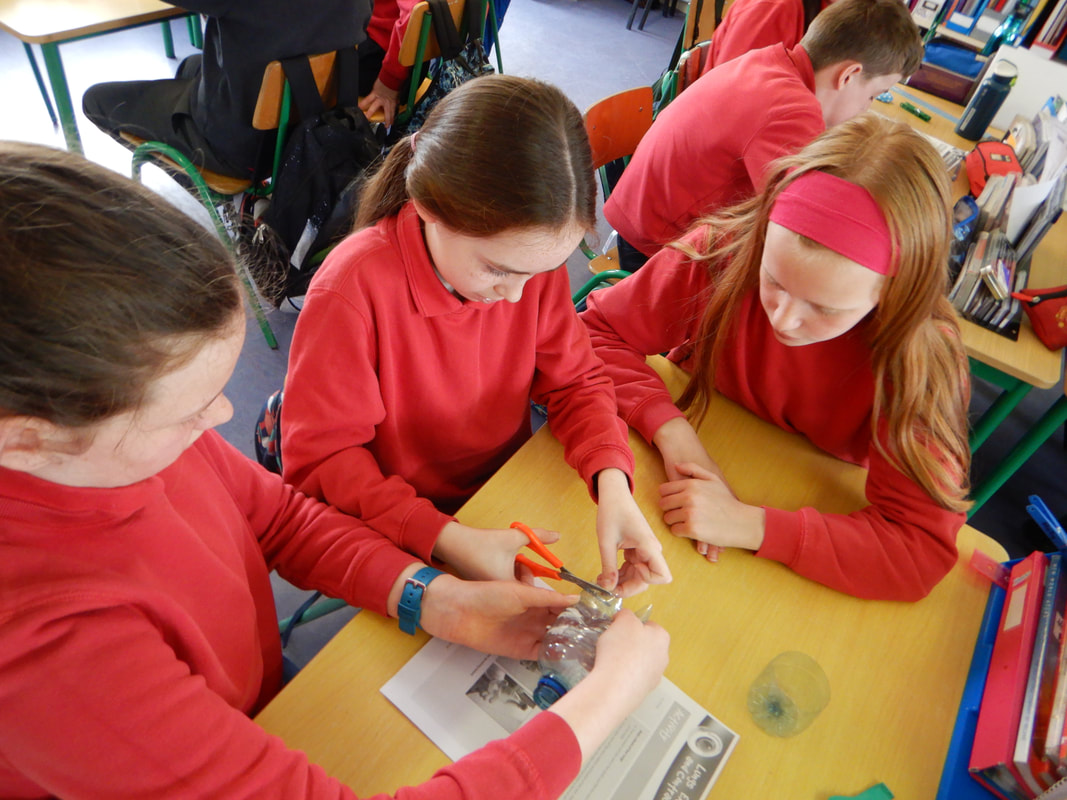
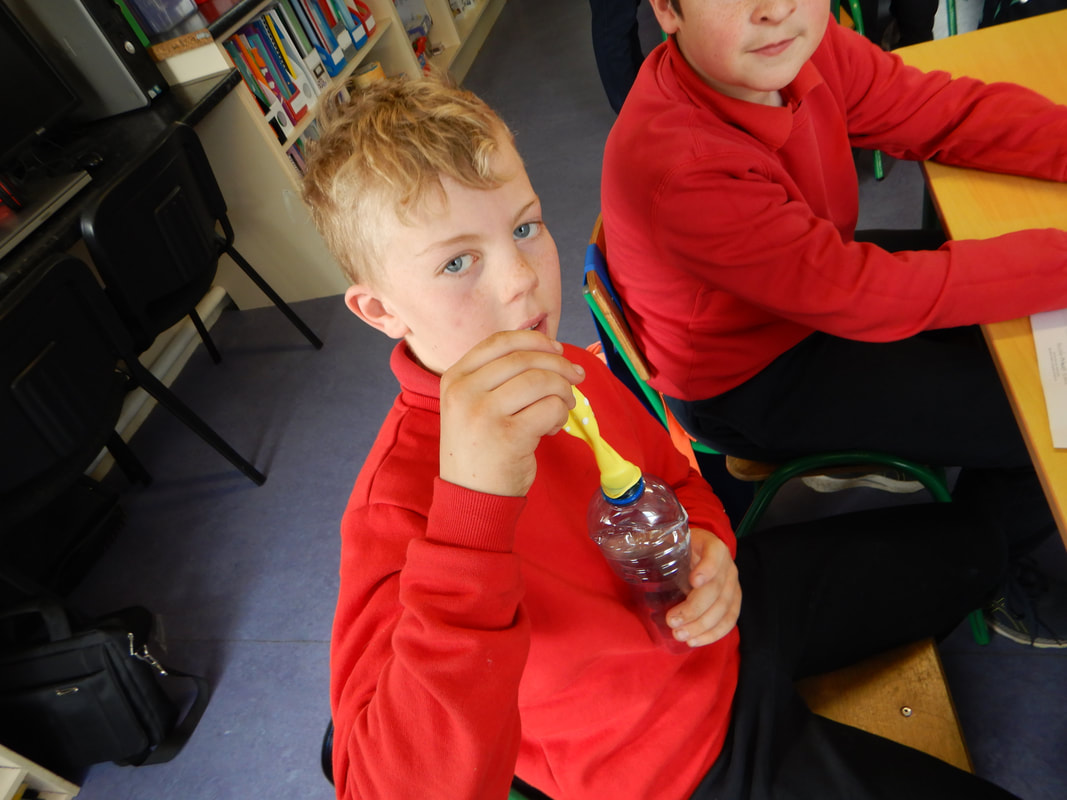
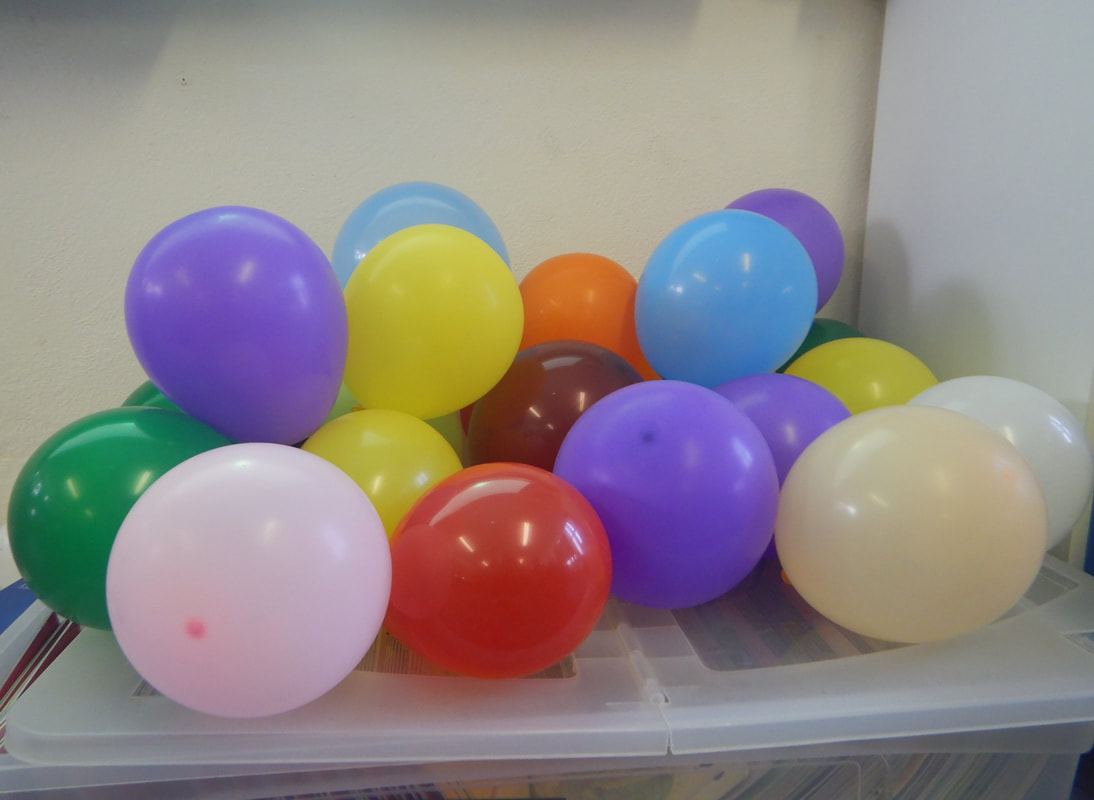
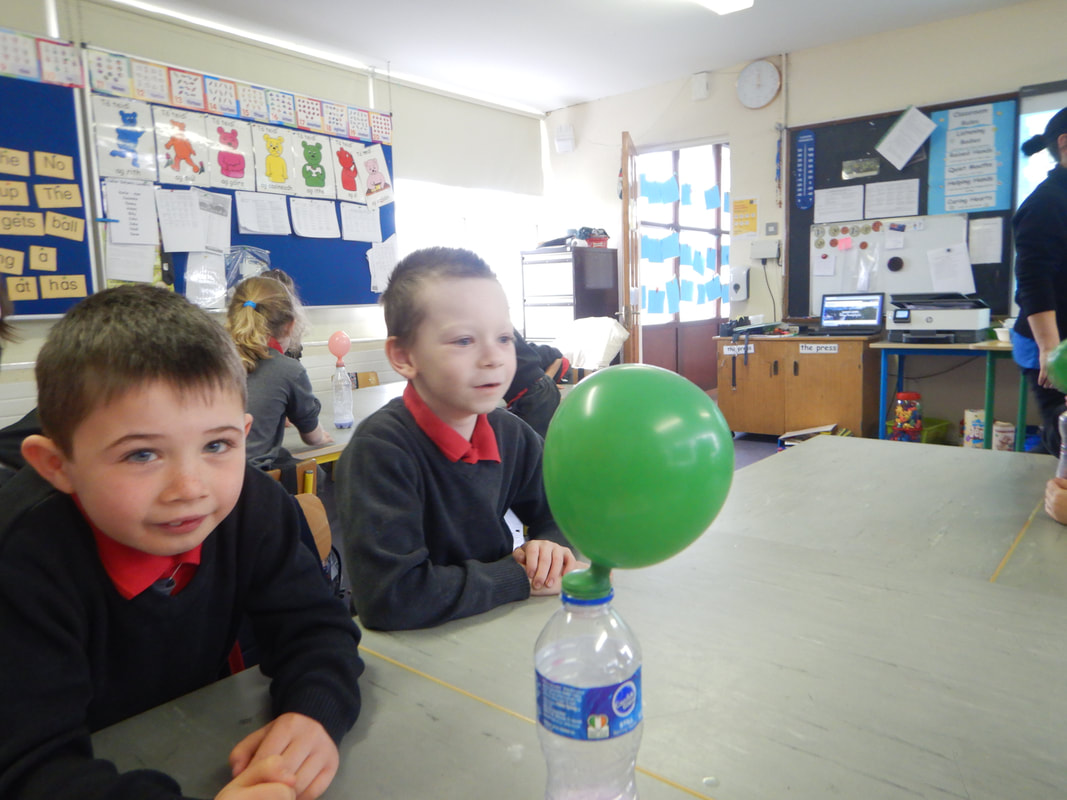
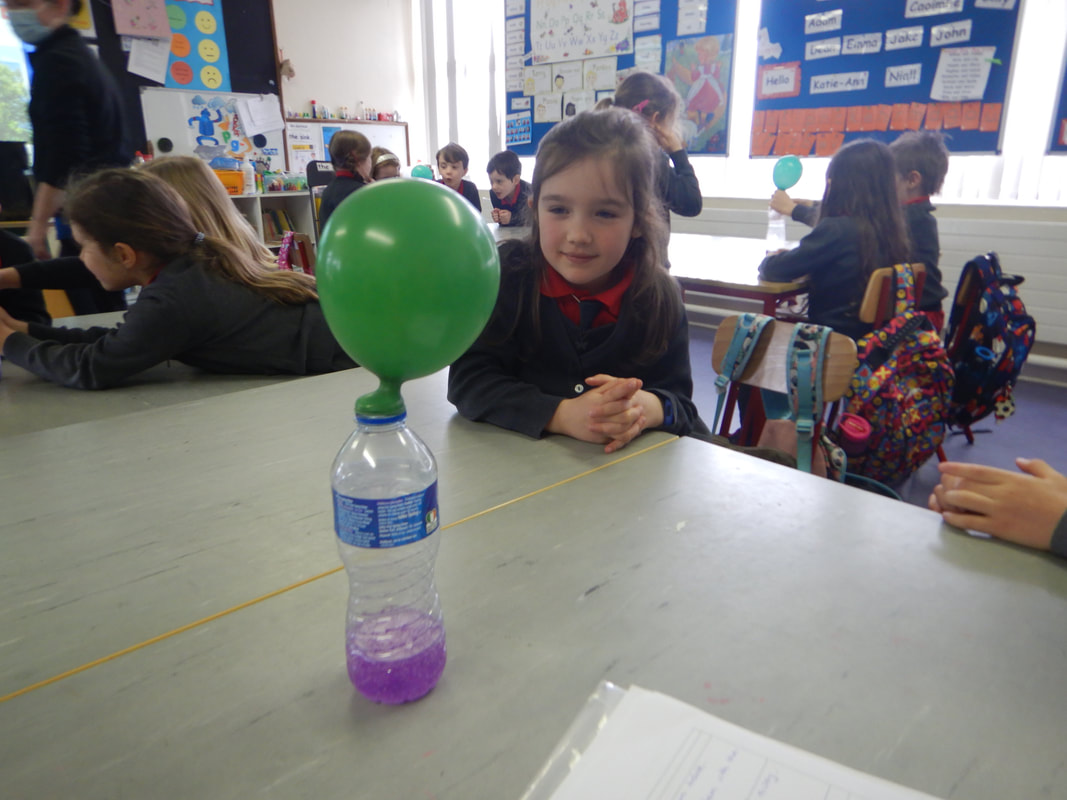
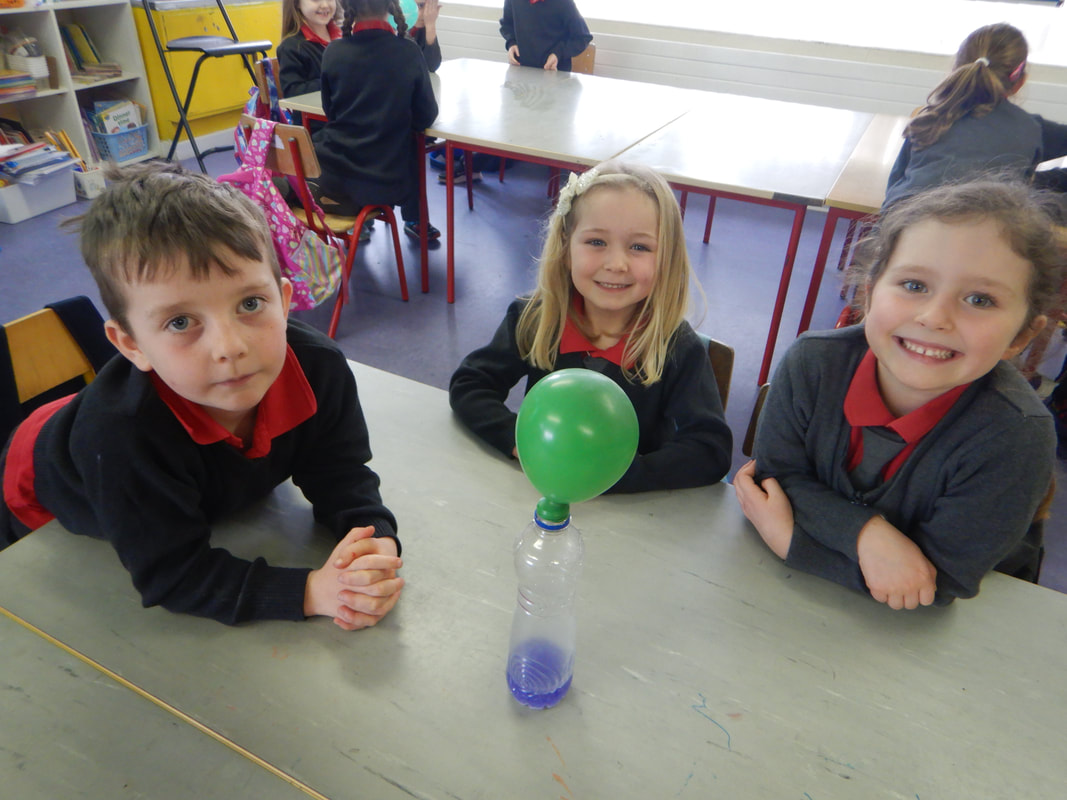
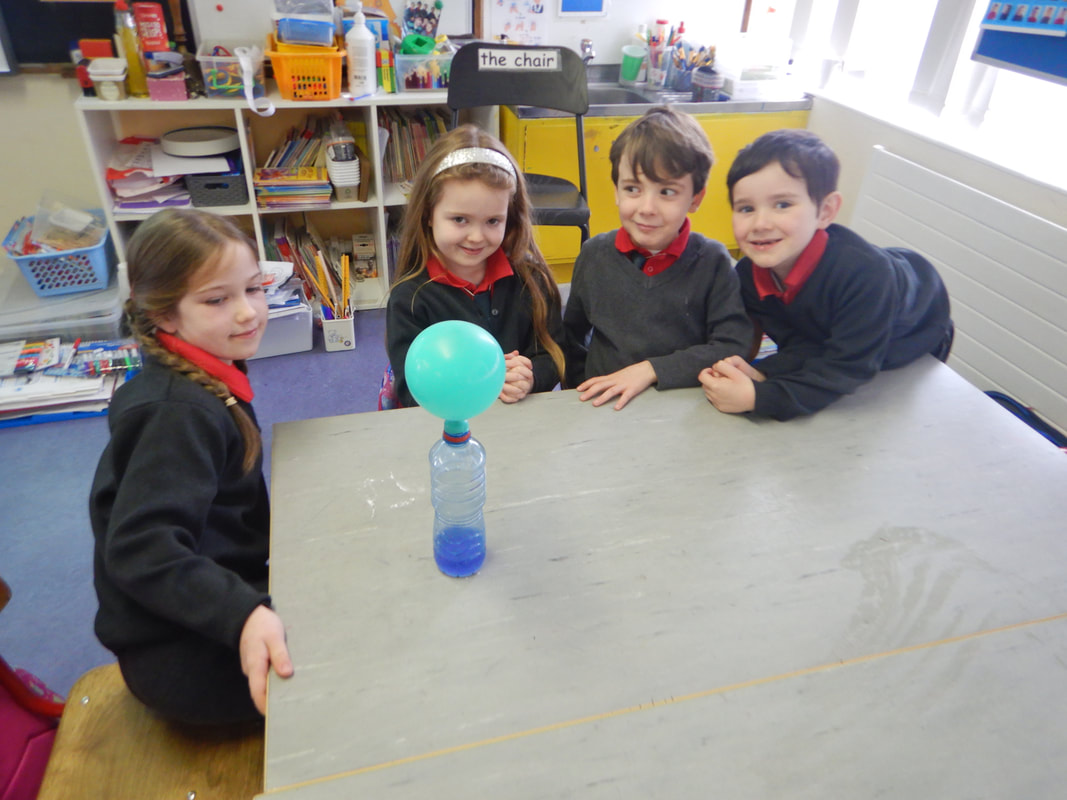
Title: Lungs Expanding and Contracting
Objectives: to demonstrate what happens to the diaphragm and the ribs when breathing in and out.
Equipment:
Two Balloons
Water bottle
Background information: The children learned that when they breathe in, the muscle under their chest, called the diaphragm, moves down and the ribs move out. This makes the space bigger and so they get lower air pressure in the lungs. Air rushes in from outside. When they breathe out, the diaphragm moves up and the ribs move back in, and the air is pushed out.
Procedure:
1. Push one balloon into the neck of the bottle, and fold the neck of it round the neck of the bottle.
2. Cut the entire neck off the other balloon, and dispose of the neck. Stretch the remaining piece of balloon, placing it over the open end of the bottle to form an air- tight join (seal if necessary with tape).
3. Pull on the middle of the piece of rubber. What happens to the balloon? (The balloon gets bigger).
4. Let go the piece of rubber, and then push it in gently. What happens to the balloon? (The balloon gets smaller).
5. Repeat stages 3 and 4: this time breathe in while doing Stage 3 – can you feel your ribs move out as your lungs expand and your diaphragm moves down?;
and breathe out while you do stage 4 – can you feel your ribs move back in as your lungs contract and your diaphragm moves up?
Can you see that your diaphragm (the rubber) and lungs (balloon) behave in a similar way to the rubber and balloon?
Scientific Skills: Experimenting & Observing
STRAND: Living things
Strand unit: Human life
Title: Lungs Expanding and Contracting
Objectives: to demonstrate what happens to the diaphragm and the ribs when breathing in and out.
Equipment:
Two Balloons
Water bottle
Background information: The children learned that when they breathe in, the muscle under their chest, called the diaphragm, moves down and the ribs move out. This makes the space bigger and so they get lower air pressure in the lungs. Air rushes in from outside. When they breathe out, the diaphragm moves up and the ribs move back in, and the air is pushed out.
Procedure:
1. Push one balloon into the neck of the bottle, and fold the neck of it round the neck of the bottle.
2. Cut the entire neck off the other balloon, and dispose of the neck. Stretch the remaining piece of balloon, placing it over the open end of the bottle to form an air- tight join (seal if necessary with tape).
3. Pull on the middle of the piece of rubber. What happens to the balloon? (The balloon gets bigger).
4. Let go the piece of rubber, and then push it in gently. What happens to the balloon? (The balloon gets smaller).
5. Repeat stages 3 and 4: this time breathe in while doing Stage 3 – can you feel your ribs move out as your lungs expand and your diaphragm moves down?;
and breathe out while you do stage 4 – can you feel your ribs move back in as your lungs contract and your diaphragm moves up?
Can you see that your diaphragm (the rubber) and lungs (balloon) behave in a similar way to the rubber and balloon?
Scientific Skills: Experimenting & Observing
Energy and Forces - Junior and Senior Infants: The pupils completed the following experiment:
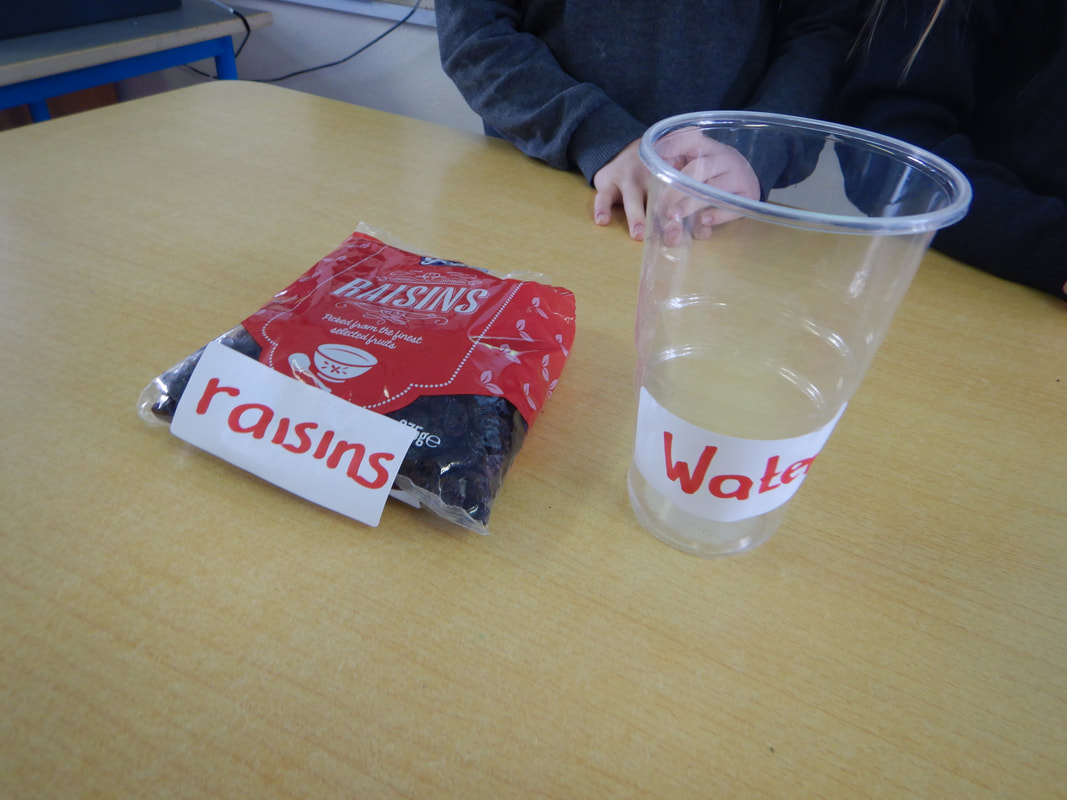
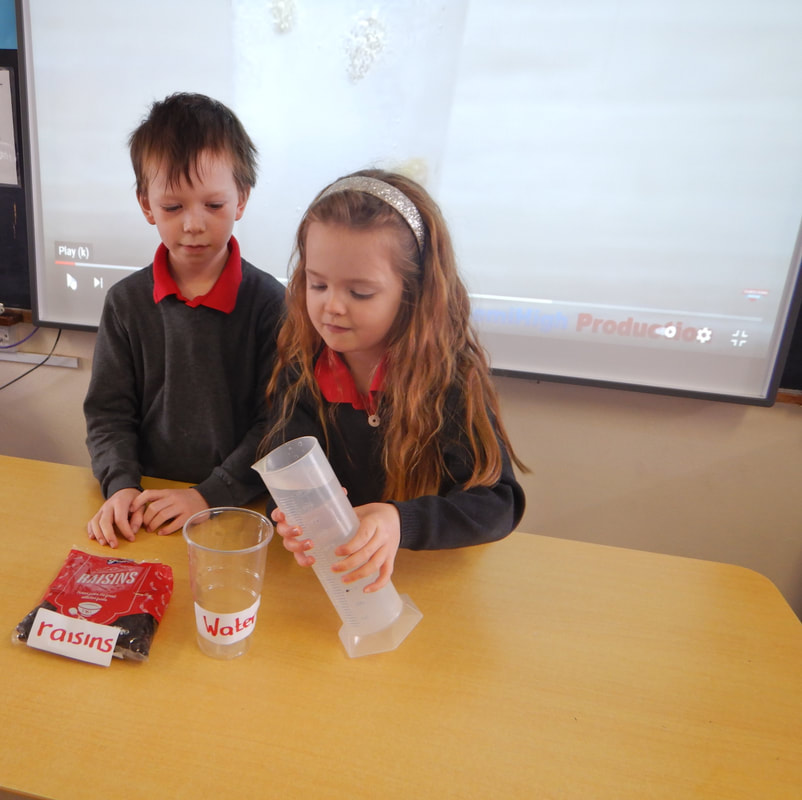
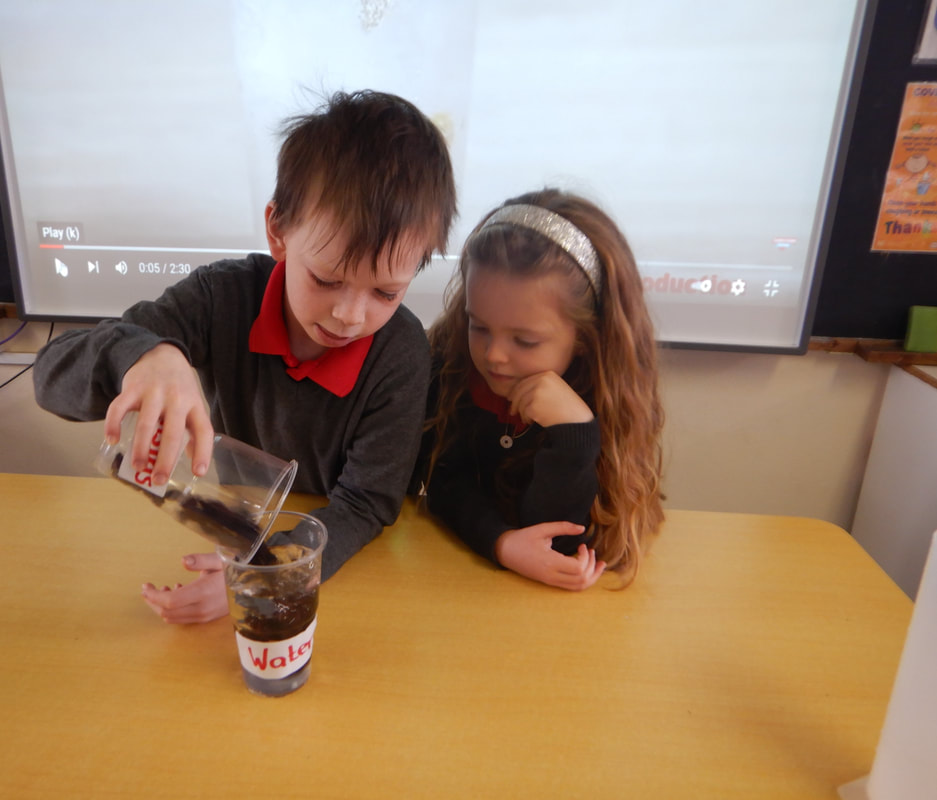
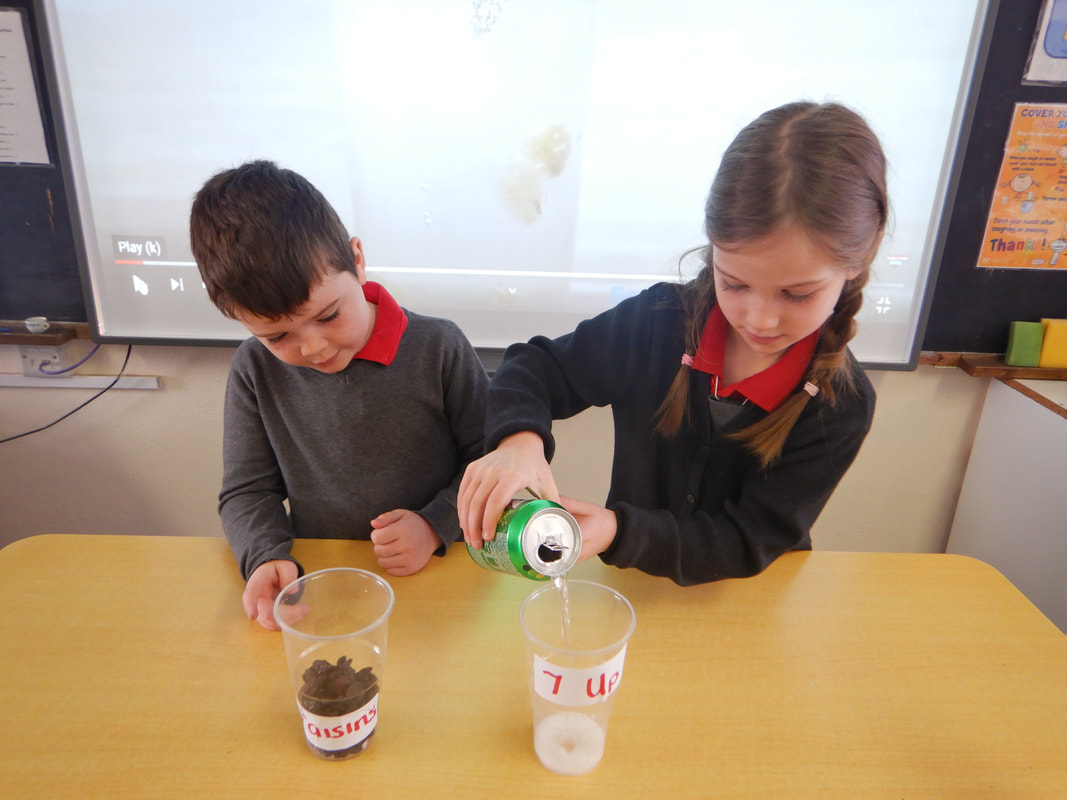
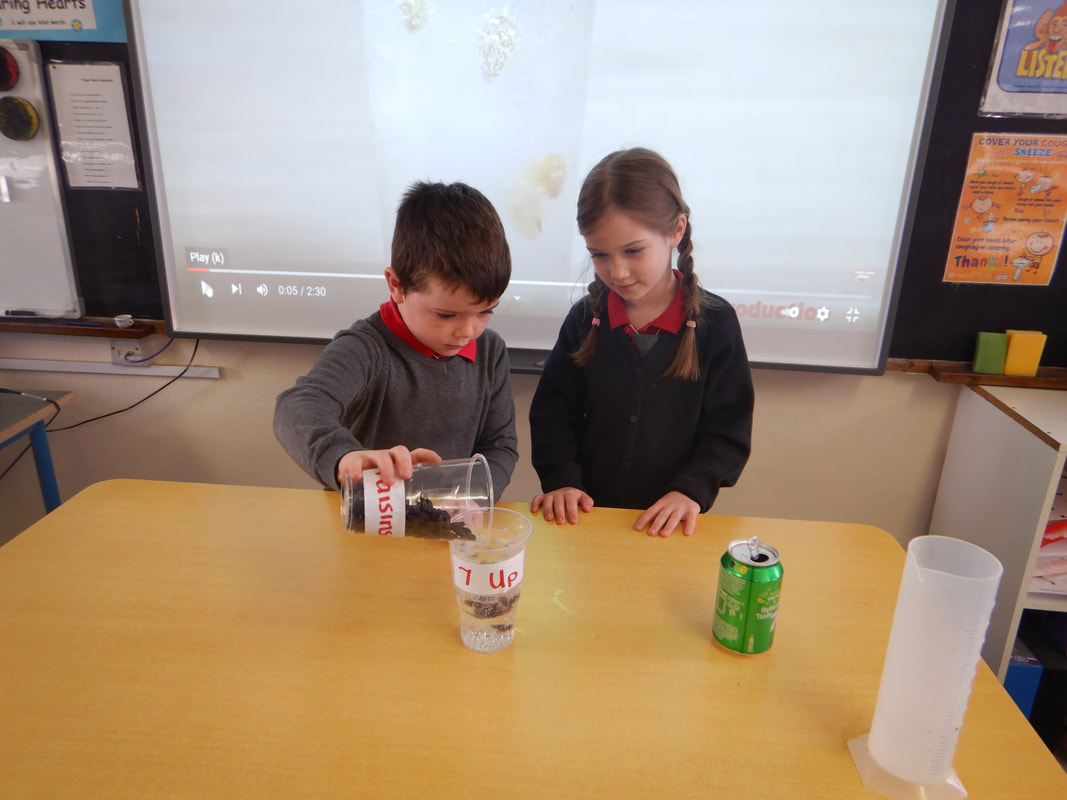
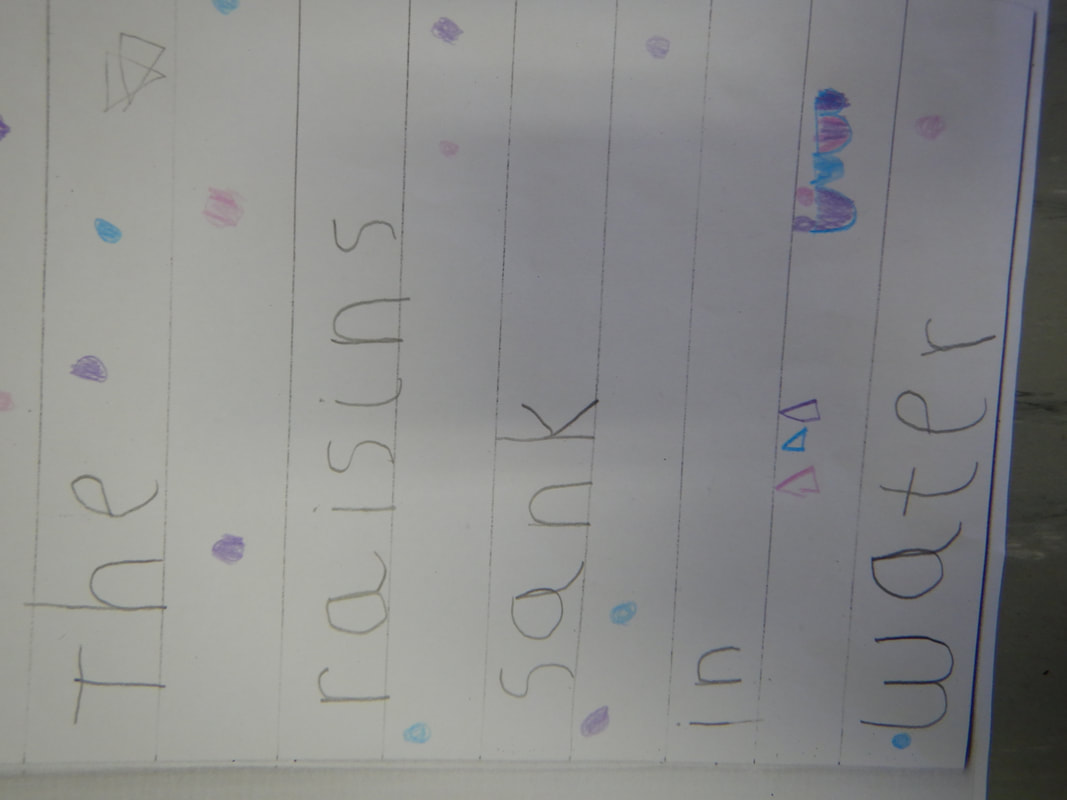
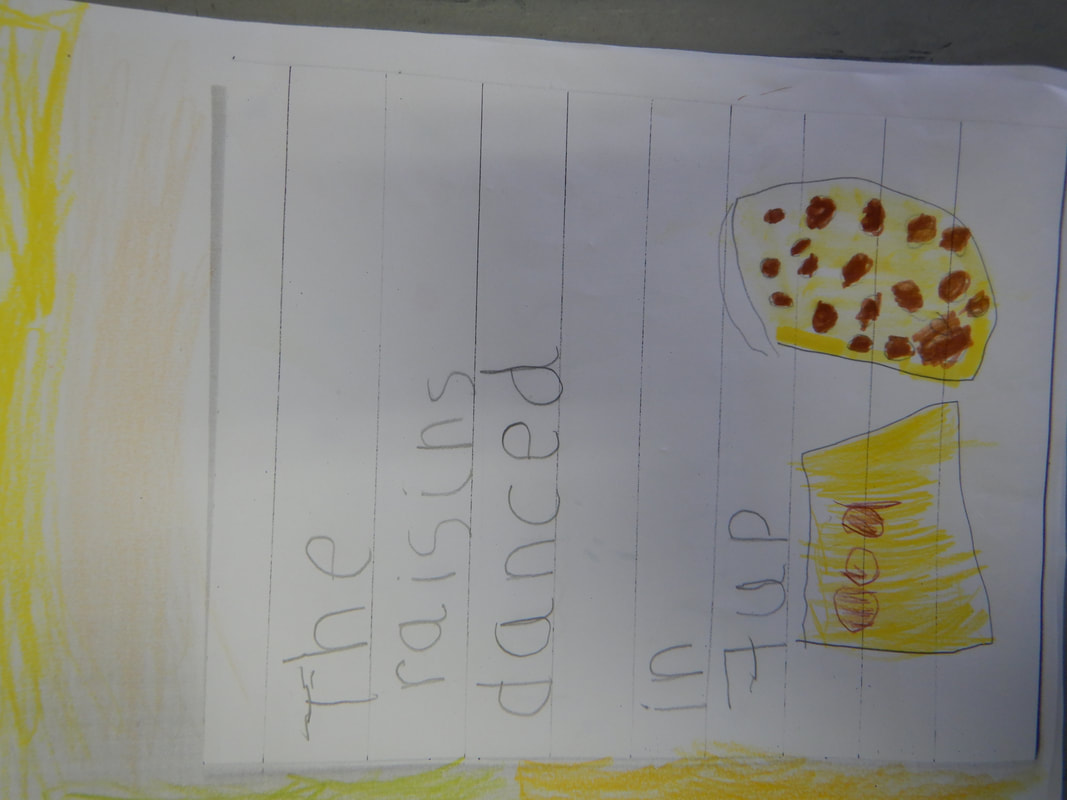
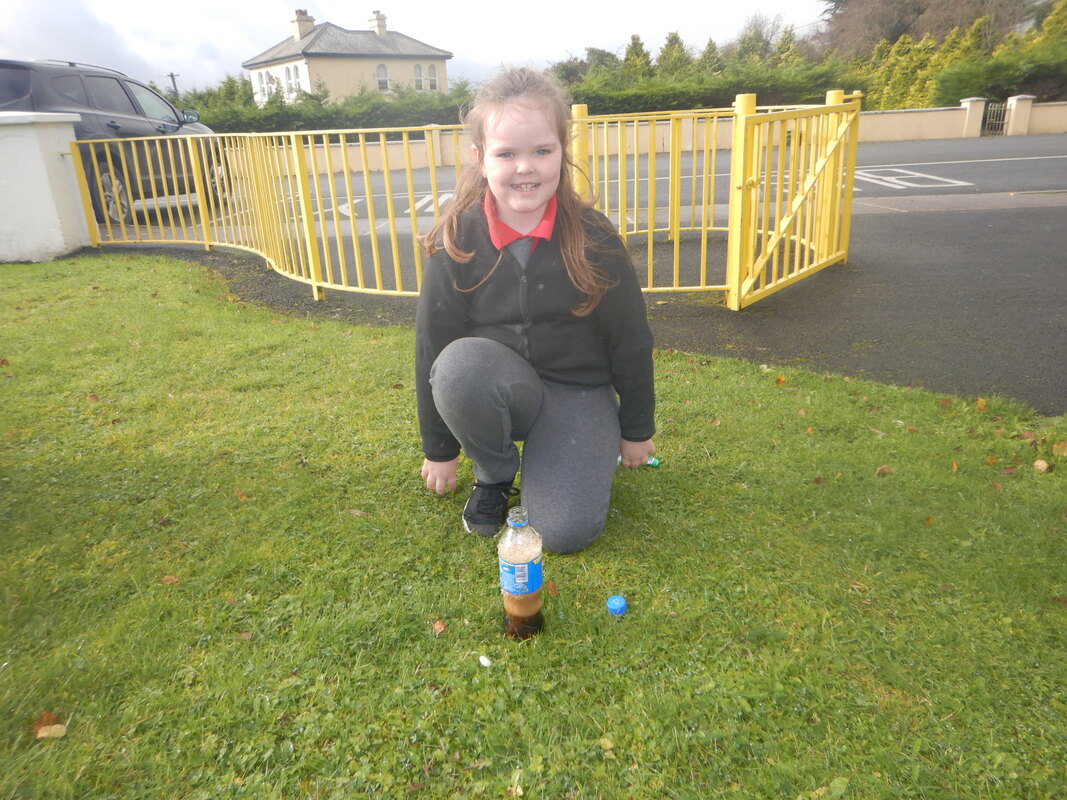
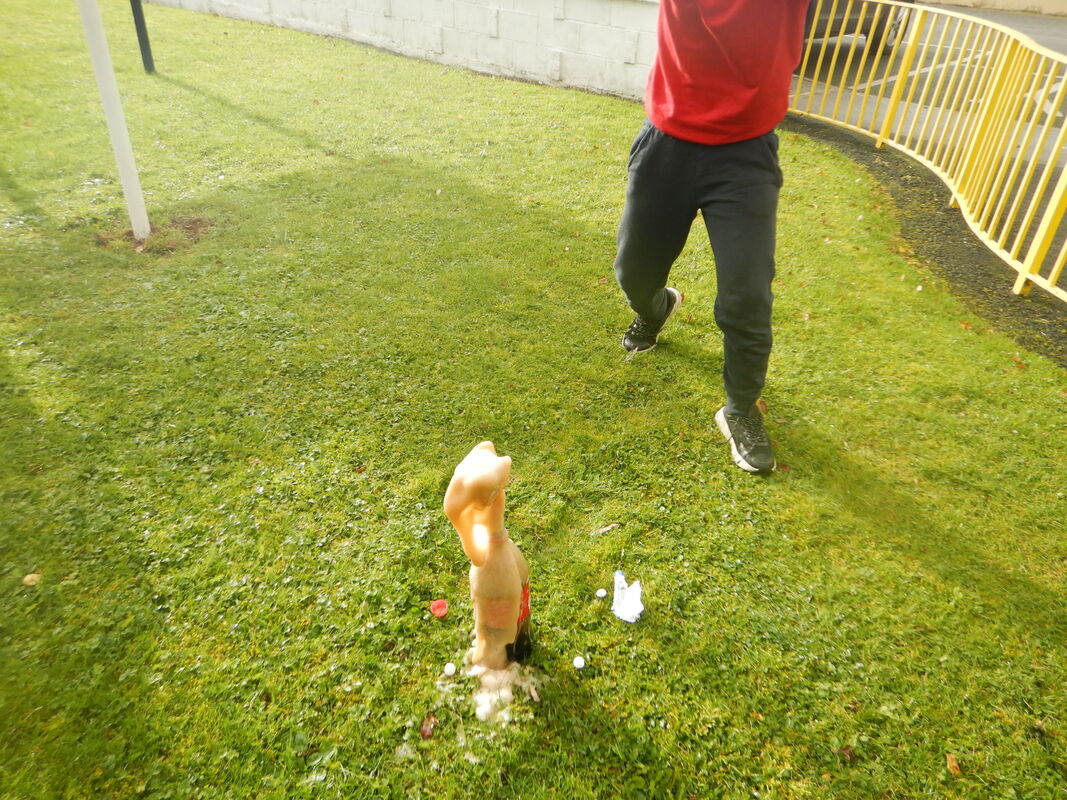
Title: Dancing Raisins
Strand: Energy and Forces
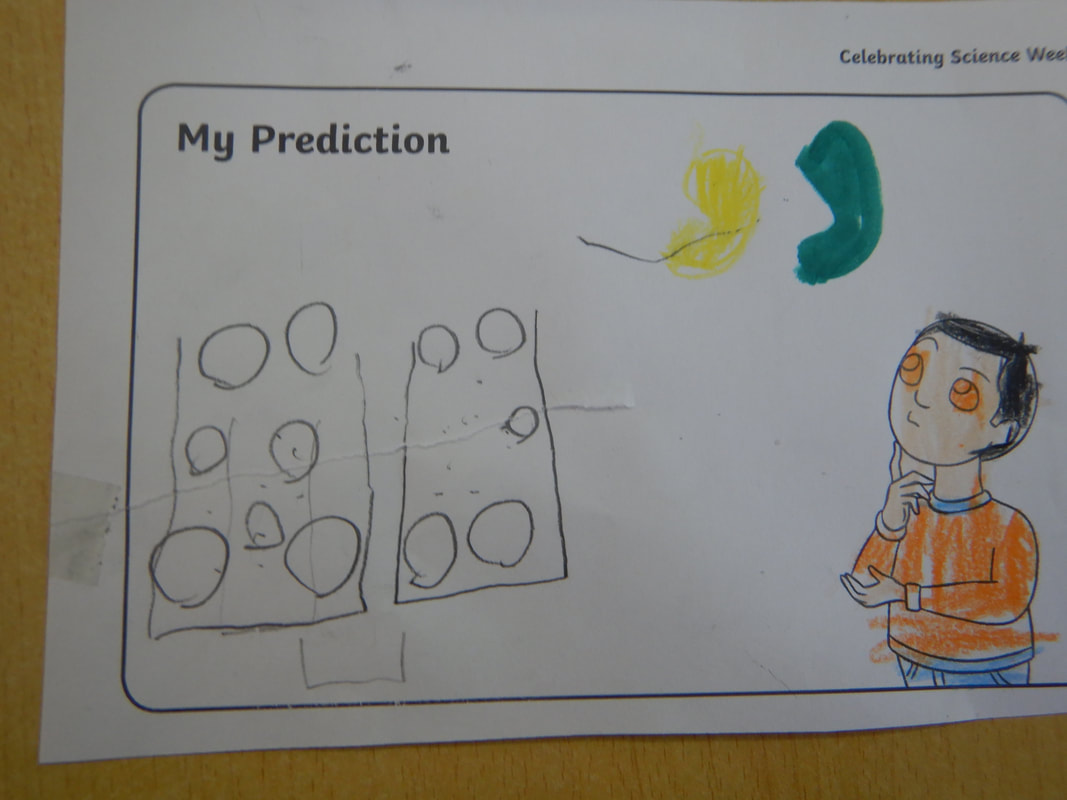
Objective: To show how the weight of the raisins change when they’re added to a fizzy drink.
What you need:
Procedure:
Title: Dancing Raisins
Strand: Energy and Forces
Objective: To show how the weight of the raisins change when they’re added to a fizzy drink.
What you need:
- 7 up
- Water
- Plastic drinking glasses
- Raisins
Procedure:
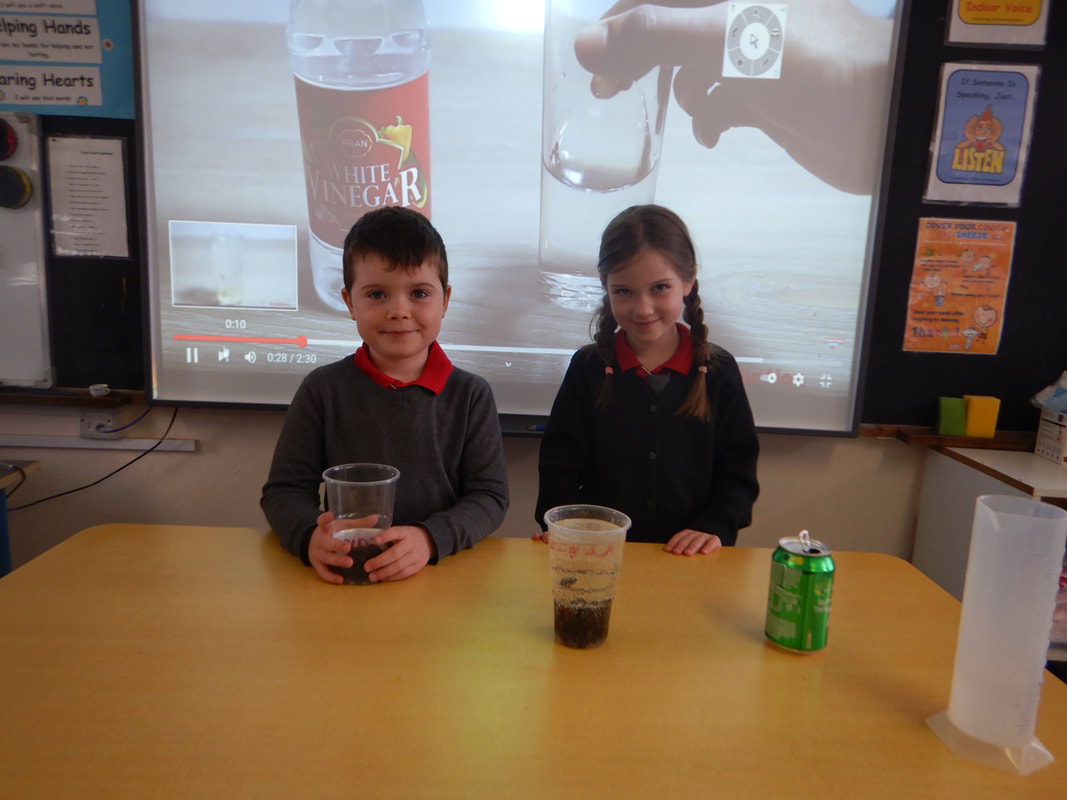
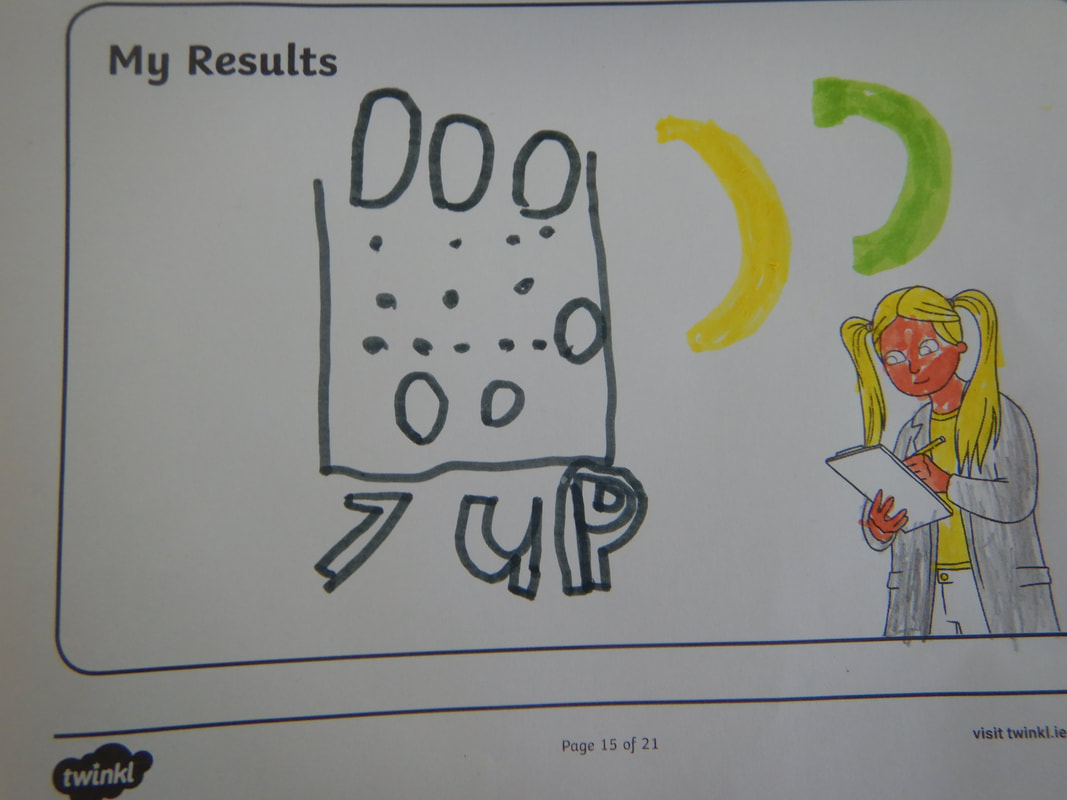
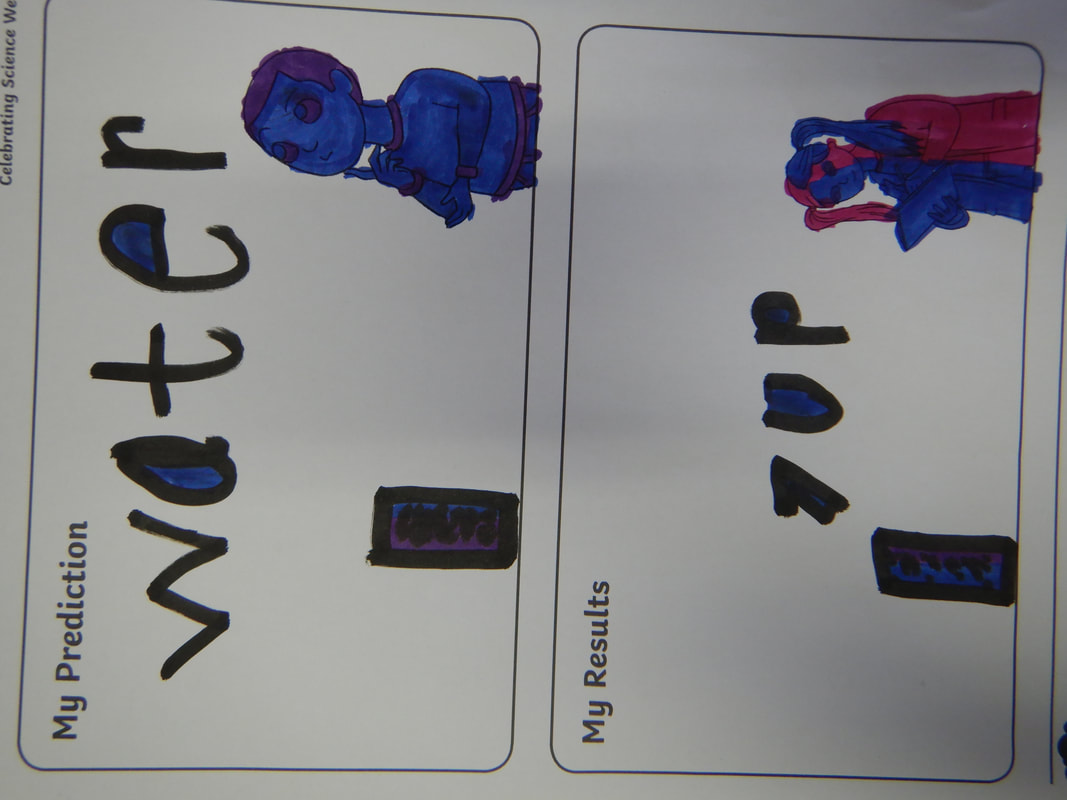
- We filled the glass with 7-Up.
- We dropped some raisins into the glass.
- We observed that at first the raisins sank to the bottom because the raisins are heavier than the 7-Up. We watched closely and after a few seconds they floated up to the top because the air bubbles in the 7-Up stick to the raisins making them float. They sank again to the bottom because the air bubbles separate from the raisins. After a while the fizz ran out of the 7-Up and the raisins no longer lifted.
- We tried the same experiment using a glass of water. The raisins sank to the bottom of the glass proving that it was the fizz in the 7-Up that made the raisins dance.
- Questioning
- Observing
- Predicting
- Investigating and experimenting
Energy and Forces - First, Second, Third and Fourth Classes: The pupils completed the following experiments:
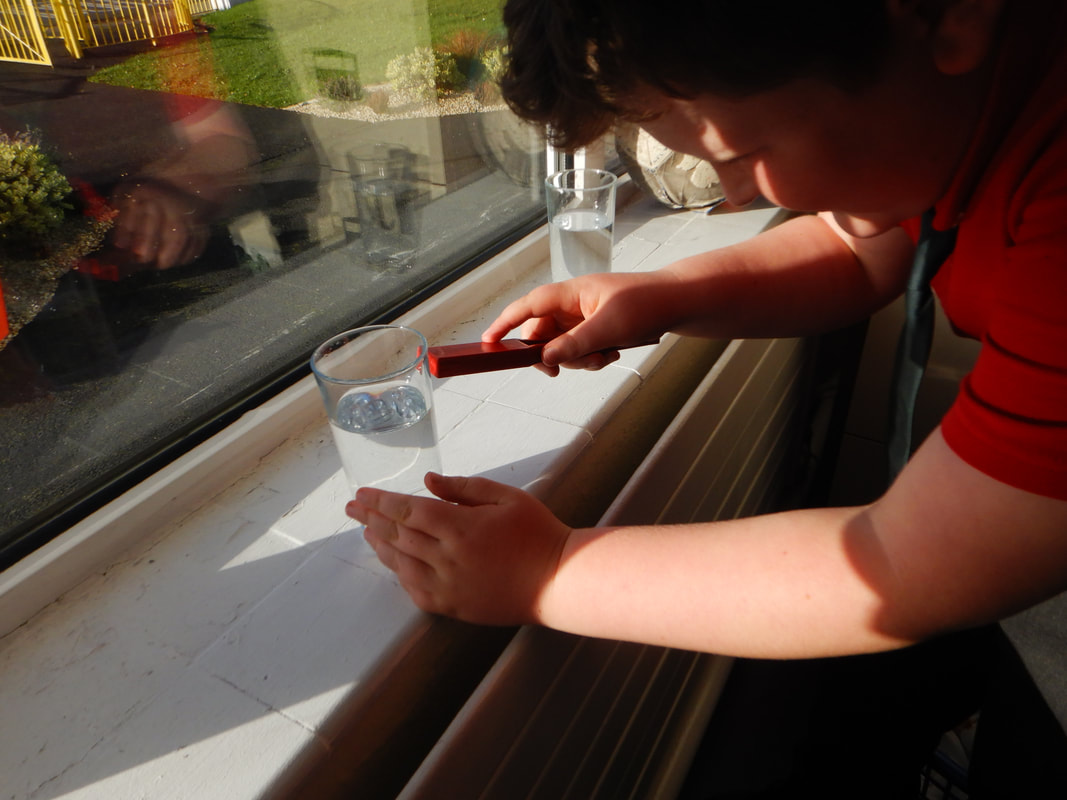
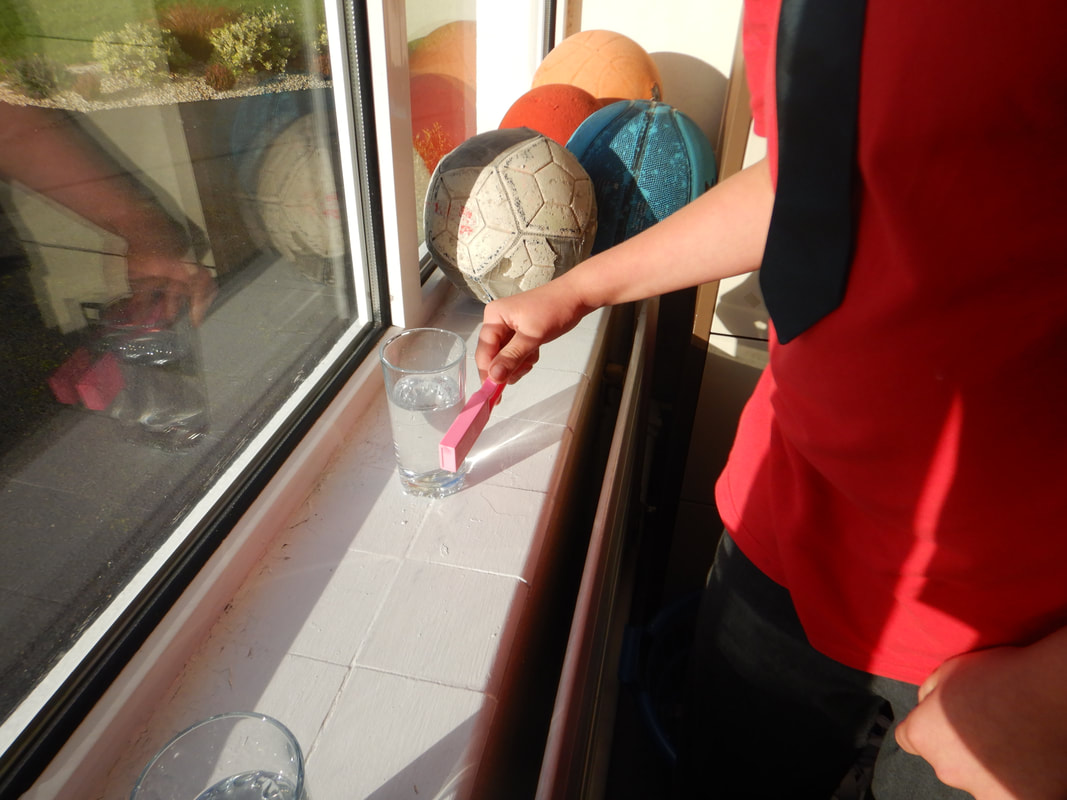
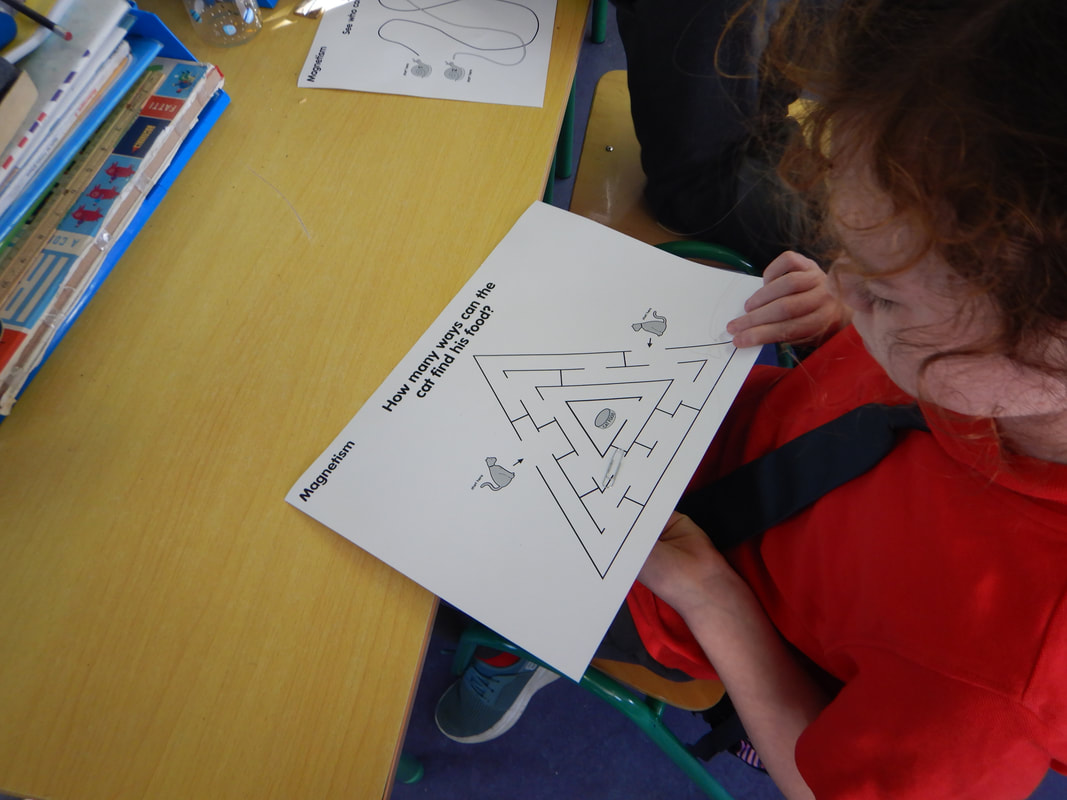
STRAND: Energy and Forces
Strand unit: Magnetism and Electricity
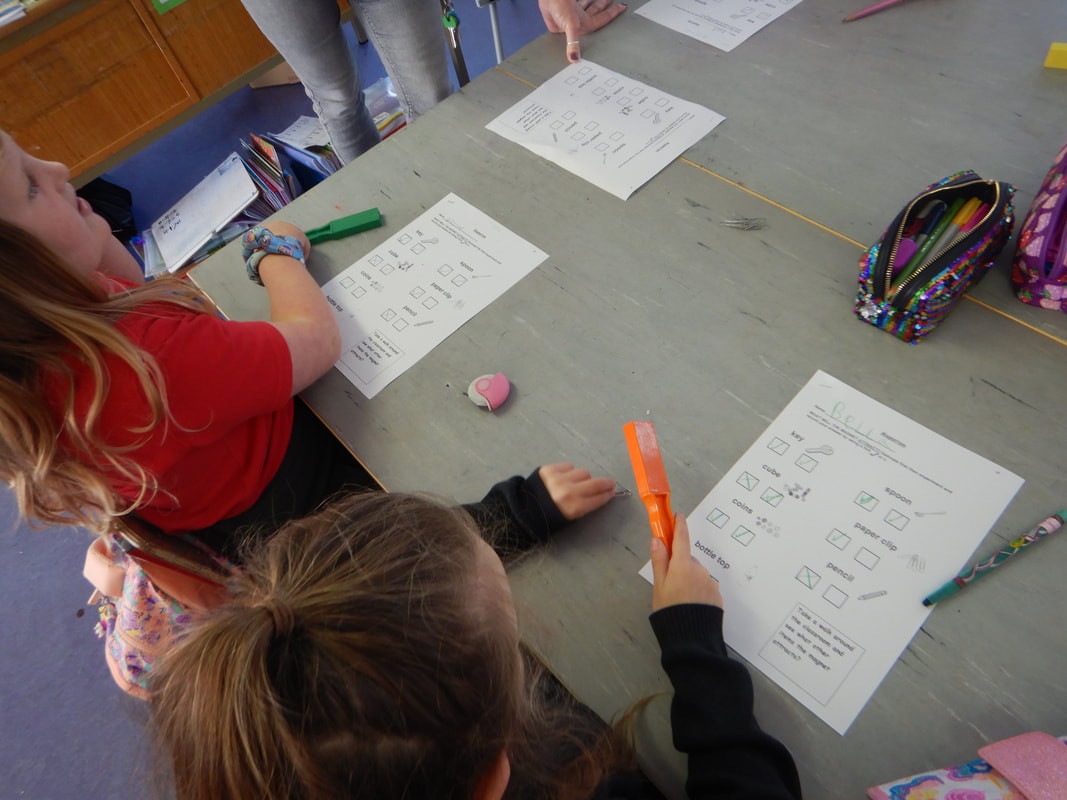
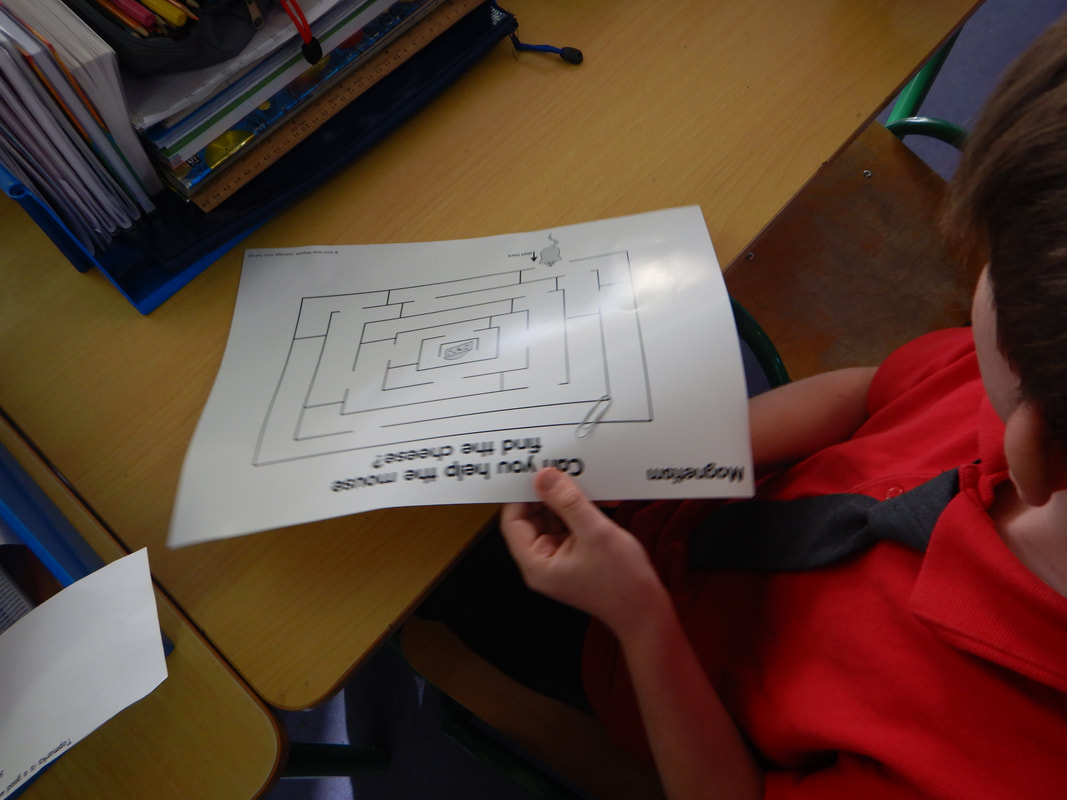
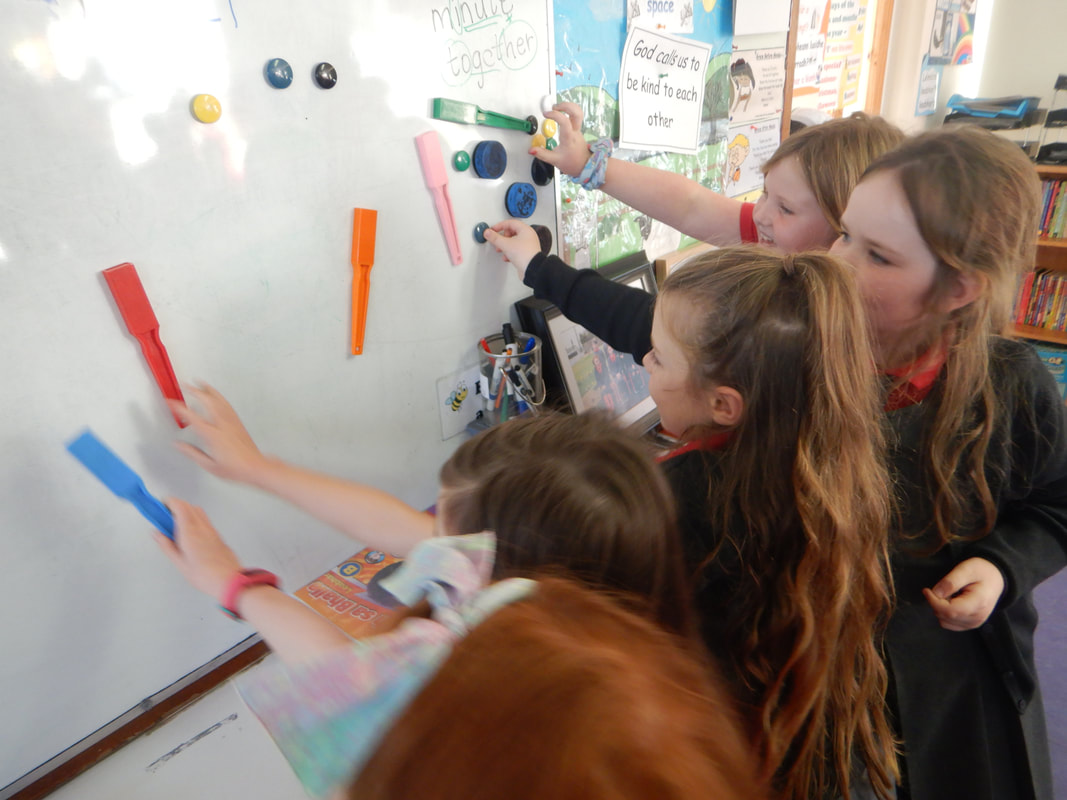
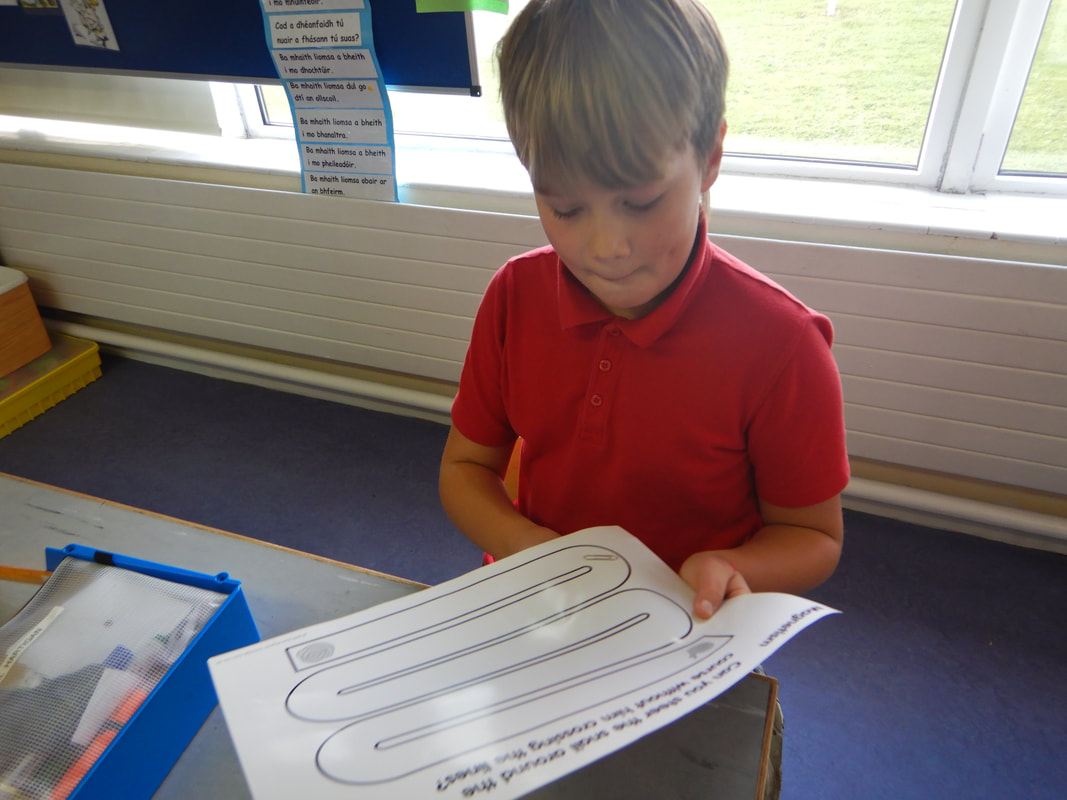
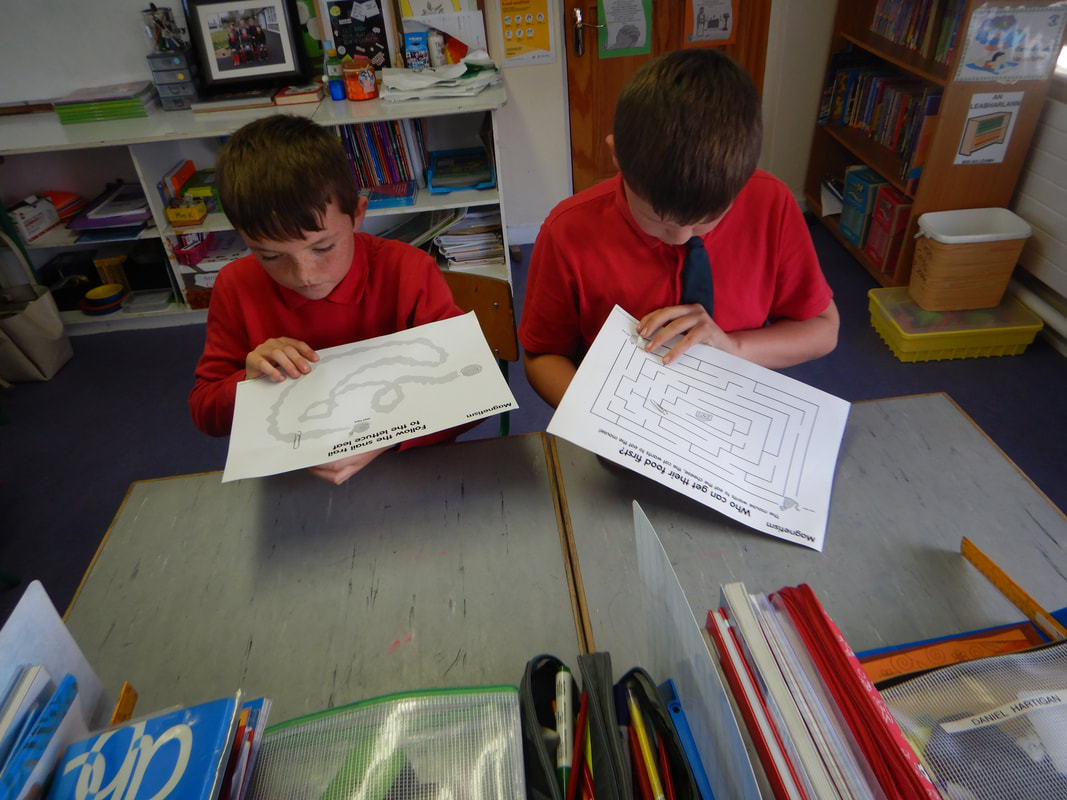
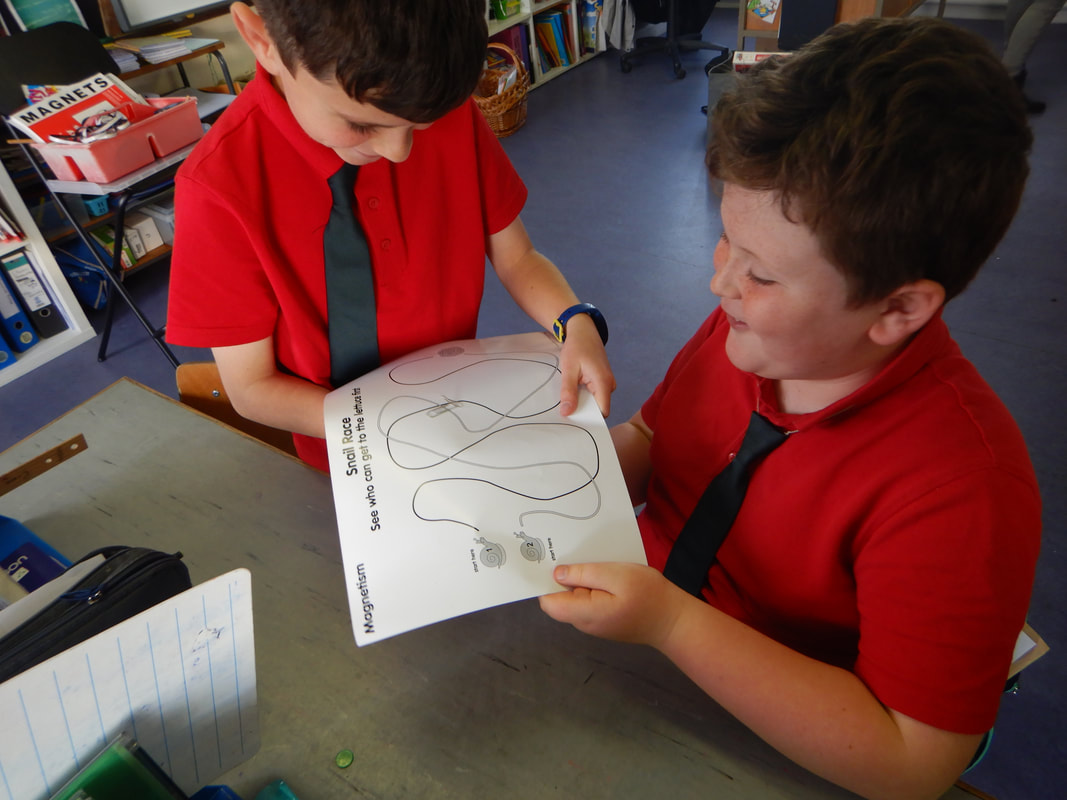
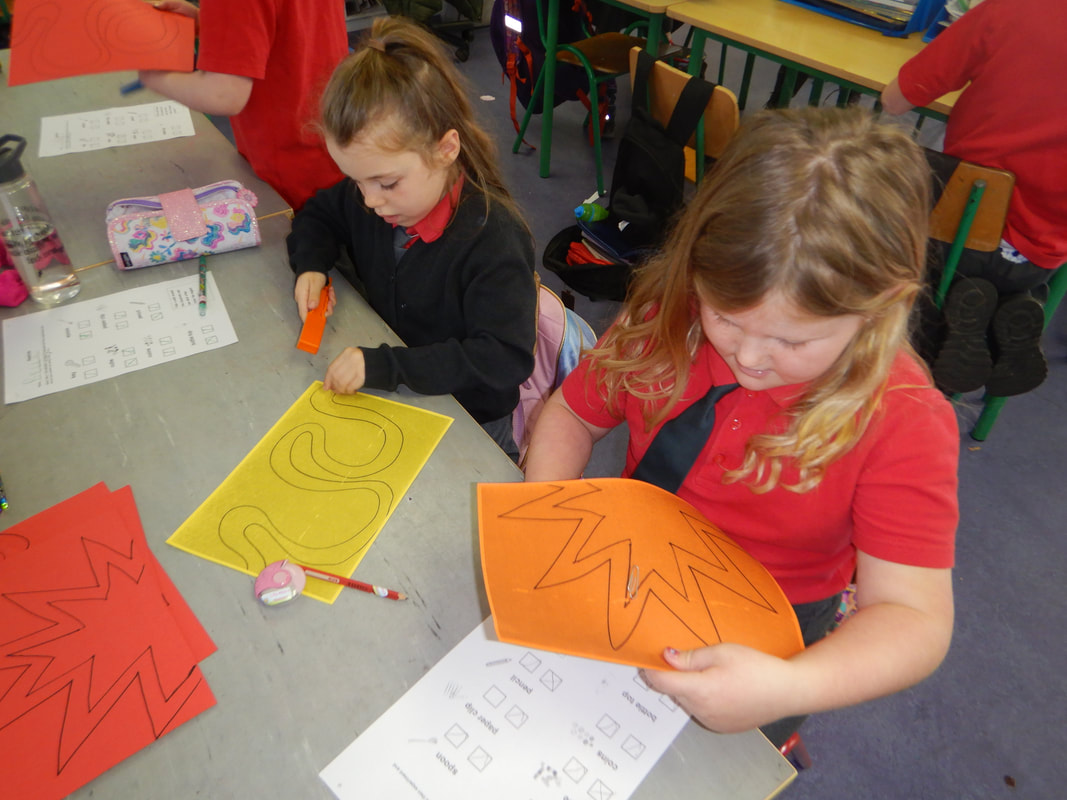
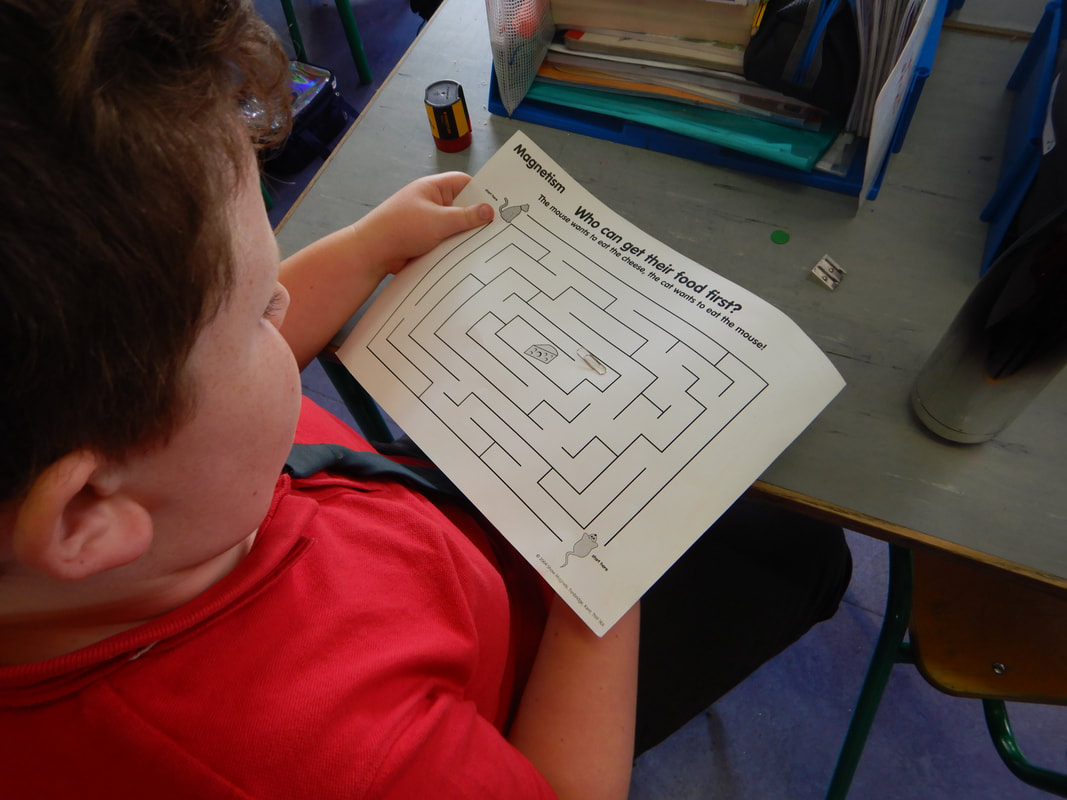
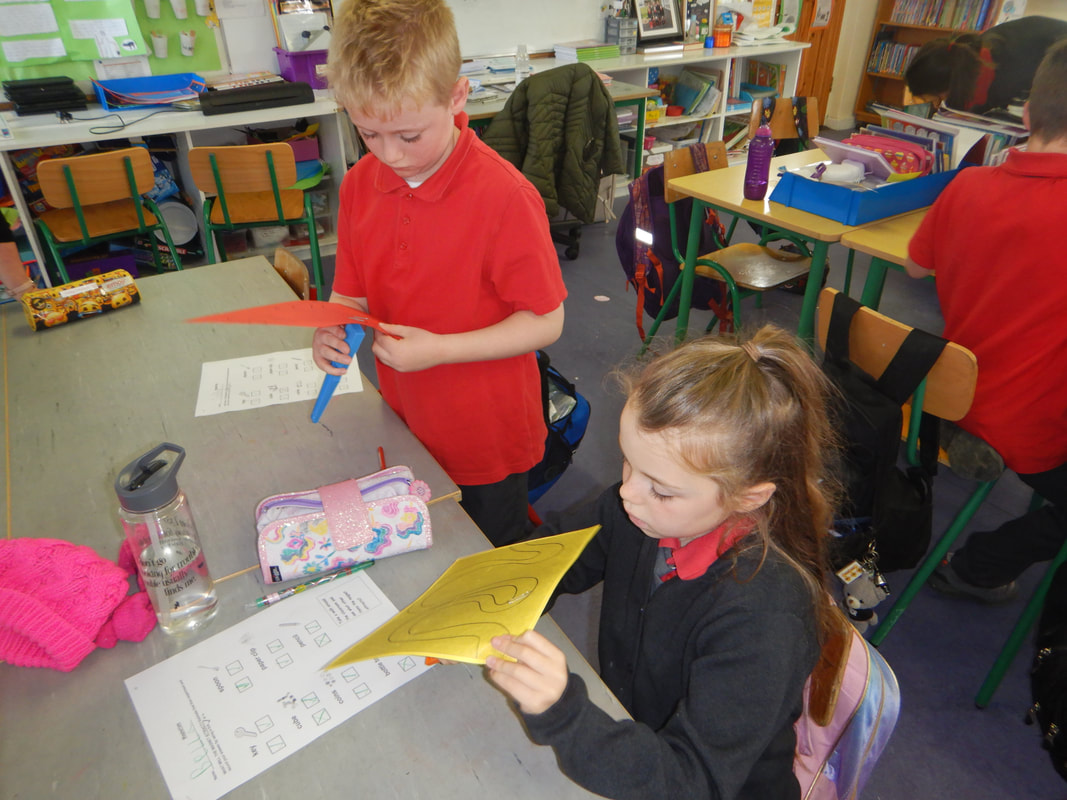
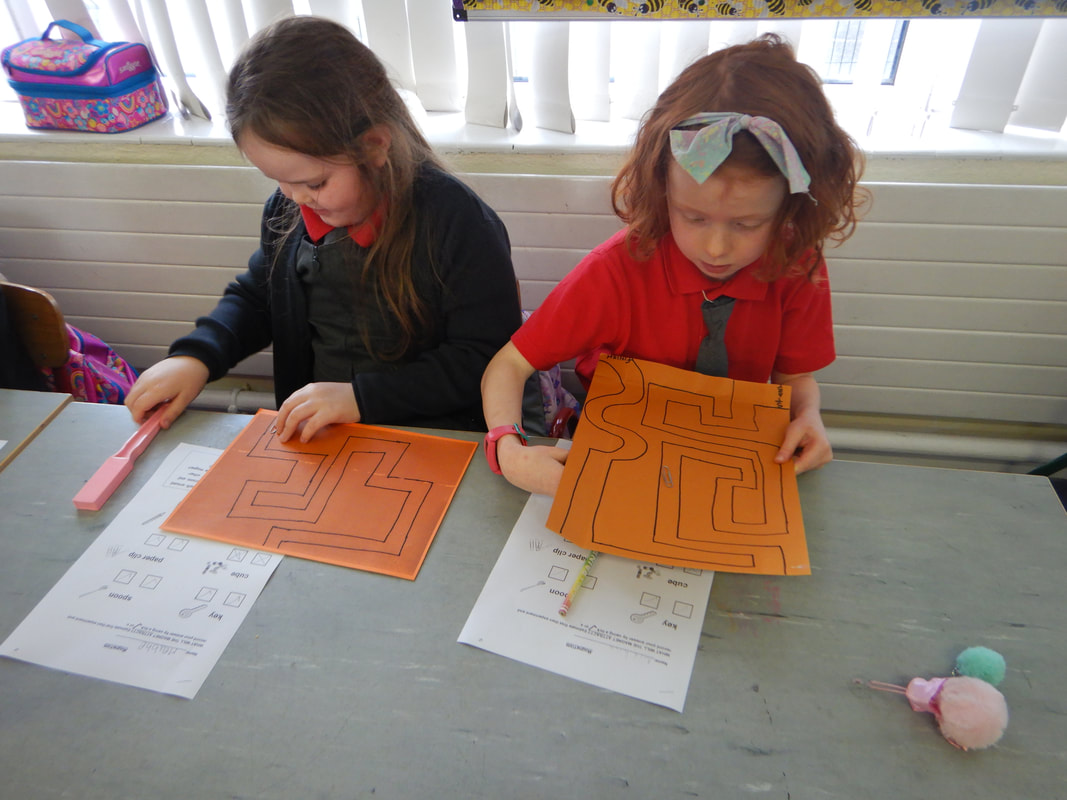
1. Title: A Magnetic Race
Objectives:
1. Place the paper clip on the maze or track. Place a magnet underneath the maze/track so that you can move the paper clip along.
2. Invite a partner to race with you.
Conclusion:
The magnet attracts the steel clip through the card moving it along the track/maze. This shows that magnets attract magnetic objects through other materials such as card, cardboard, glass or plastic.
Scientific skills:
Questioning, Observing, Predicting, Investigating and Experimenting, Classifying
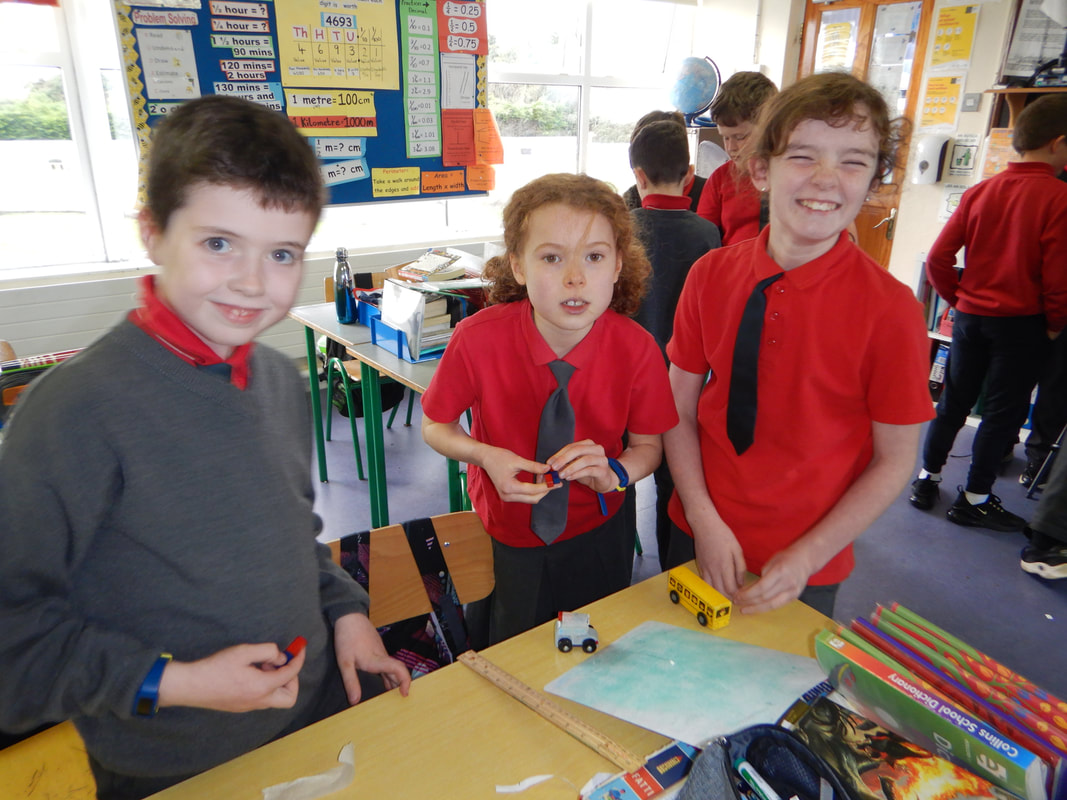
2. Title: Magnetic Car
Objectives:
1.The aim is to get the toy car to move without touching it.
2.Attach 1 magnet to a toy car using masking tape.
3.Hold the other magnet near the car without touching it and find a way to get the car to move forwards and backwards using a repelling force.
4.Race the cars with a friend.
Conclusion:
Two magnets can either attract or repel each other. If the North Pole of the magnet on the car is facing the North Pole of the other magnet the magnets will repel each other and the car will move. Similarly, with the South Poles facing each other.
Like poles repel each other, opposite poles attract.
Scientific skills:
Questioning, Observing, Predicting, Investigating and Experimenting
STRAND: Energy and Forces
Strand unit: Magnetism and Electricity
1. Title: A Magnetic Race
Objectives:
- Investigate that magnets attract magnetic materials
- Investigate that magnets attract certain materials through other materials
- Card
- Magnetic mazes
- Paper clips
- Magnets
1. Place the paper clip on the maze or track. Place a magnet underneath the maze/track so that you can move the paper clip along.
2. Invite a partner to race with you.
Conclusion:
The magnet attracts the steel clip through the card moving it along the track/maze. This shows that magnets attract magnetic objects through other materials such as card, cardboard, glass or plastic.
Scientific skills:
Questioning, Observing, Predicting, Investigating and Experimenting, Classifying
2. Title: Magnetic Car
Objectives:
- Learn that magnets can push or pull magnetic materials
- Explore how magnets have poles and investigate how these poles attract and repel each other
- Toy cars
- Magnets
- Books to create slopes
- Masking tape
1.The aim is to get the toy car to move without touching it.
2.Attach 1 magnet to a toy car using masking tape.
3.Hold the other magnet near the car without touching it and find a way to get the car to move forwards and backwards using a repelling force.
4.Race the cars with a friend.
Conclusion:
Two magnets can either attract or repel each other. If the North Pole of the magnet on the car is facing the North Pole of the other magnet the magnets will repel each other and the car will move. Similarly, with the South Poles facing each other.
Like poles repel each other, opposite poles attract.
Scientific skills:
Questioning, Observing, Predicting, Investigating and Experimenting


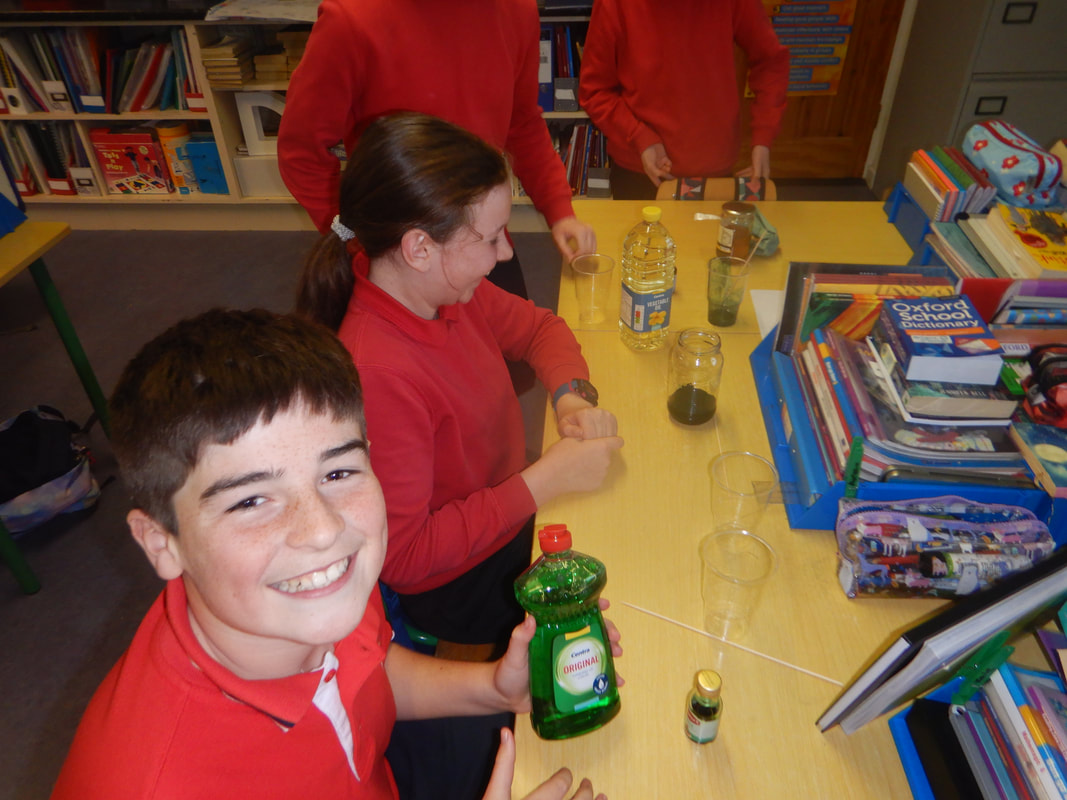
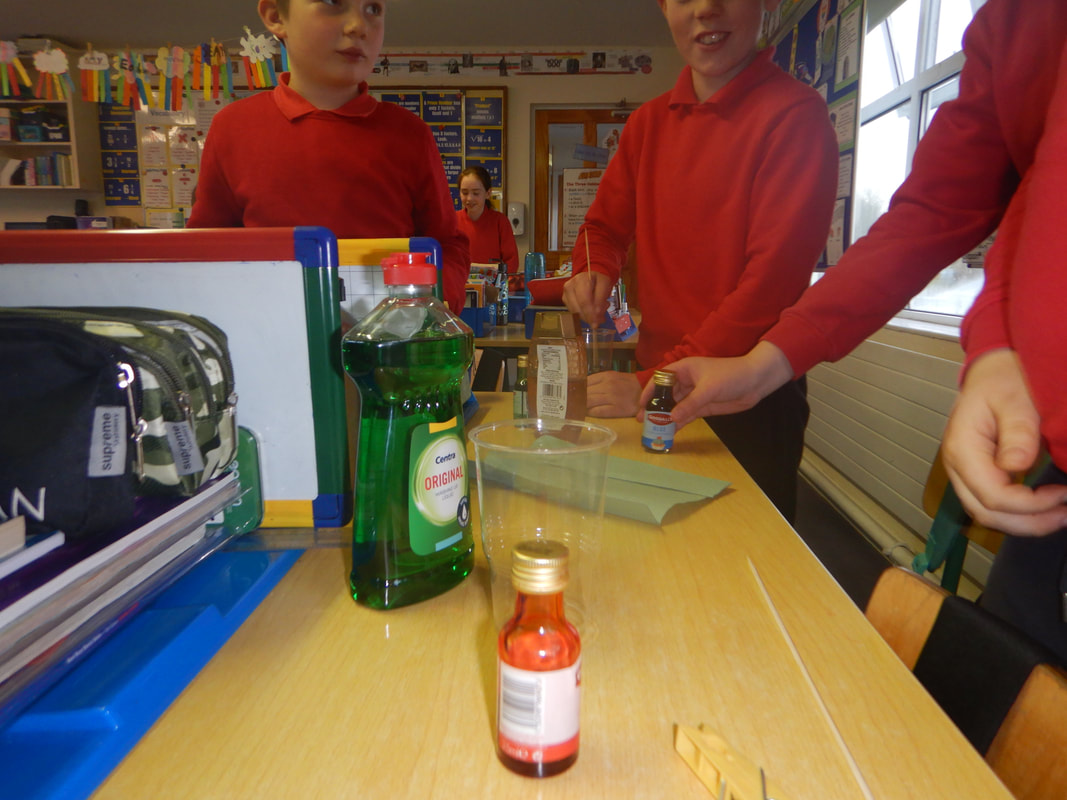
Energy and Forces - Fifth and Sixth Class: The pupils completed the following experiment:
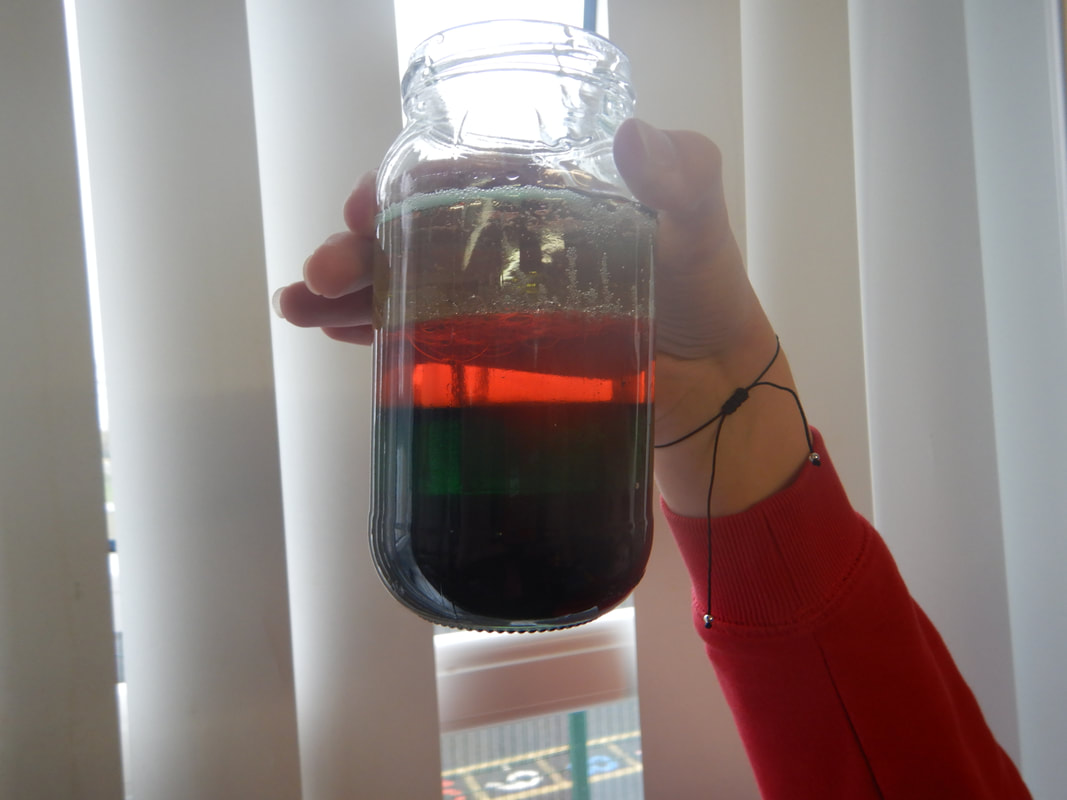
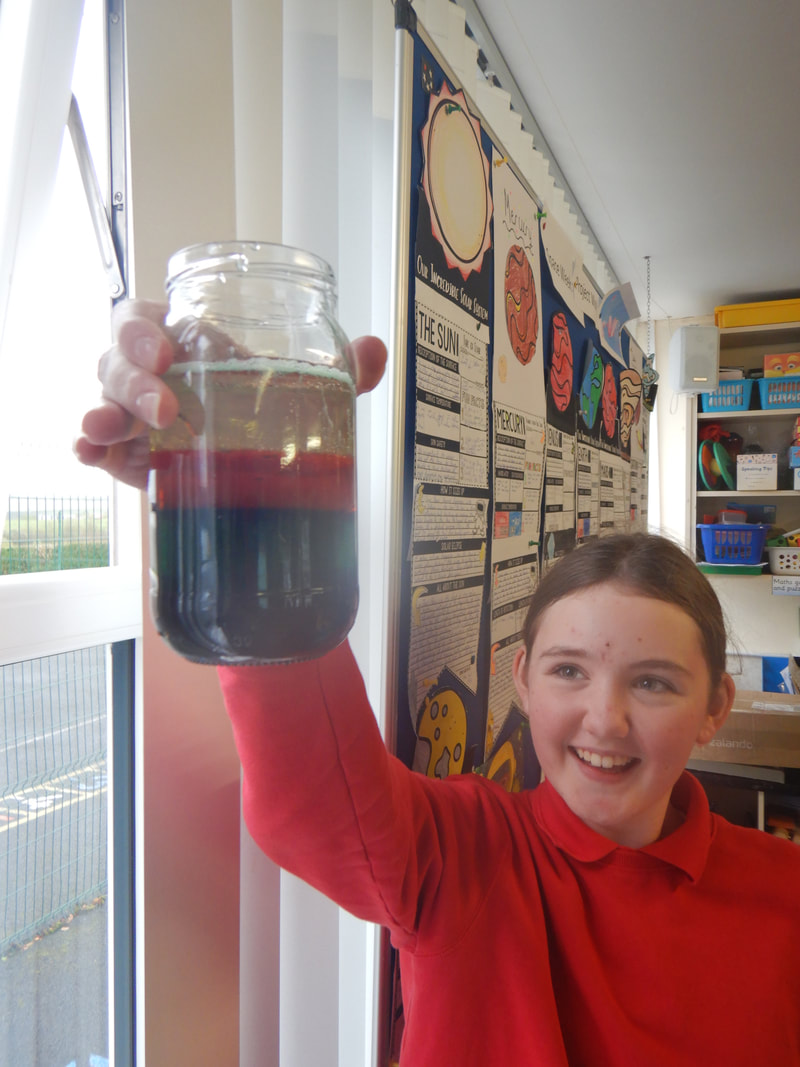
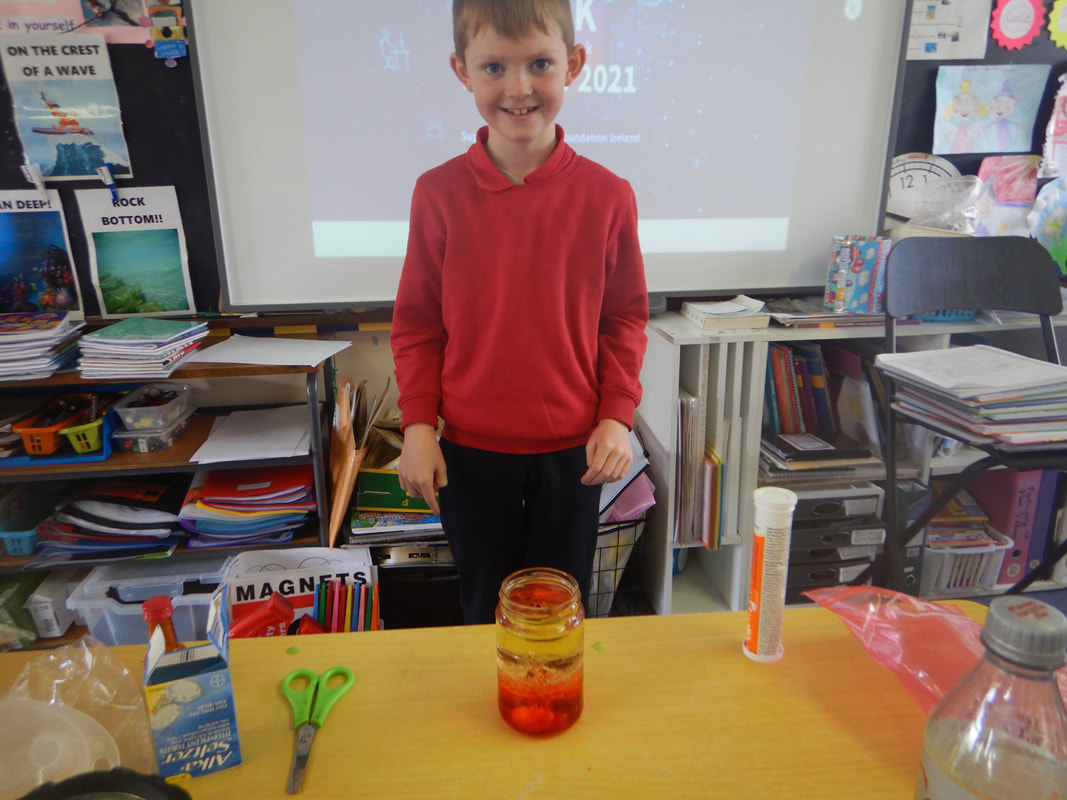
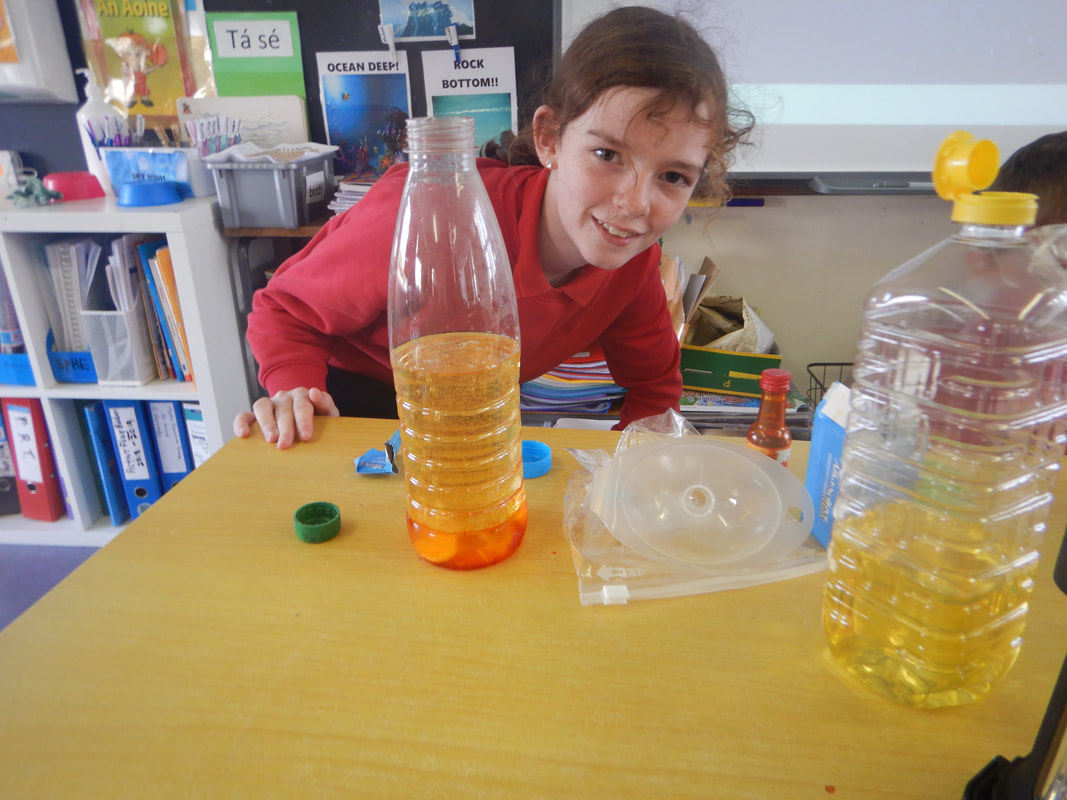
Strand: Energy and Forces (Density)
Title: Investigating Density (Rainbow Jar)
Objective: To investigate the density of liquids.
What you need:
1. In a disposable container, mix 50ml of honey and a few drops of blue food colouring. Use a lollipop stick to mix in the food colouring.
2. Pour the mixture into the bottom of the jar. Pour the mixture in slowly, pouring it against the side of the jar.
3. In a disposable container, mix a light green soap. Use a lollipop stick to mix in the food colouring.
4. Pour the mixture into the bottom of the jar. Pour the mixture in slowly, pouring it against the side of the jar.
5. In a disposable container, pour 50ml of olive oil.
6. Pour the mixture into the bottom of the jar. Pour the mixture in slowly, pouring it against the side of the jar
7. In a disposable container, mix 50ml of water and a few drops of red food colouring. Use a lollipop stick to mix in the food colouring.
8. Pour the mixture into the bottom of the jar. Pour the mixture in slowly, pouring it against the side of the jar
9. Look at the layers. Have the liquids mixed together? Why/why not?
Conclusion:
Density is the weight of a liquid. Different liquids have different densities.
Each of the liquids have a different mass of molecules or different numbers of parts squashed into the same volume of liquid, this makes them have different densities and therefore one can sit on top of the other – the more dense a liquid is the heavier it is.
Scientific Skills used:
Predicting
Observing
Recording
Estimating and Measuring
Recording and Communicating
Strand: Energy and Forces (Density)
Title: Investigating Density (Rainbow Jar)
Objective: To investigate the density of liquids.
What you need:
- Tall clear jars
- Disposable containers
- Honey
- Washing up liquid
- Olive oil
- Water
- Food colouring
- Dropper/pipette
- Lollipop sticks
- Funnel
1. In a disposable container, mix 50ml of honey and a few drops of blue food colouring. Use a lollipop stick to mix in the food colouring.
2. Pour the mixture into the bottom of the jar. Pour the mixture in slowly, pouring it against the side of the jar.
3. In a disposable container, mix a light green soap. Use a lollipop stick to mix in the food colouring.
4. Pour the mixture into the bottom of the jar. Pour the mixture in slowly, pouring it against the side of the jar.
5. In a disposable container, pour 50ml of olive oil.
6. Pour the mixture into the bottom of the jar. Pour the mixture in slowly, pouring it against the side of the jar
7. In a disposable container, mix 50ml of water and a few drops of red food colouring. Use a lollipop stick to mix in the food colouring.
8. Pour the mixture into the bottom of the jar. Pour the mixture in slowly, pouring it against the side of the jar
9. Look at the layers. Have the liquids mixed together? Why/why not?
Conclusion:
Density is the weight of a liquid. Different liquids have different densities.
Each of the liquids have a different mass of molecules or different numbers of parts squashed into the same volume of liquid, this makes them have different densities and therefore one can sit on top of the other – the more dense a liquid is the heavier it is.
Scientific Skills used:
Predicting
Observing
Recording
Estimating and Measuring
Recording and Communicating
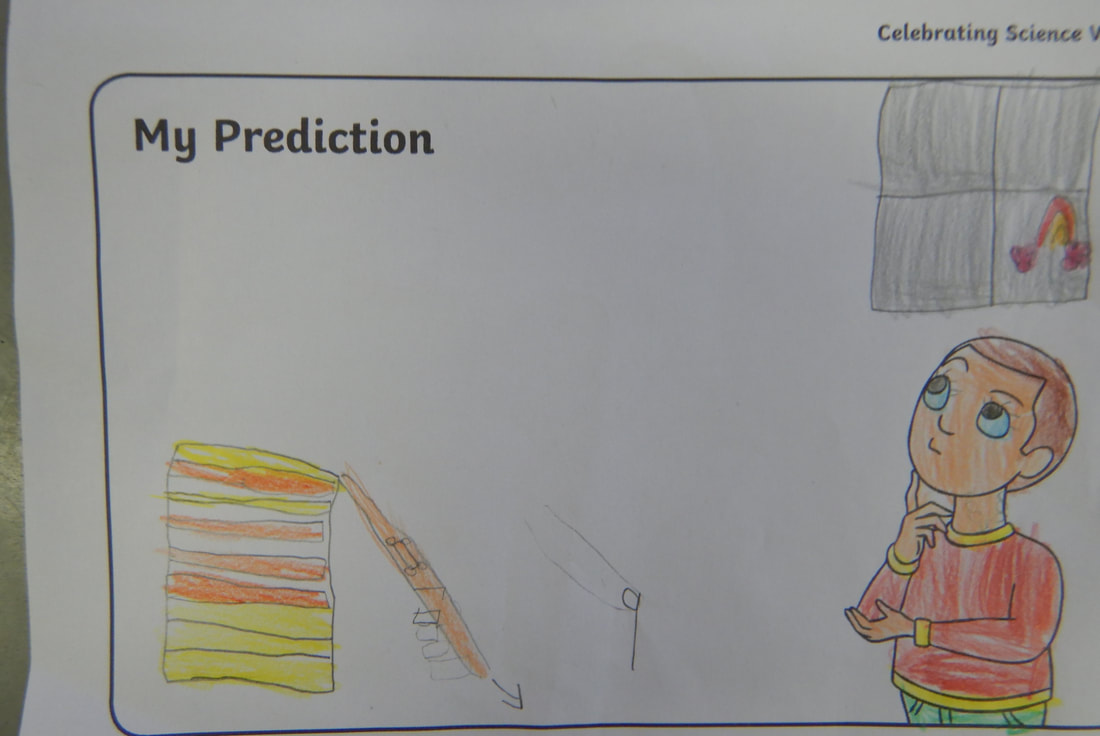
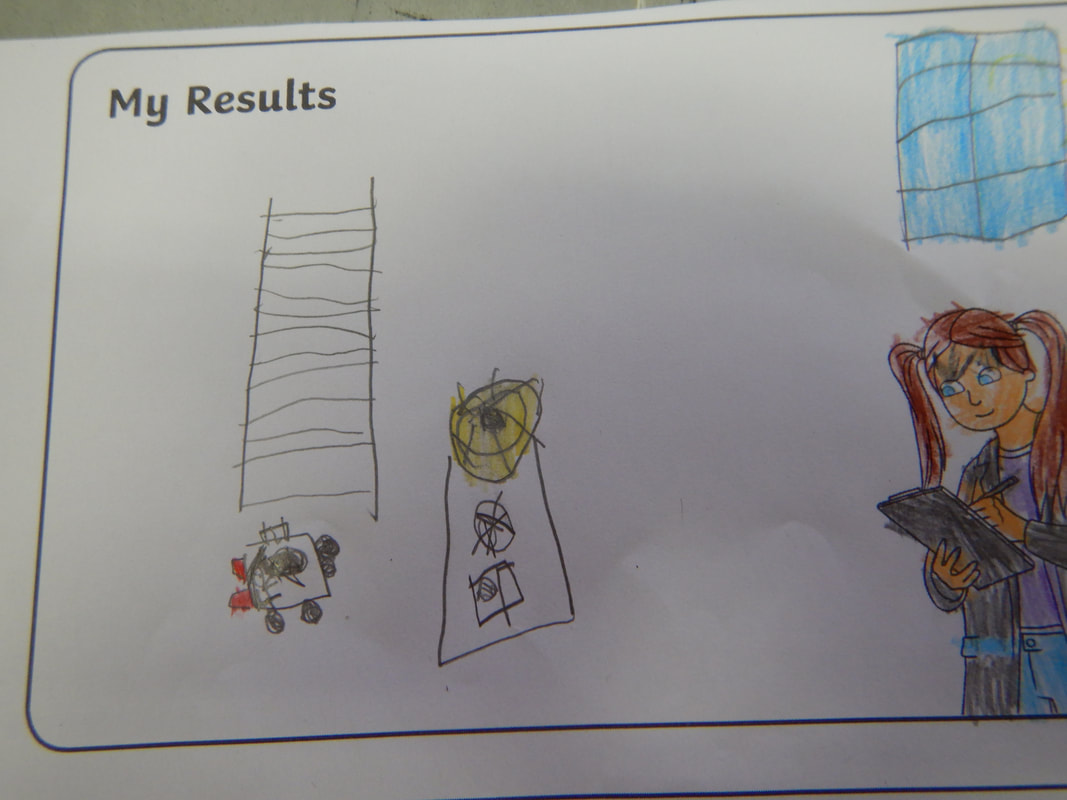
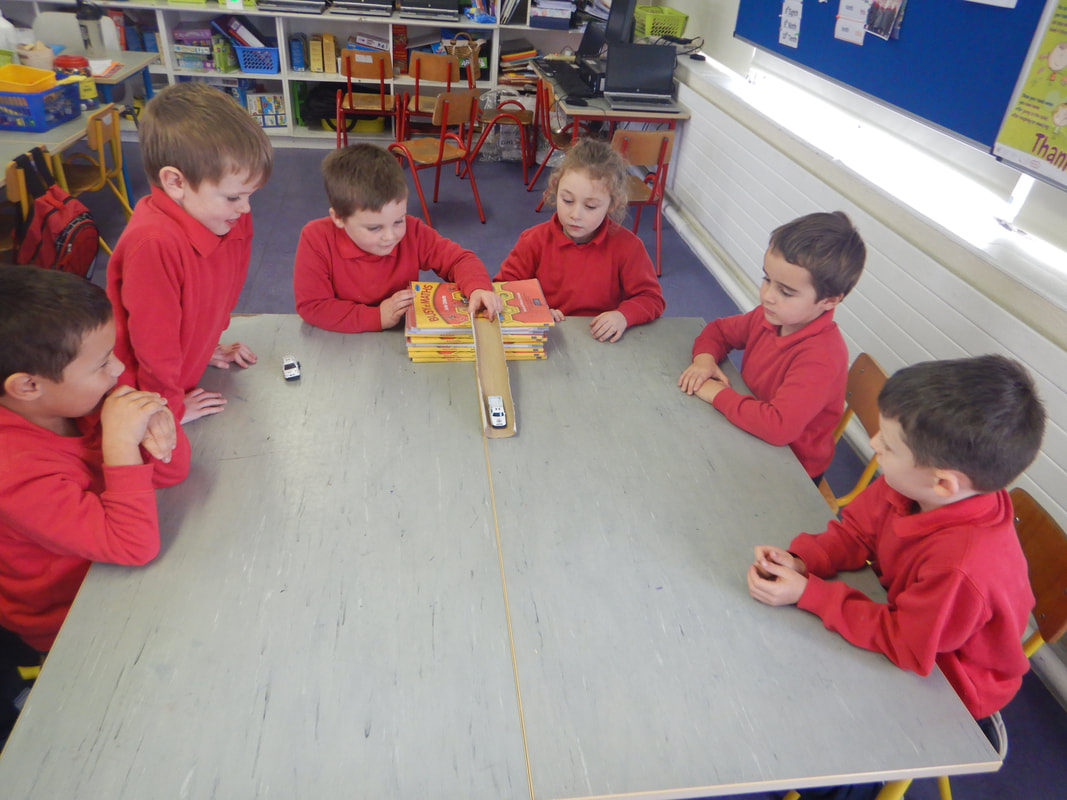
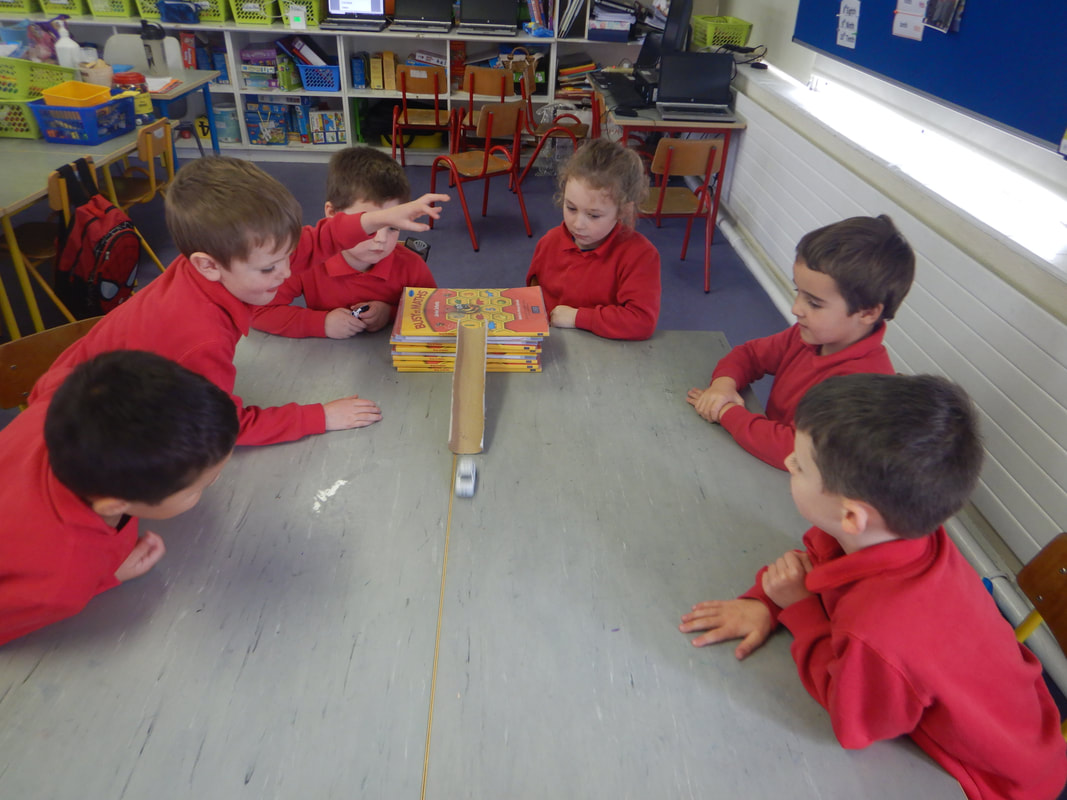
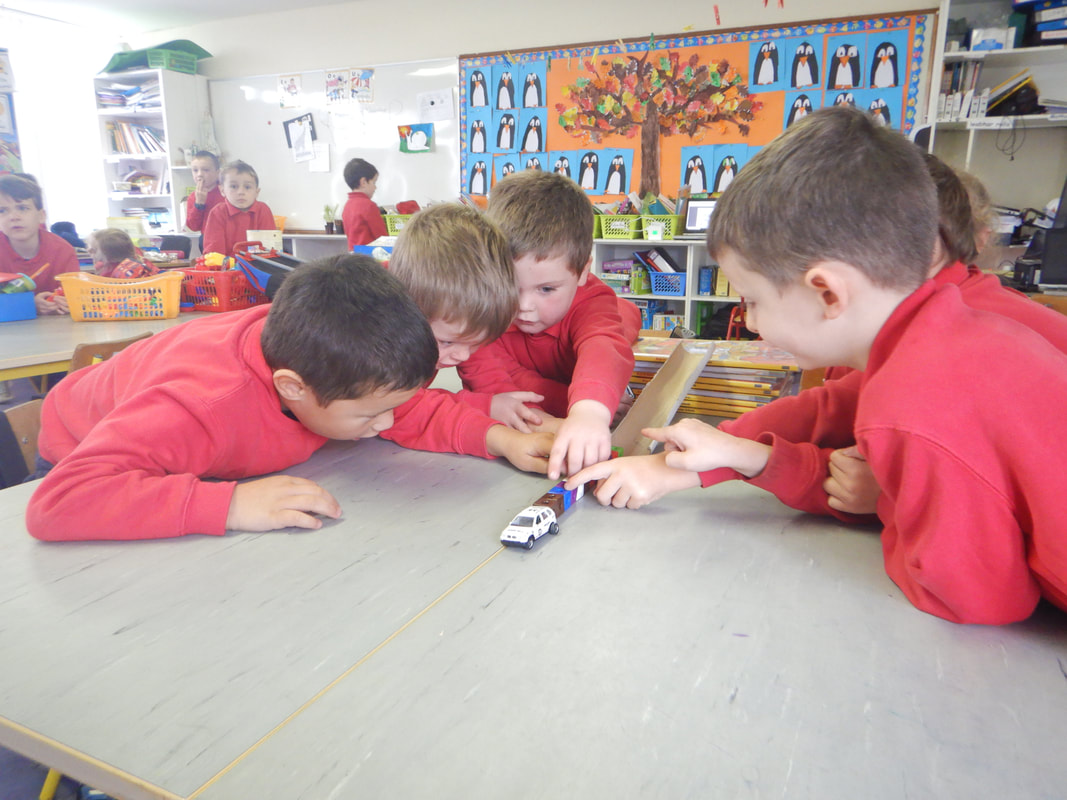
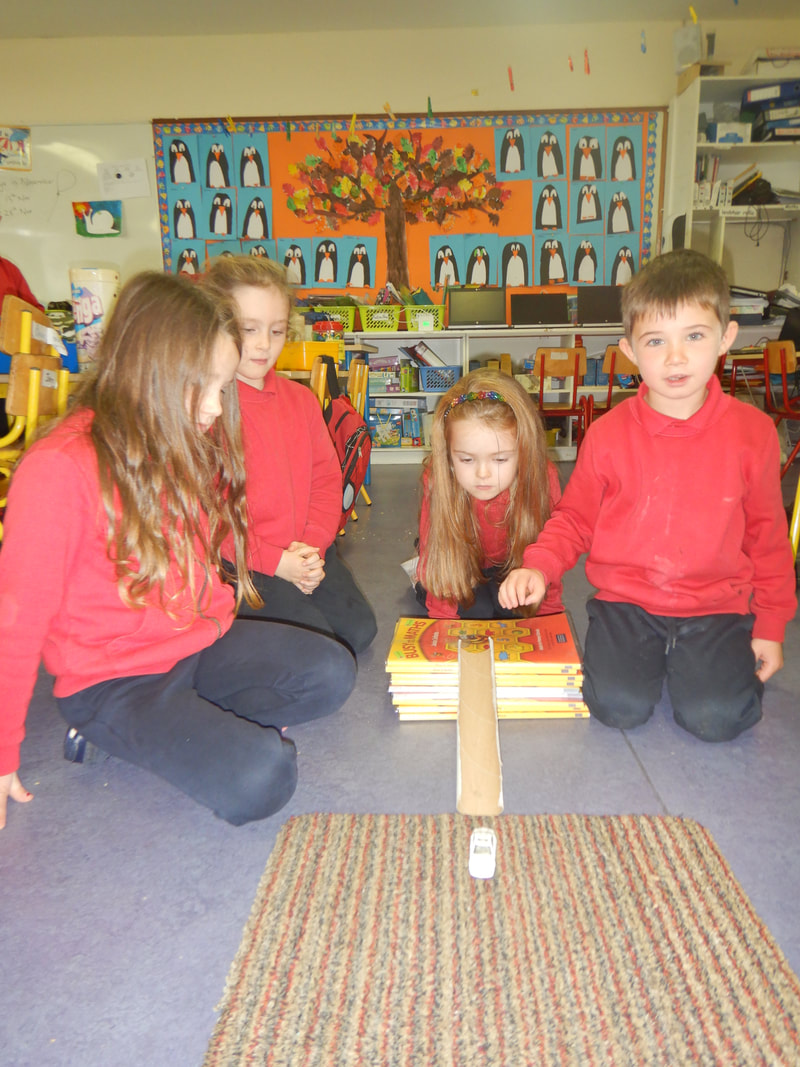
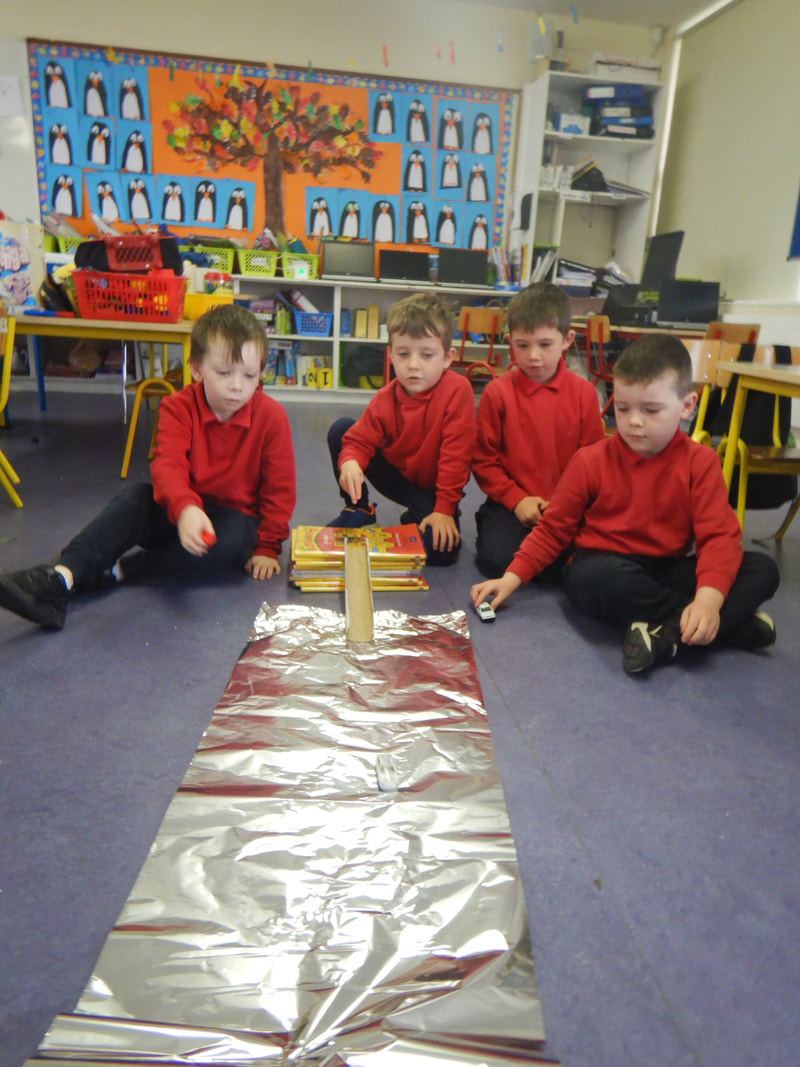
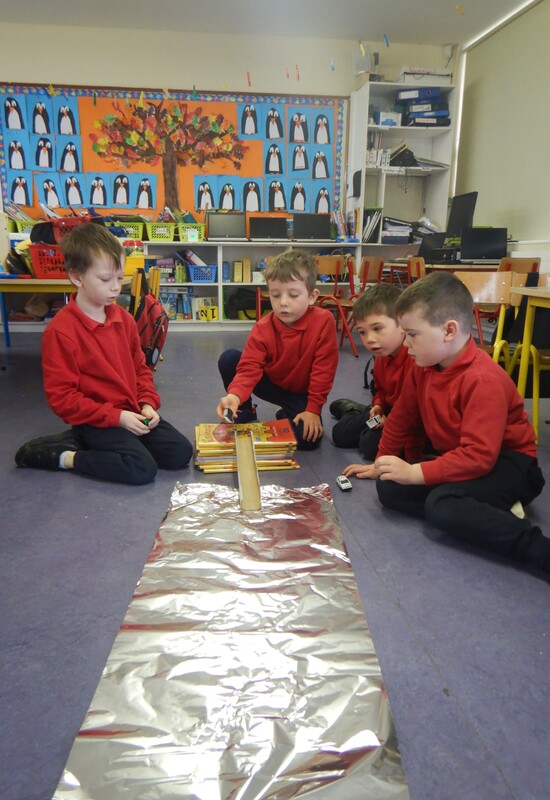
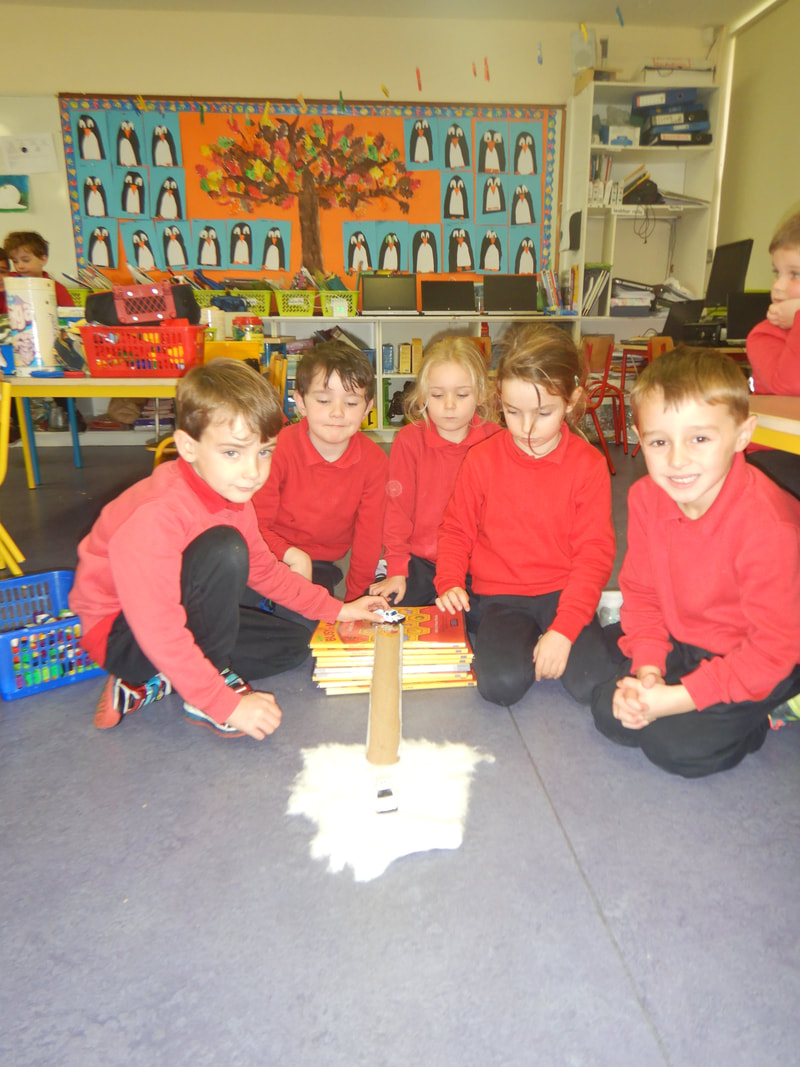
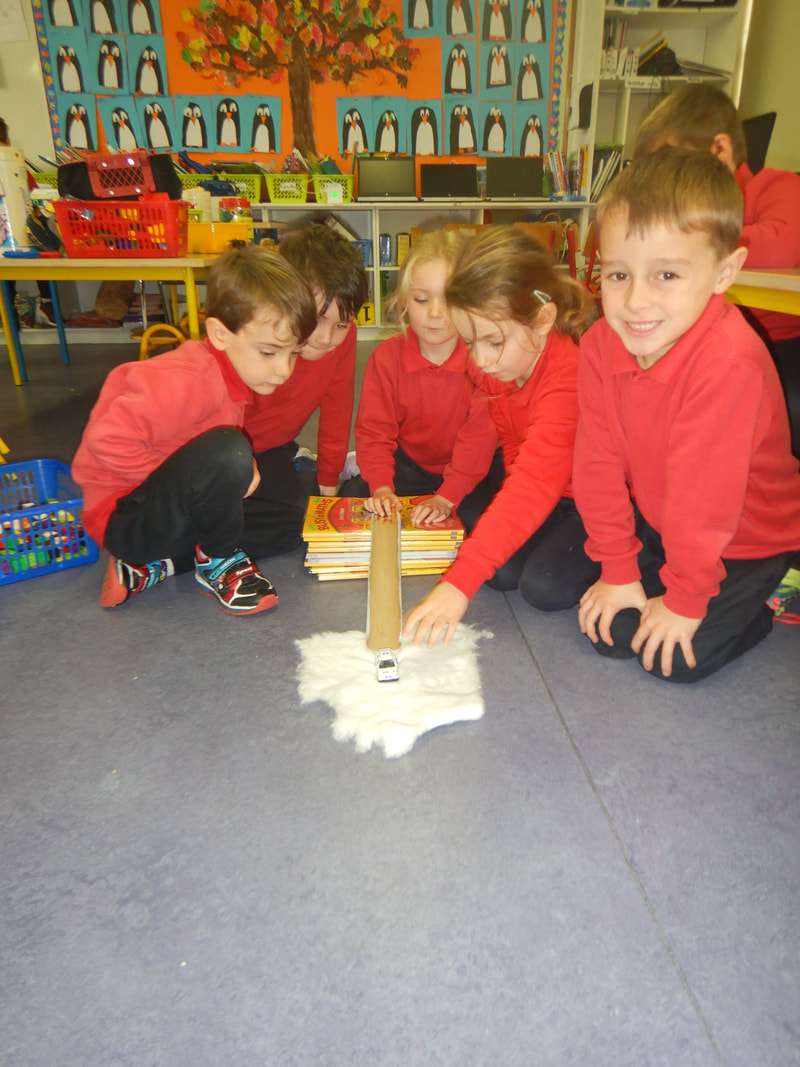
Materials - Juniors, Seniors and First: The pupils completed the following experiment:
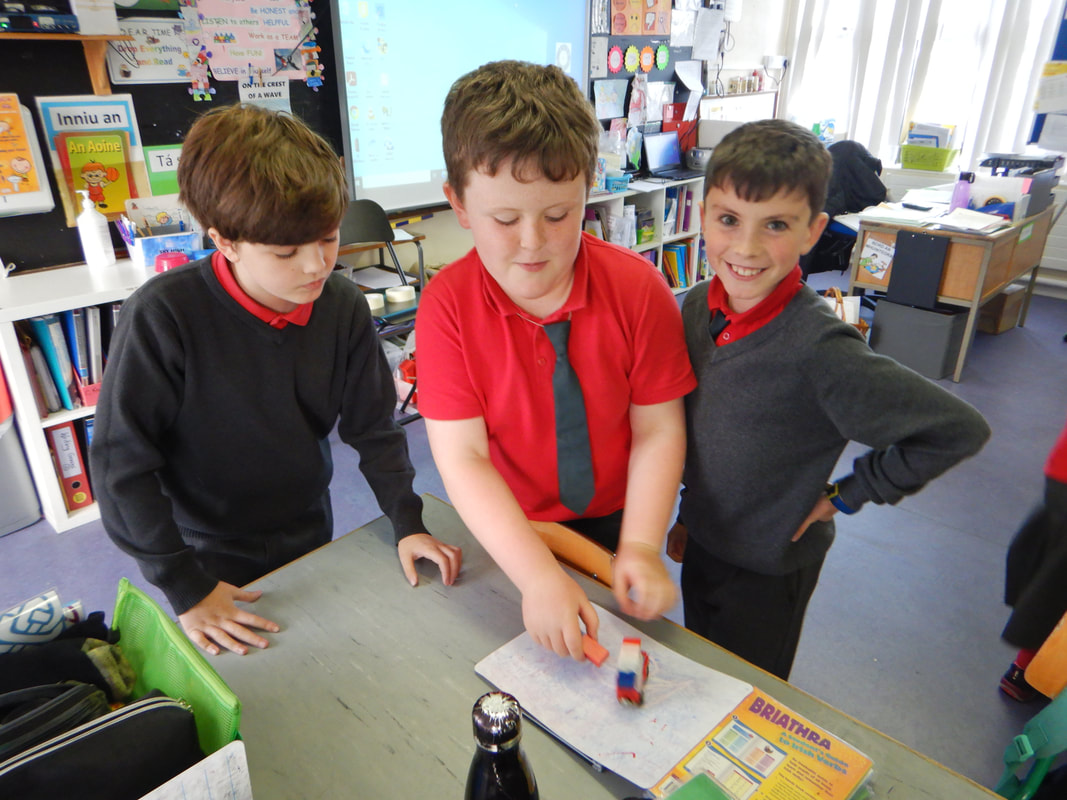
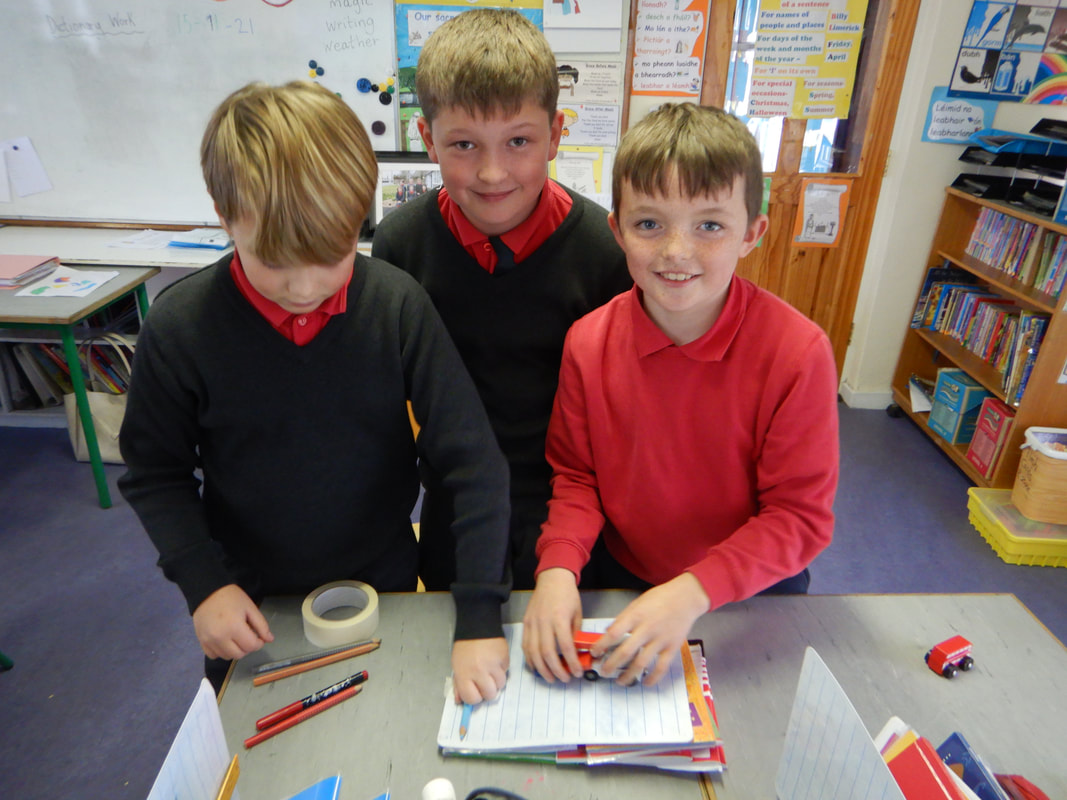
Strand: Materials
Title: Investigating Slopes
Objective: To discover how different surfaces affect how far an object will travel and to discover how the steepness of a slope affects how far an object will travel
What you need:
1. First we discussed the force of gravity and how because of gravity everything falls down.
2. Next we experimented with slopes and different materials on slopes. Firstly, we predicted on which surface (cotton wool, tin foil, carpet) the toy car would travel the furthest.
3. We carried out the experiment keeping the height of the slope the same for each experiment (3 books) so that the experiment would be fair but we changed the material.
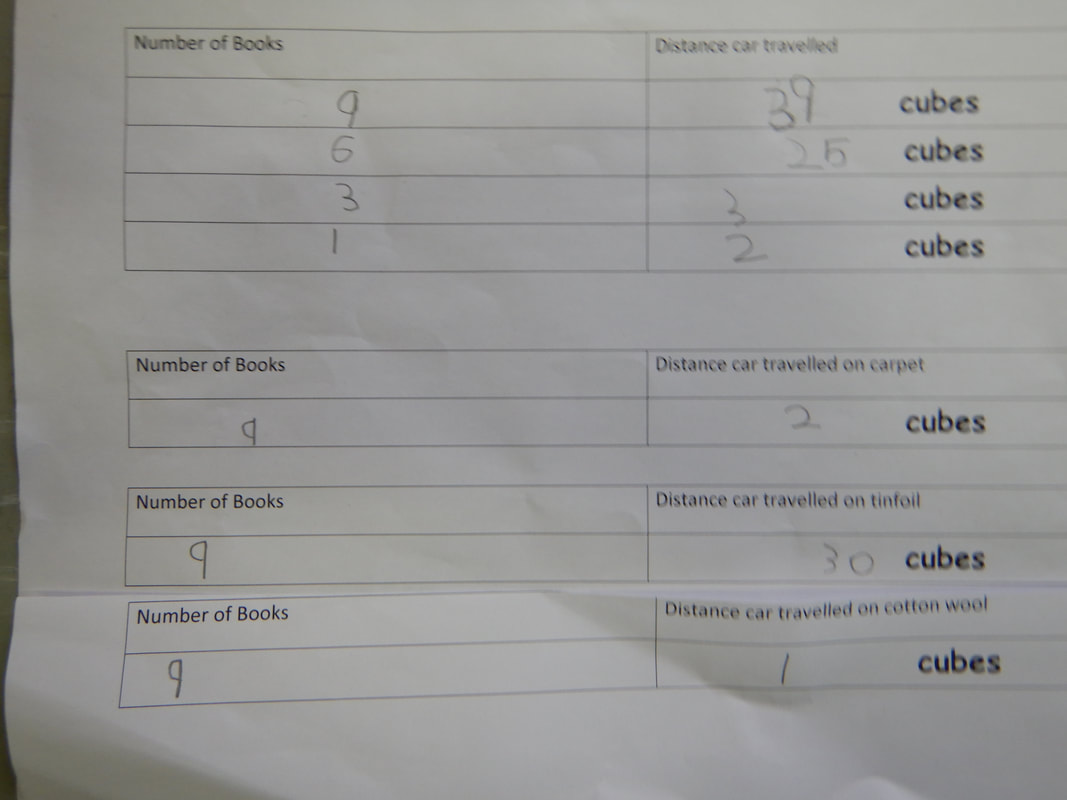
The toy car travelled the furthest on the tinfoil. The toy car travelled the shortest distance on the cotton wool.
4. Next, we changed the height of the slope but so that the experiment would be fair we made sure that the surface the toy car travelled on remained the same. We discovered that the toy car travelled further when we increased the height of the slope.
Scientific Skills used:
Predicting
Observing
Recording
Estimating and Measuring
Recording and Communicating
Strand: Materials
Title: Investigating Slopes
Objective: To discover how different surfaces affect how far an object will travel and to discover how the steepness of a slope affects how far an object will travel
What you need:
- Lots of books of equal height i.e. Busy at Maths books
- Toy cars
- Empty kitchen roll
- Blu tack
- Different materials i.e. cotton wool, carpet, tin foil
- Cubes
1. First we discussed the force of gravity and how because of gravity everything falls down.
2. Next we experimented with slopes and different materials on slopes. Firstly, we predicted on which surface (cotton wool, tin foil, carpet) the toy car would travel the furthest.
3. We carried out the experiment keeping the height of the slope the same for each experiment (3 books) so that the experiment would be fair but we changed the material.
The toy car travelled the furthest on the tinfoil. The toy car travelled the shortest distance on the cotton wool.
4. Next, we changed the height of the slope but so that the experiment would be fair we made sure that the surface the toy car travelled on remained the same. We discovered that the toy car travelled further when we increased the height of the slope.
Scientific Skills used:
Predicting
Observing
Recording
Estimating and Measuring
Recording and Communicating
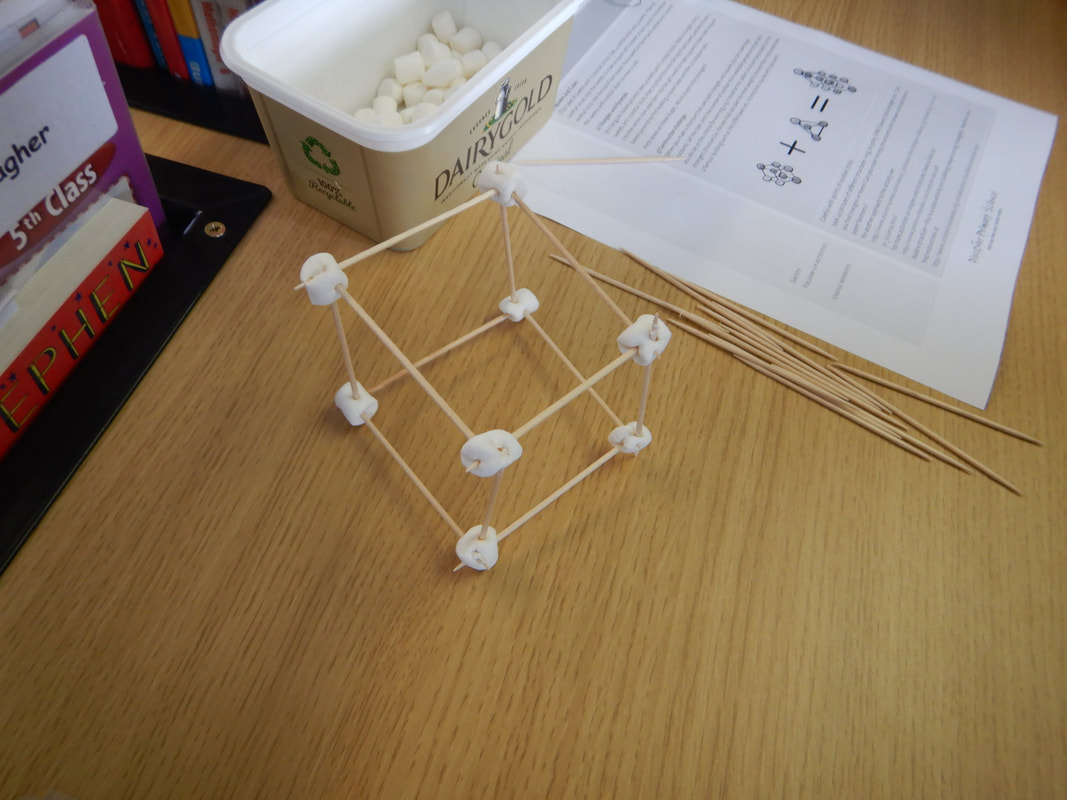
Materials - Fifth and Sixth Class: The pupils completed the following experiment:
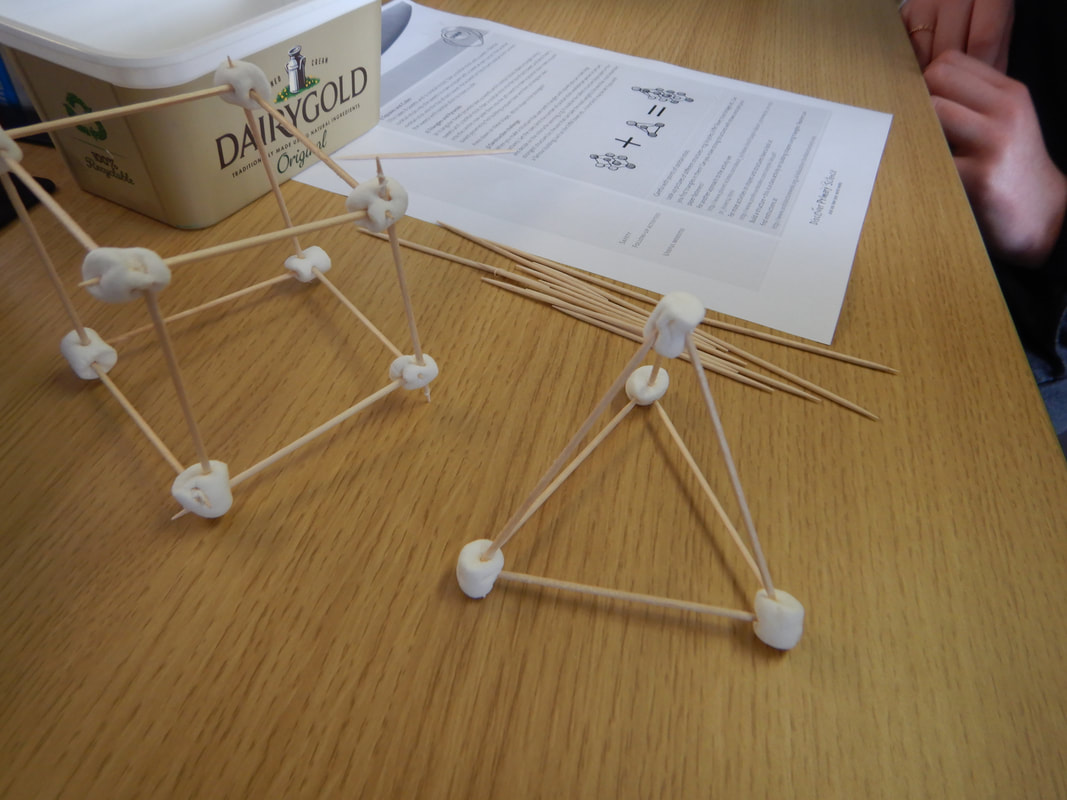
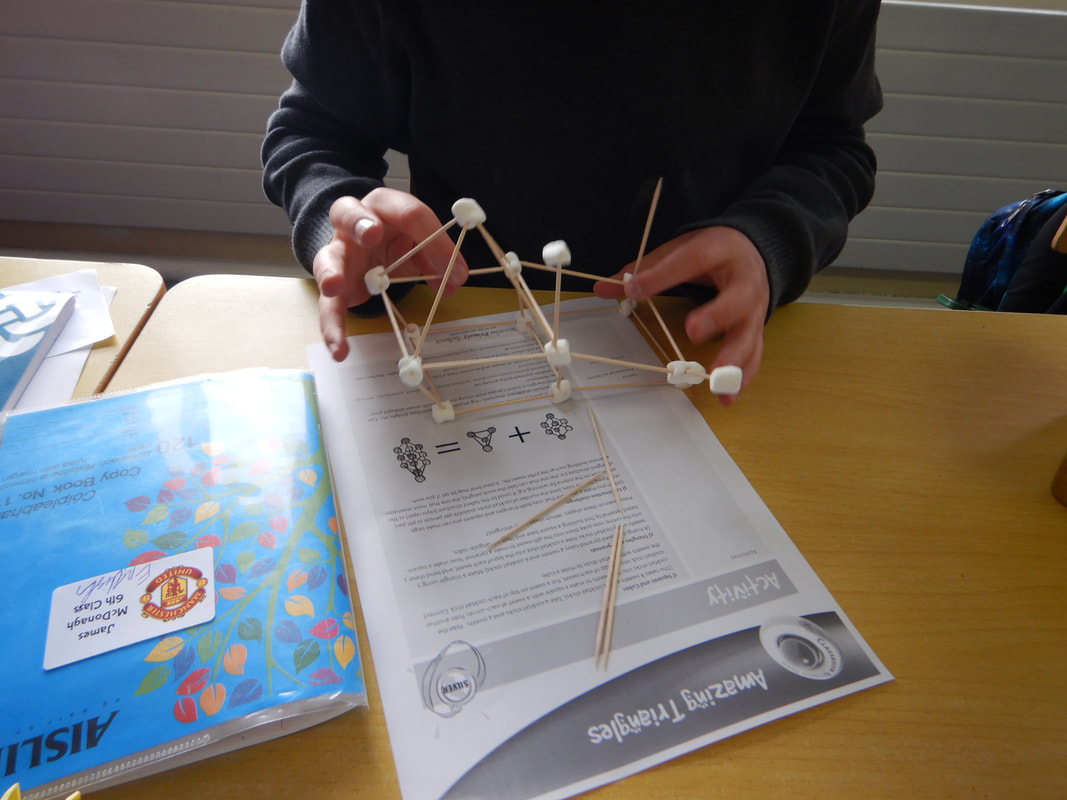
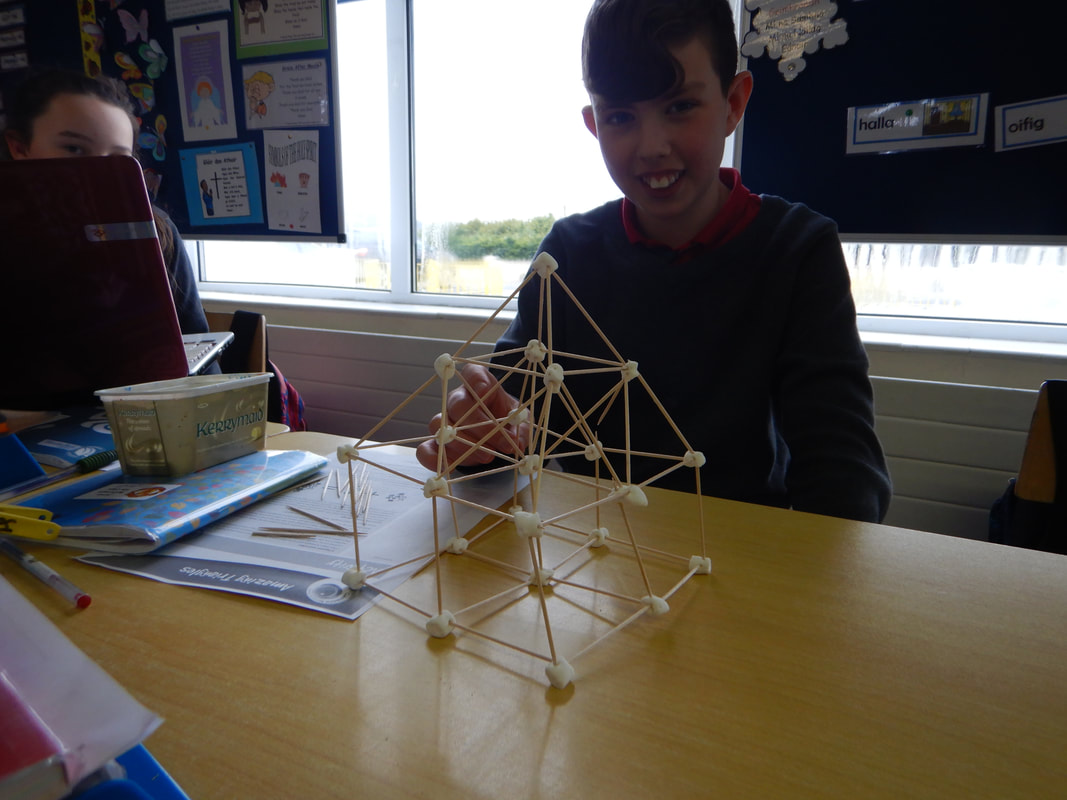
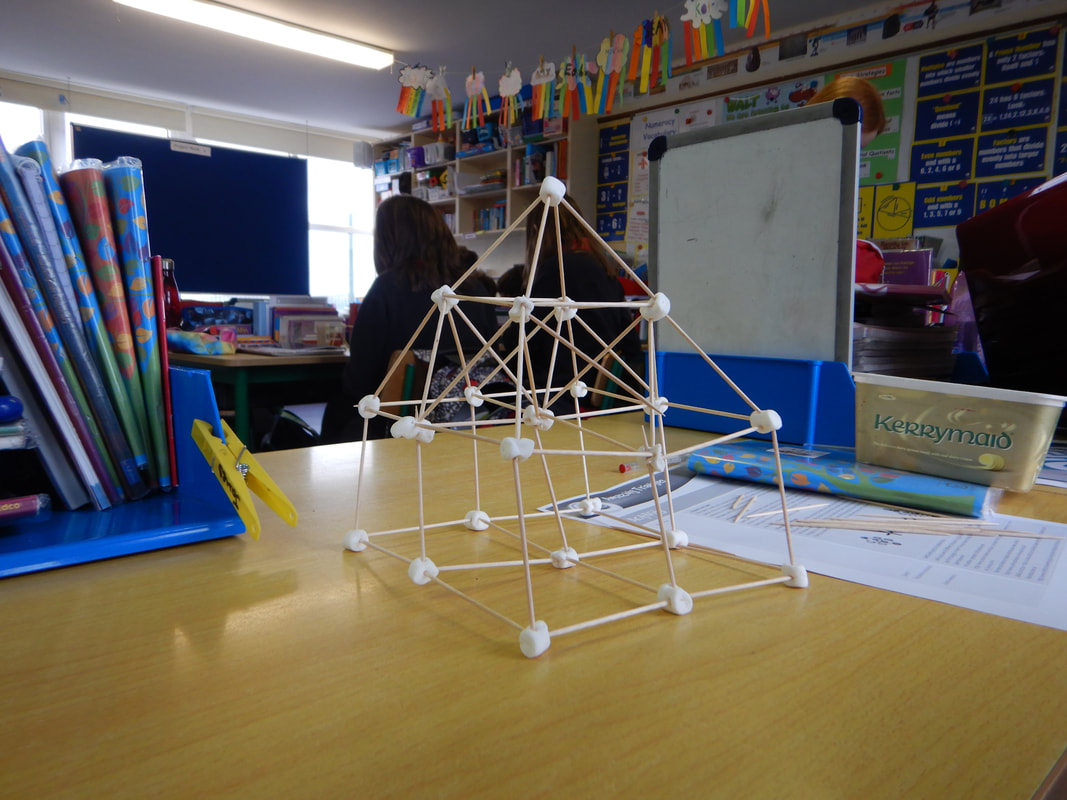
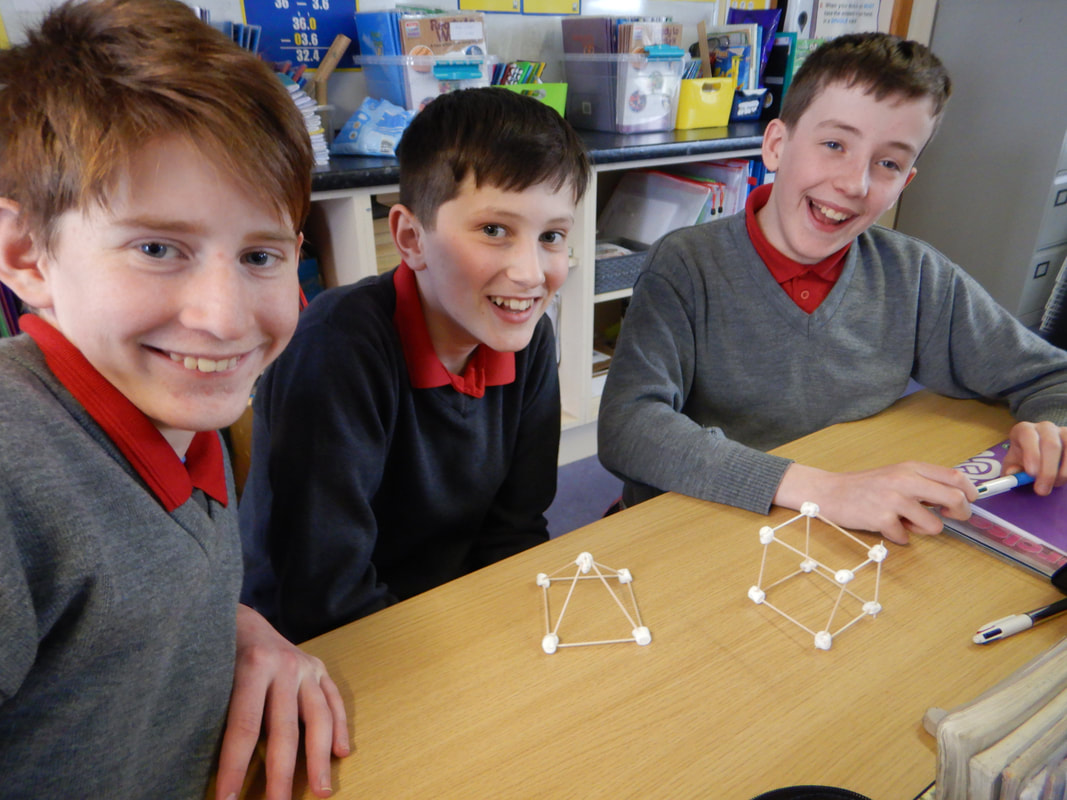
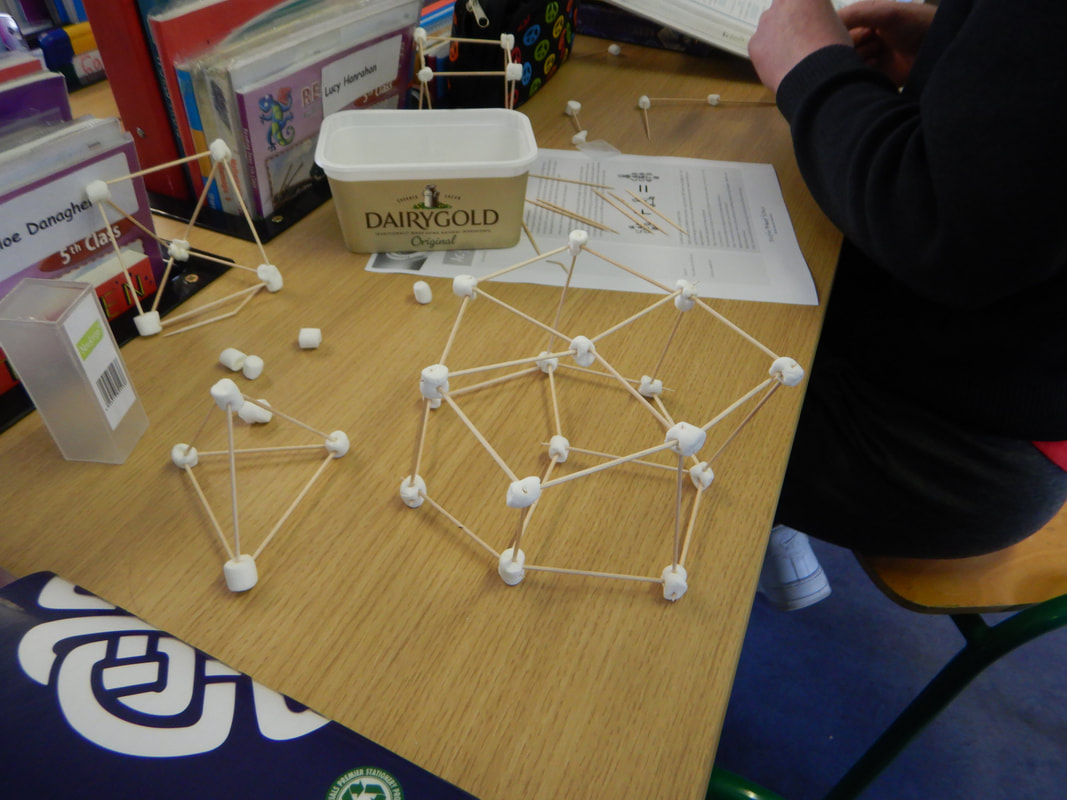
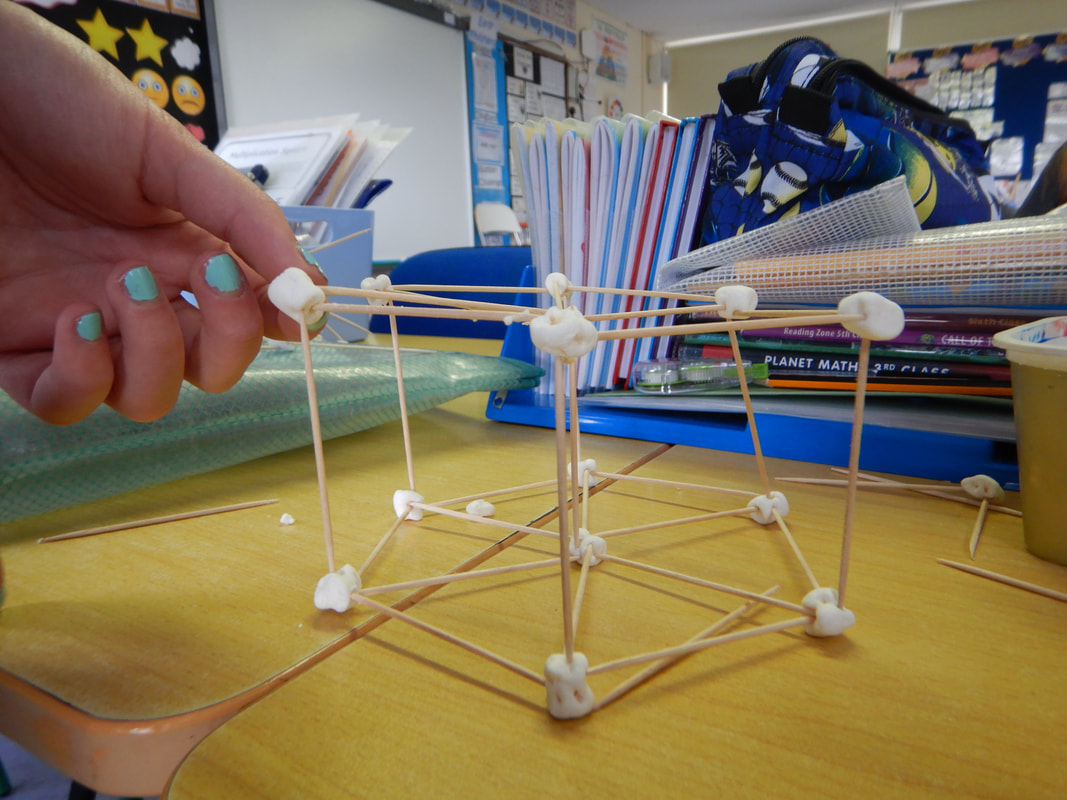
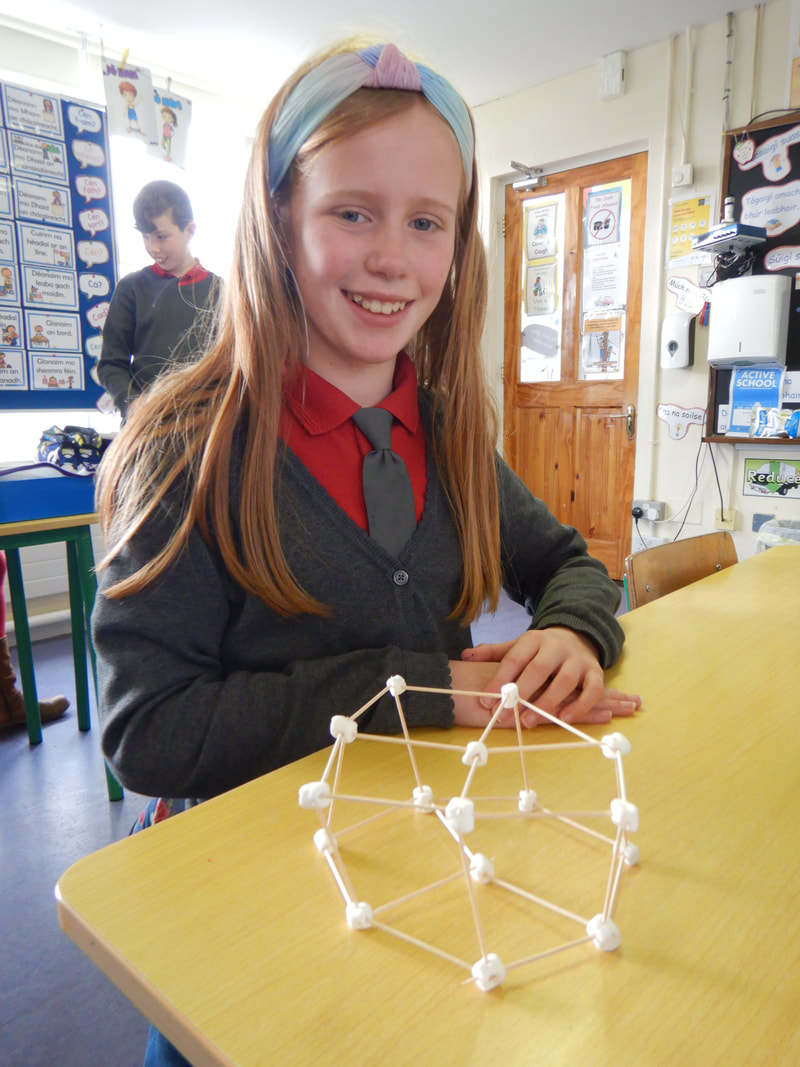
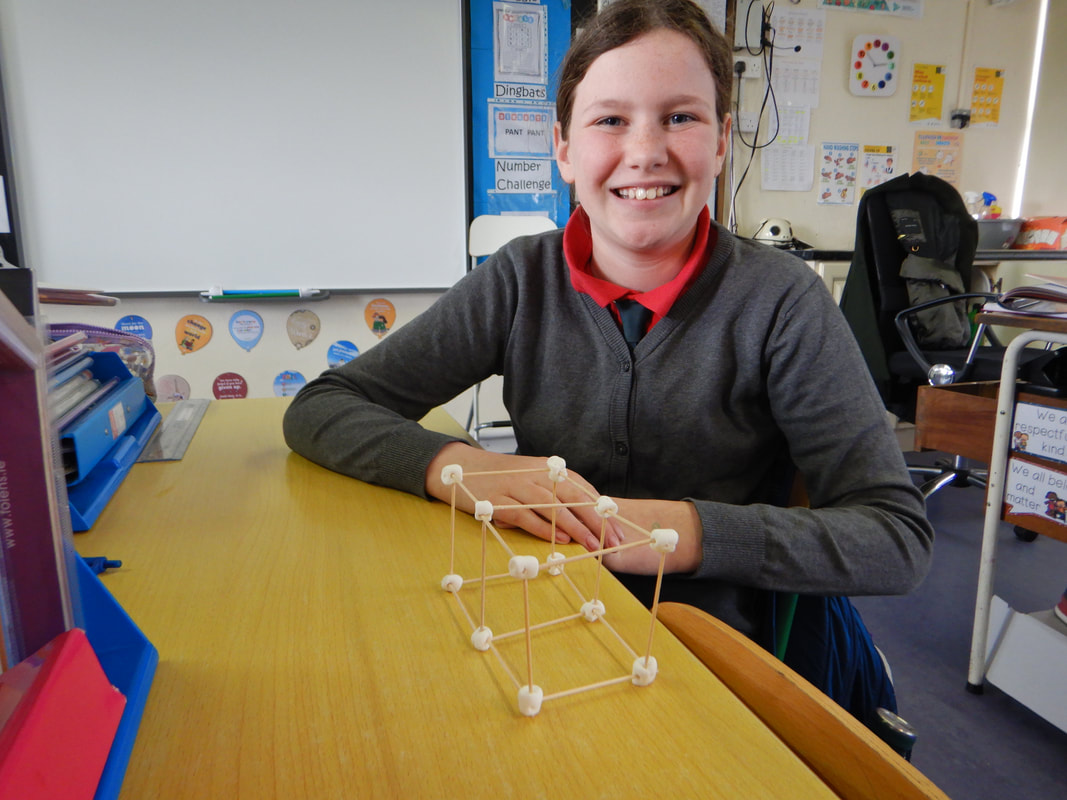
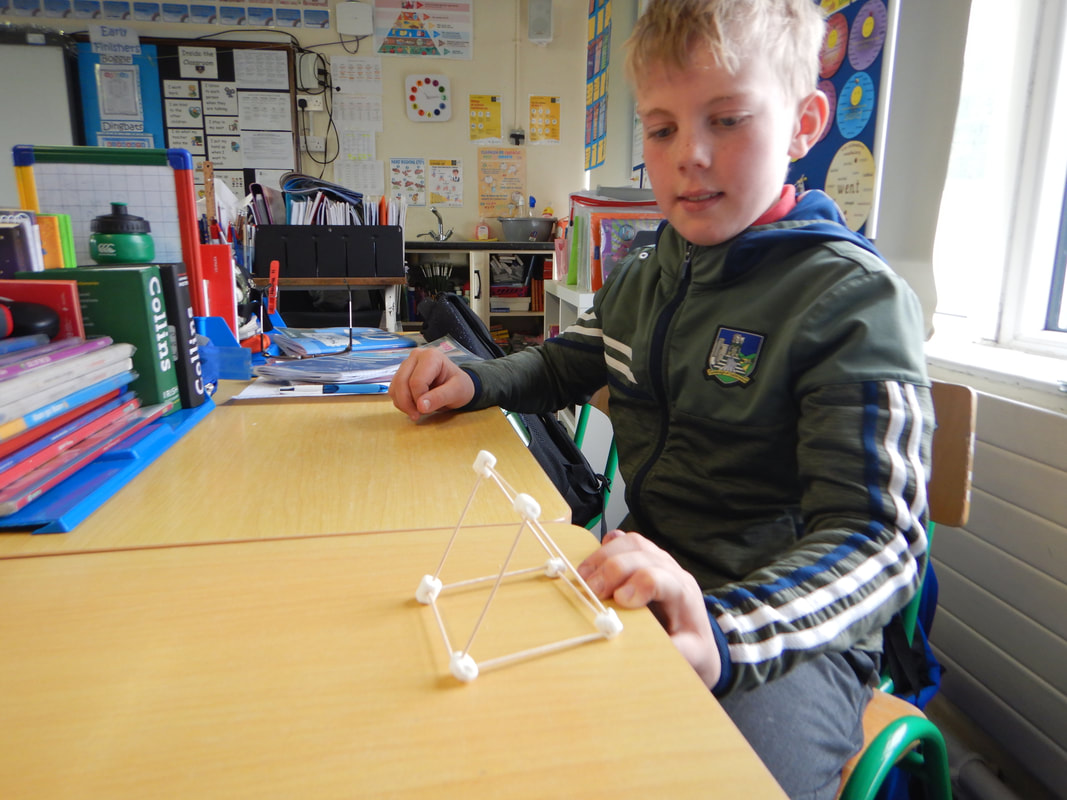
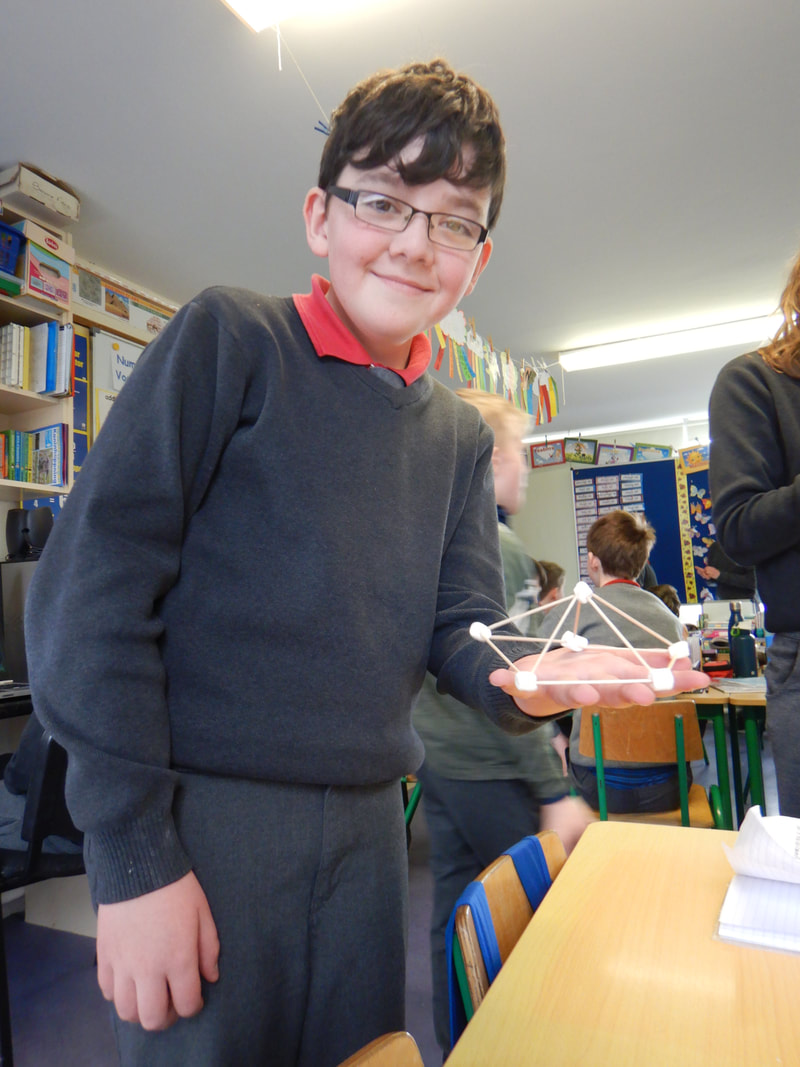
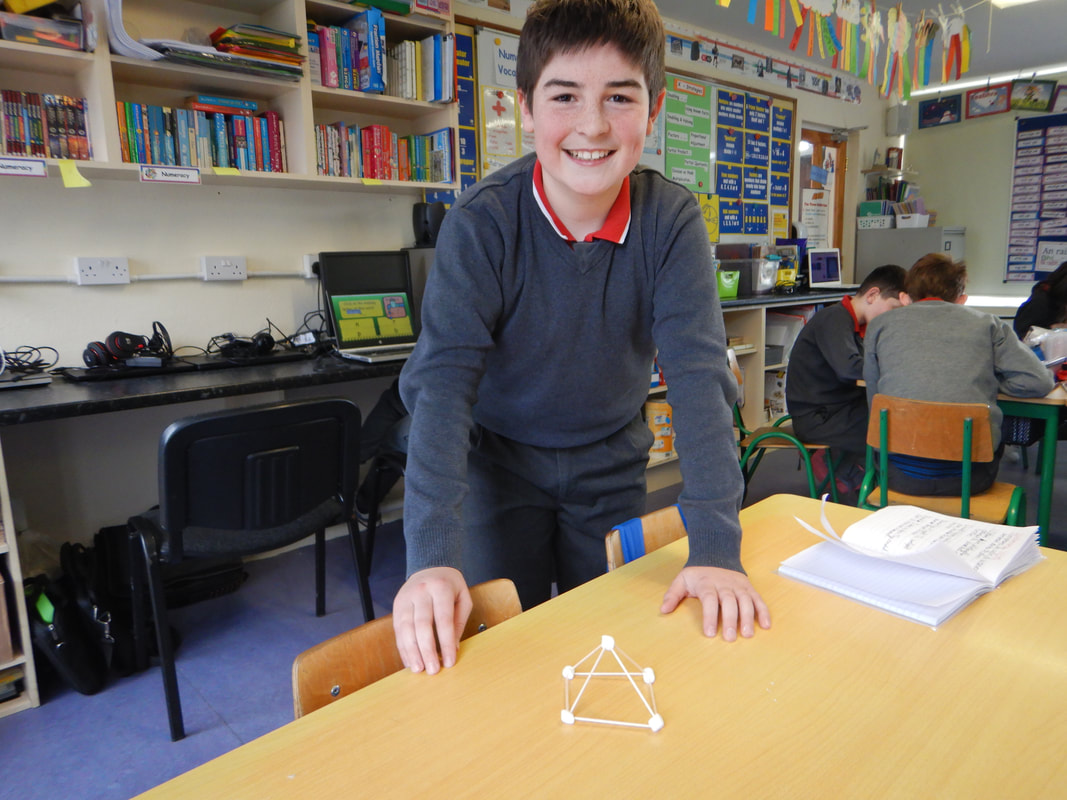
Strand: Materials
Title: Amazing Triangles
Objective:
Resources:
Cocktail sticks
Marshmallows
Procedure:
1. To begin with, we studied buildings and identified their structure and shapes. We identified triangles in the world around us.
2. Squares and cubes:
Using 4 cocktail sticks and 4 marshmallows, poke the cocktail sticks into the marshmallows to make a square with a marshmallow at each corner. Poke another cocktail stick into the top of the marshmallow. Put a marshmallow on top of each cocktail stick. Connect the marshmallows with cocktail sticks to make a cube, and then a cuboid.
3. Triangles and pyramids
Make a triangle using 3 marshmallows and 3 cocktail sticks. Poke a cocktail stick into the top of each marshmallow, and bend these 3 into the centre; now poke them into the 4th marshmallow to make a pyramid. Now, make a square-based pyramid by first building a square base and then 4 triangular sides. Press down on the shapes. Which shape is the strongest?
4. Construction challenge
Rules: 40 cocktail sticks per POD. The aim is to build the tallest structure possible, that is supported by itself.
Scientific Skills:
Experimenting
Design and Make
Investigating
Observing
Analysing
Conclusion: We used our Scientific skills to conclude that the triangle is a strong shape which is used to support structures. If a brace is put diagonally across a square, we create two triangles and a much stronger and more sturdy shape. The triangle is a very popular building shape because it is not easily distorted.


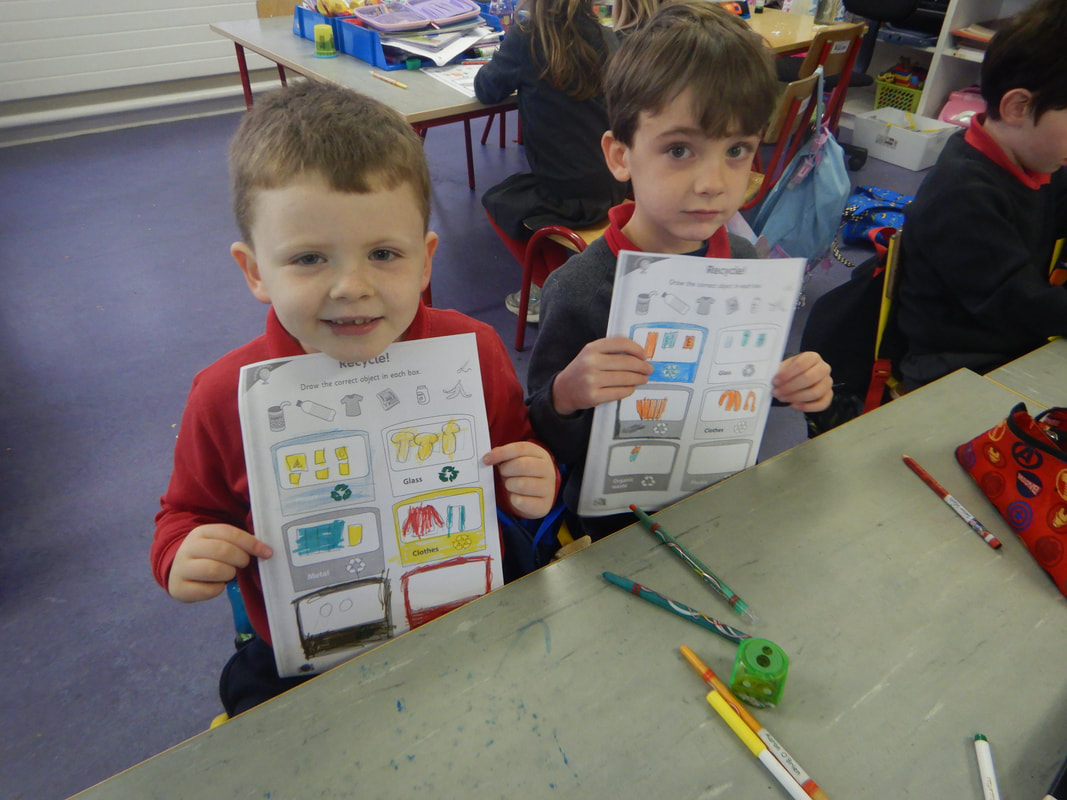
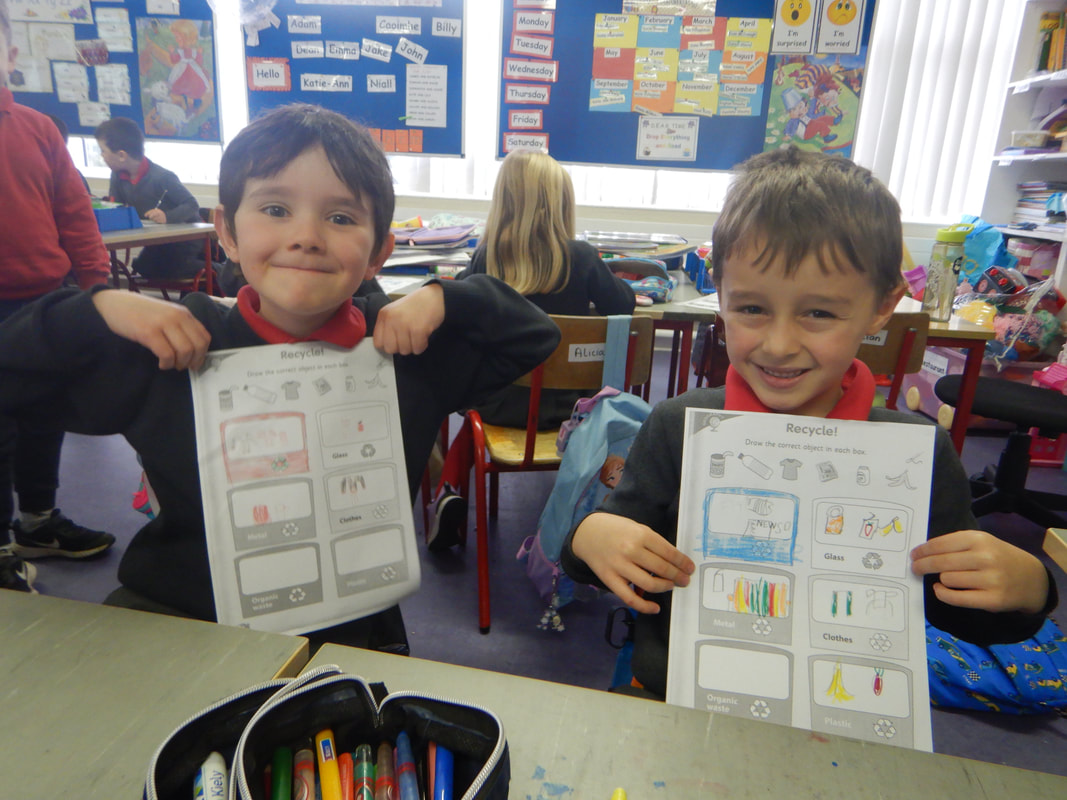
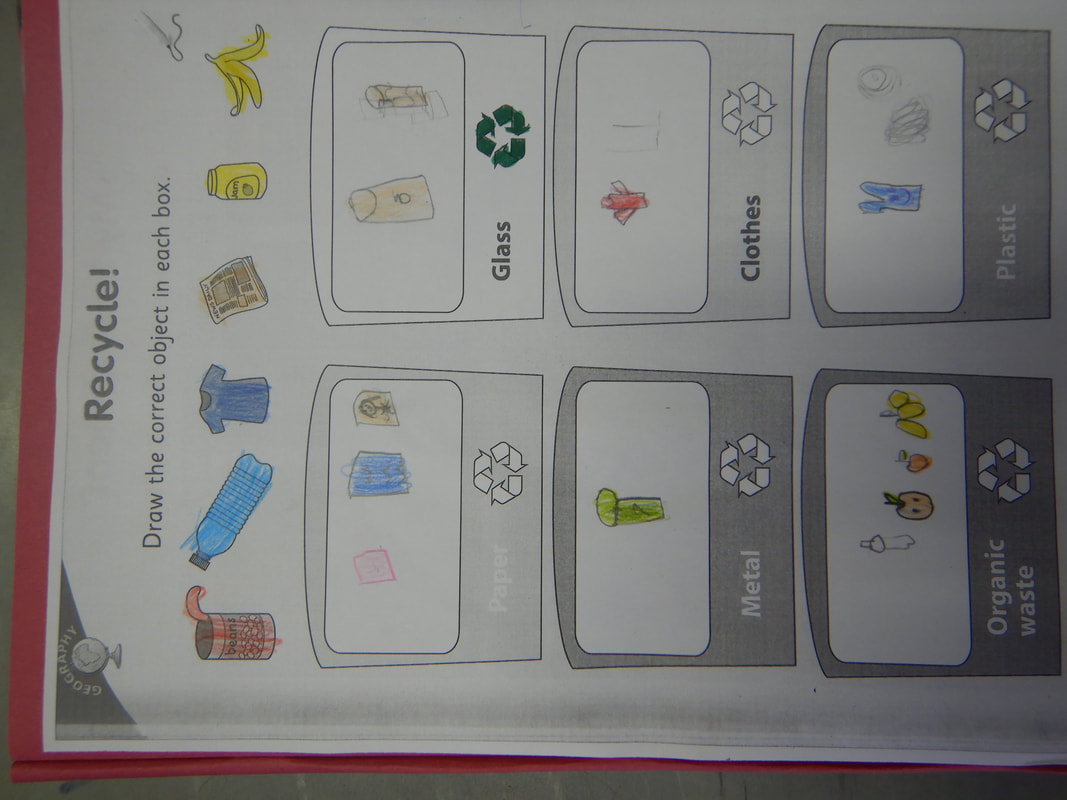
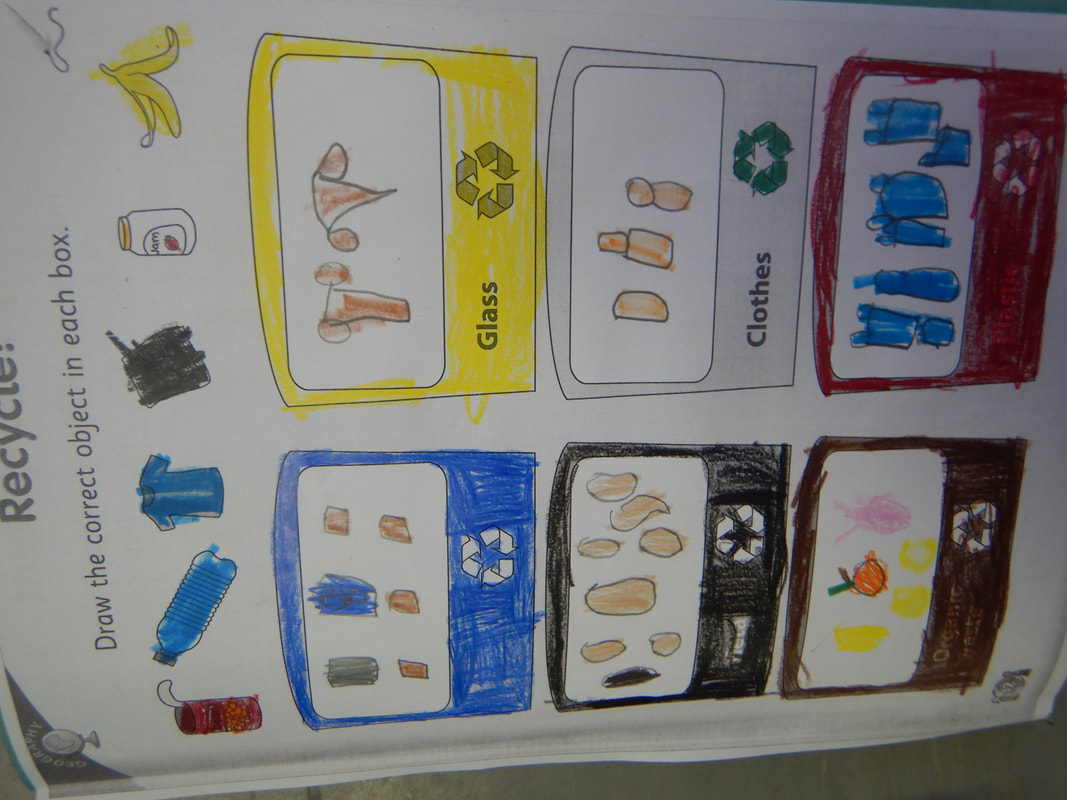
Environmental Awareness and Care - Junior and Senior Infants: The pupils completed the following experiment:
Strand: Environmental Awareness and Care
Title: Developing a Sense of Responsibility for Taking Care of and improving the Environment
Objective: To become aware of ways that we can care for the environment
We learned that:
The Earth is our home and we must take care of our home.
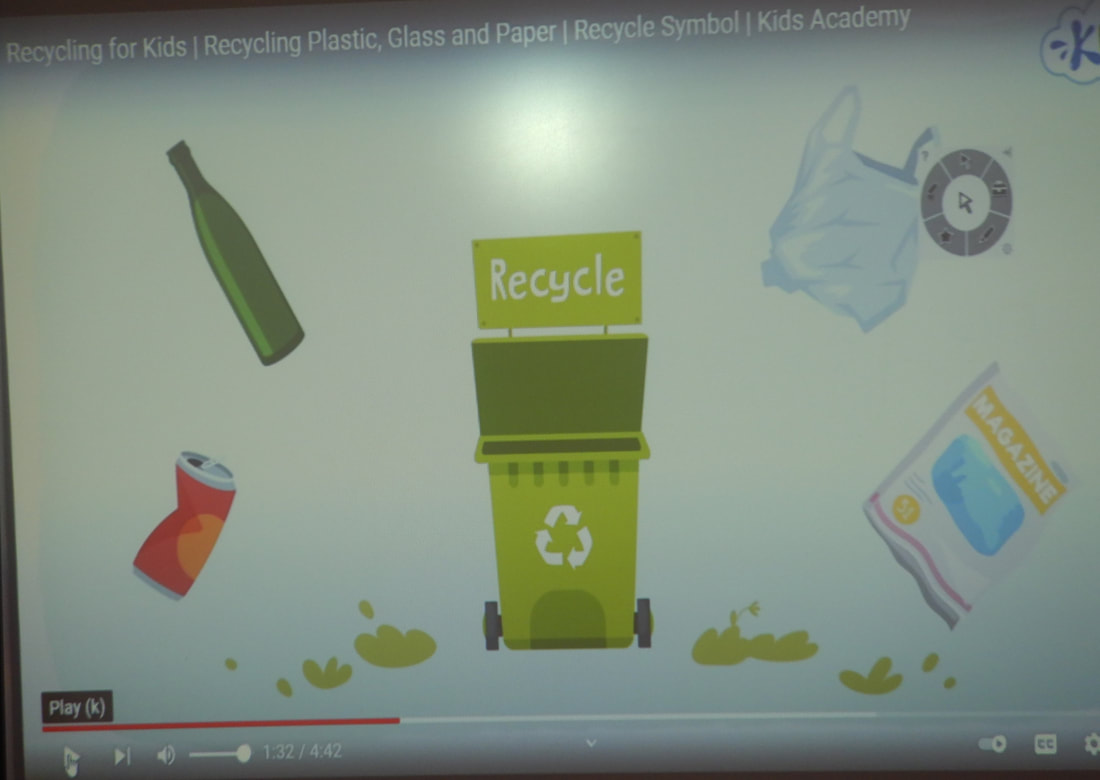
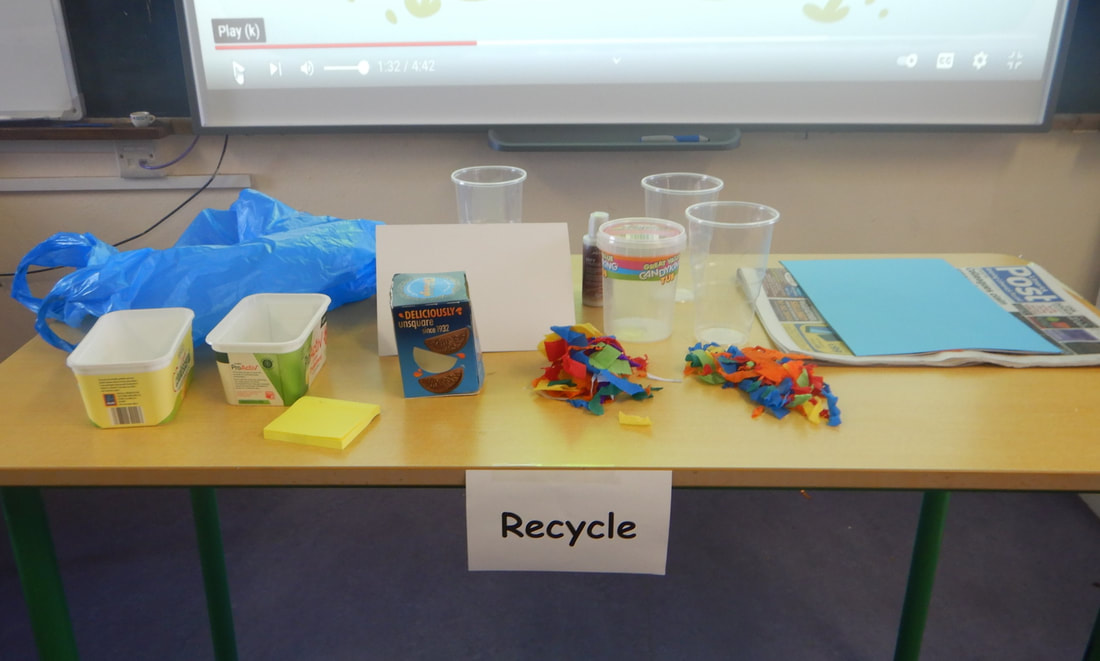
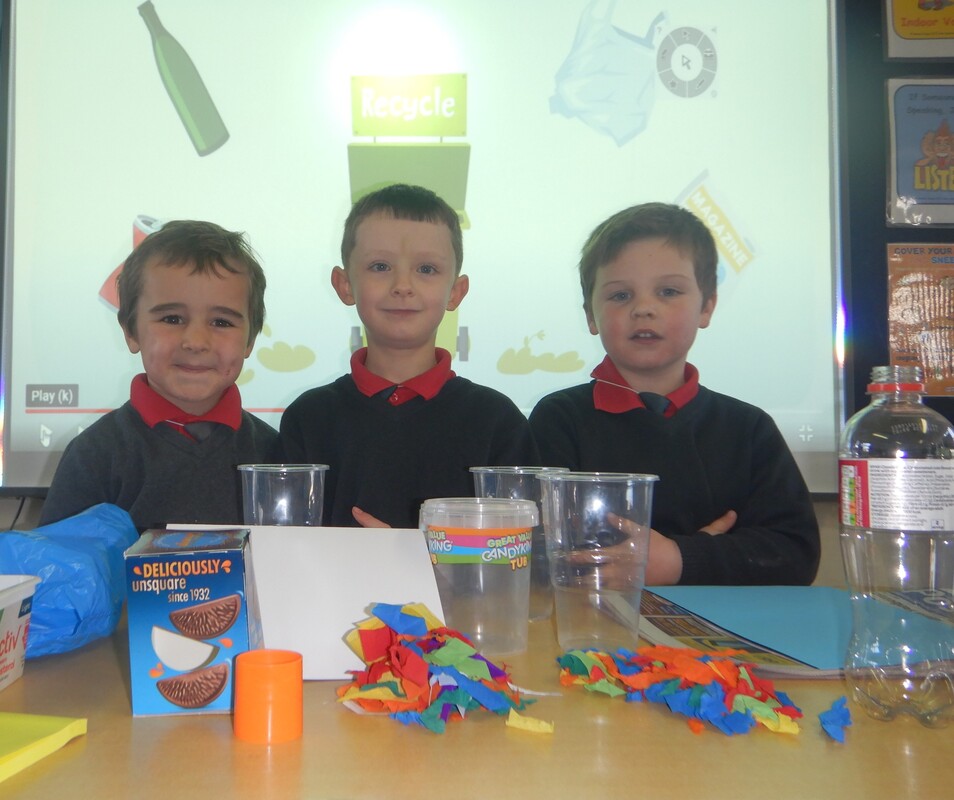
We looked at the different ways we could help our environment by recycling.
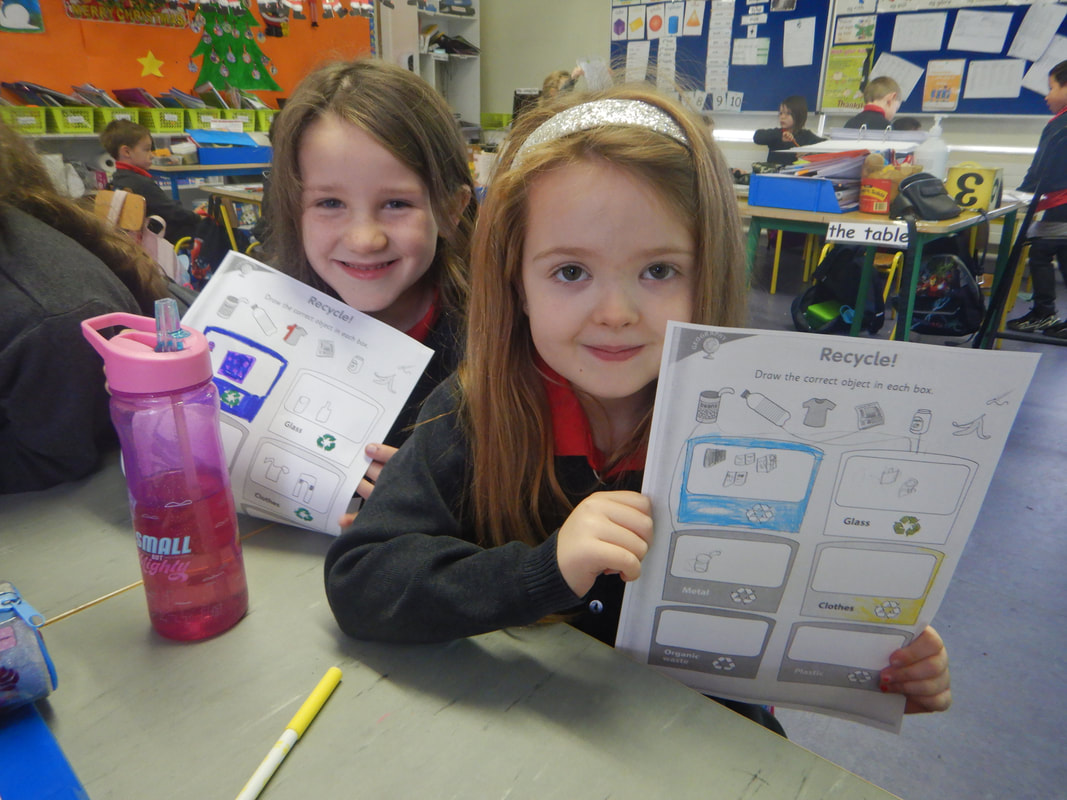
We can recycle glass, paper, metal and plastic. It cannot be wet and it has to be clean.
We can recycle glass bottles at the bottle bank at O’Gorman’s shop.
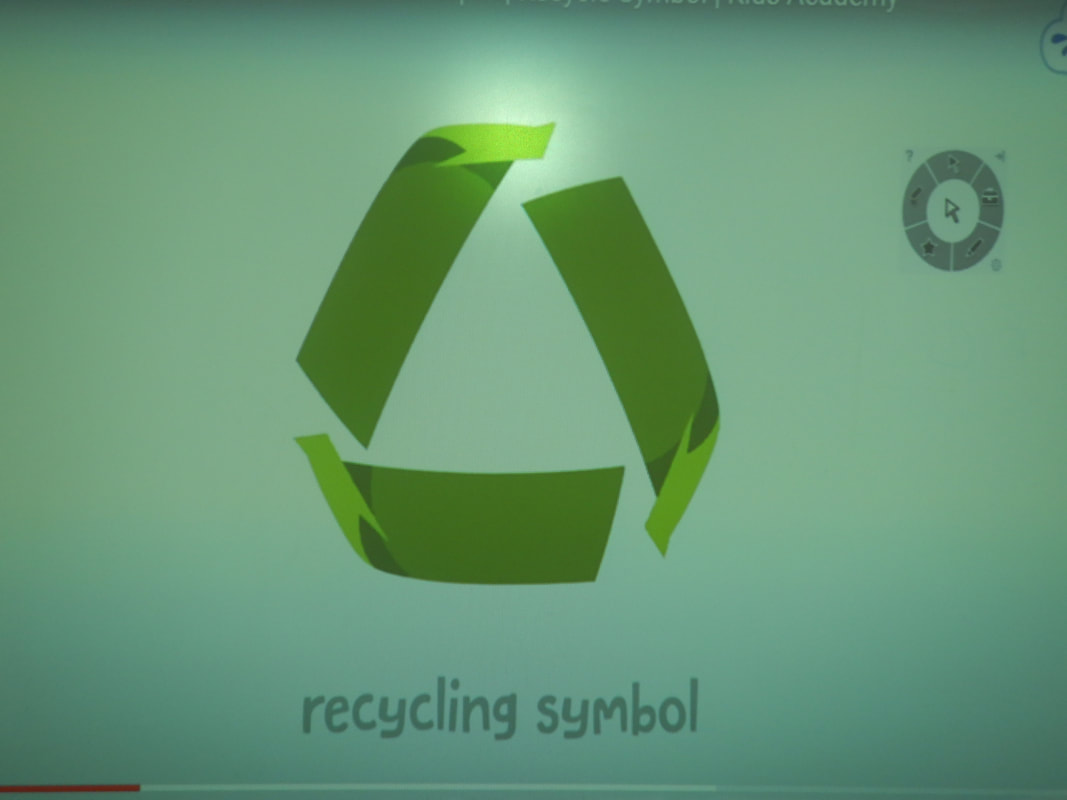
What does recycling mean?
It means turning something old into something new. This magic happens at the recycle plant.
We can put banana skins, orange peel and apple cores into our green compost bin.
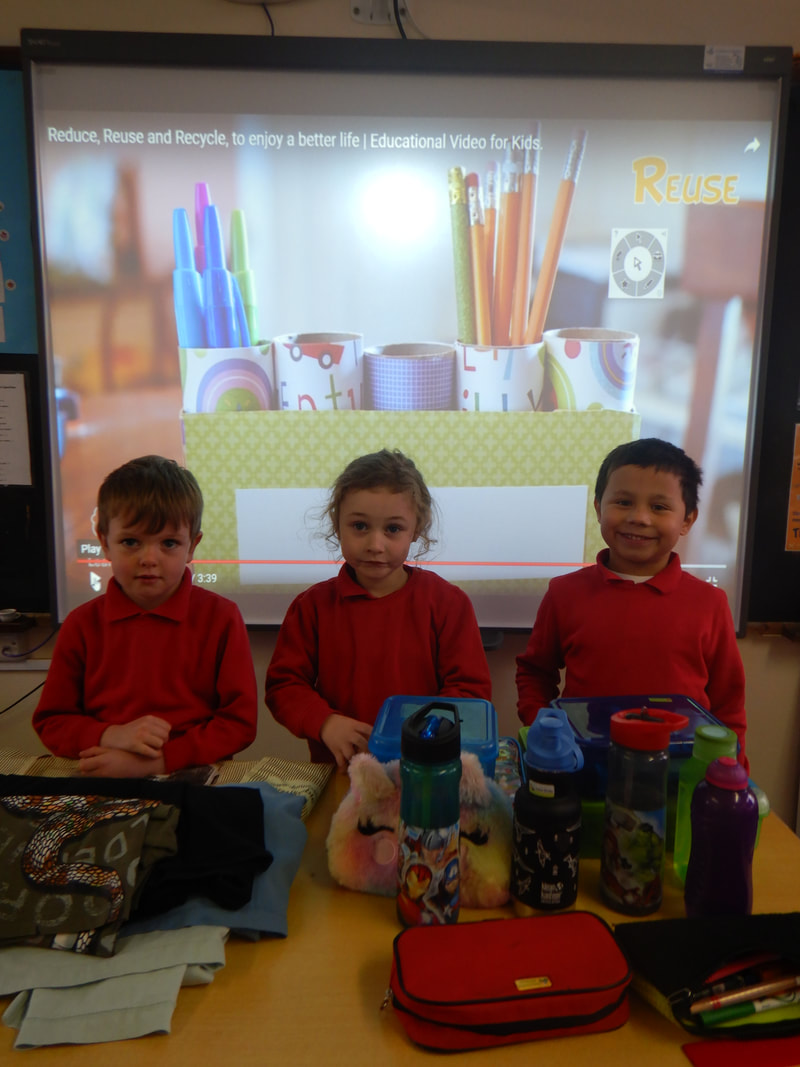
We can reuse old t-shirts, old newspapers, butter tubs and yogurt cartons when we’re painting. We can give clothes that are too small for us to the clothes collection. We can use reusable lunch boxes and bottles at school.
We can also reduce the amount of energy that we use that means we can use less of it. We can walk or cycle with an adult instead of using a car. We can use our own shopping bags.
Other ways we can save our environment
We can save energy when we turn off the tap when we’re washing our hands.
We can turn off the lights when we’re not in the room.
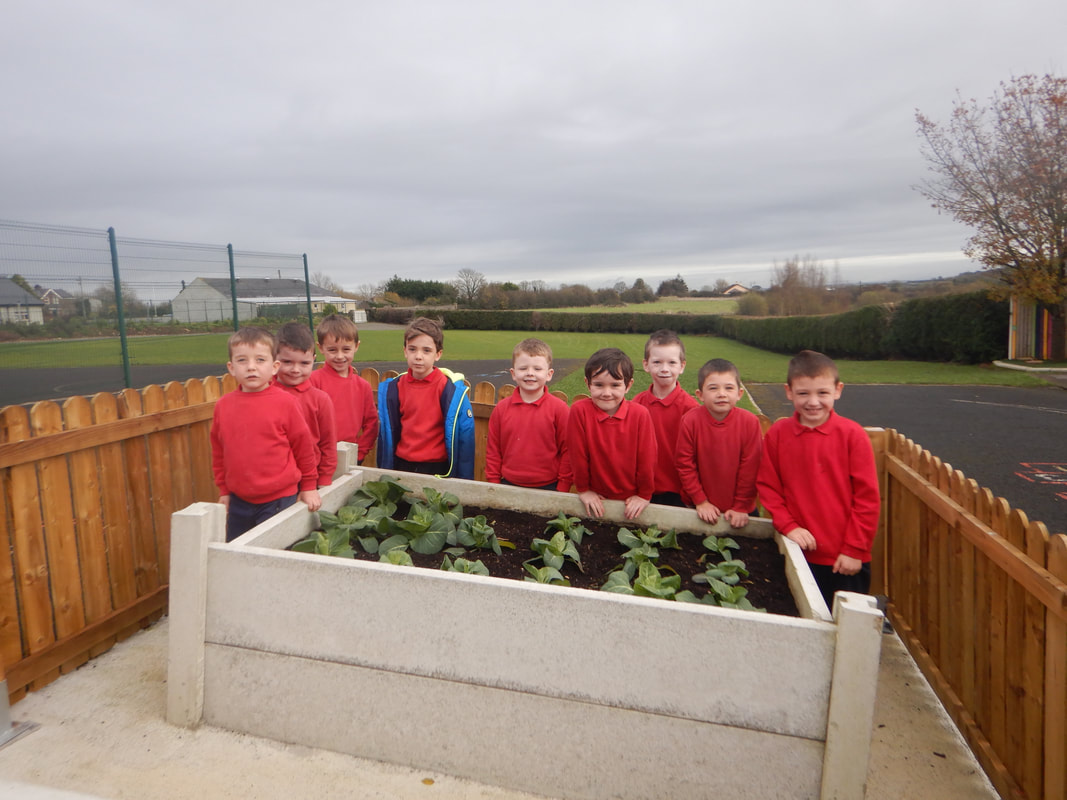
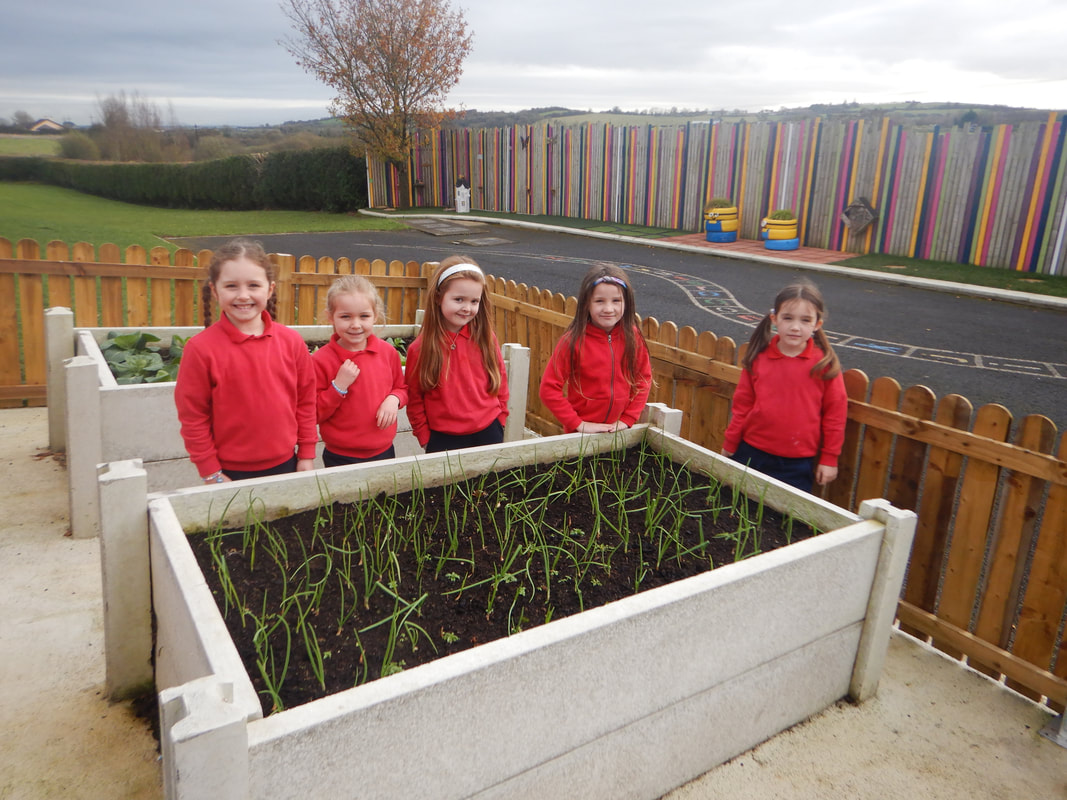
We can save our environment by planting vegetables in our garden.
Scientific Skills used:
Questioning
Observing
Predicting
Recording
Strand: Environmental Awareness and Care
Title: Developing a Sense of Responsibility for Taking Care of and improving the Environment
Objective: To become aware of ways that we can care for the environment
We learned that:
The Earth is our home and we must take care of our home.
We looked at the different ways we could help our environment by recycling.
We can recycle glass, paper, metal and plastic. It cannot be wet and it has to be clean.
We can recycle glass bottles at the bottle bank at O’Gorman’s shop.
What does recycling mean?
It means turning something old into something new. This magic happens at the recycle plant.
We can put banana skins, orange peel and apple cores into our green compost bin.
We can reuse old t-shirts, old newspapers, butter tubs and yogurt cartons when we’re painting. We can give clothes that are too small for us to the clothes collection. We can use reusable lunch boxes and bottles at school.
We can also reduce the amount of energy that we use that means we can use less of it. We can walk or cycle with an adult instead of using a car. We can use our own shopping bags.
Other ways we can save our environment
We can save energy when we turn off the tap when we’re washing our hands.
We can turn off the lights when we’re not in the room.
We can save our environment by planting vegetables in our garden.
Scientific Skills used:
Questioning
Observing
Predicting
Recording
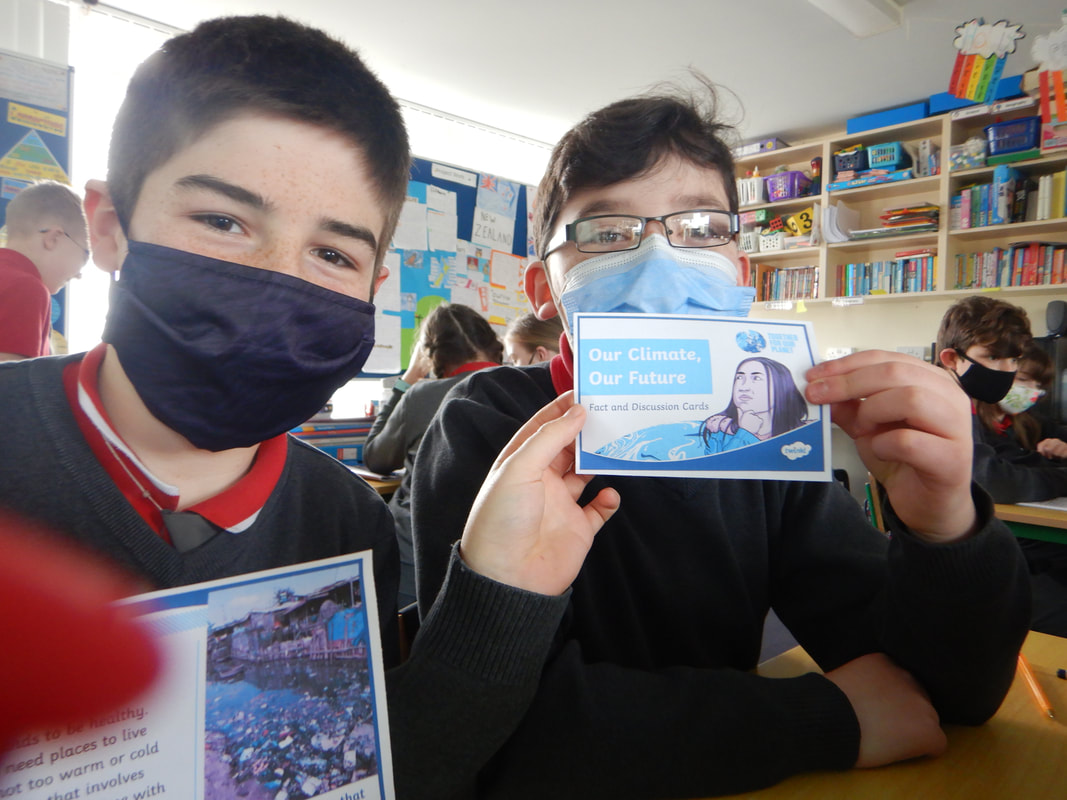
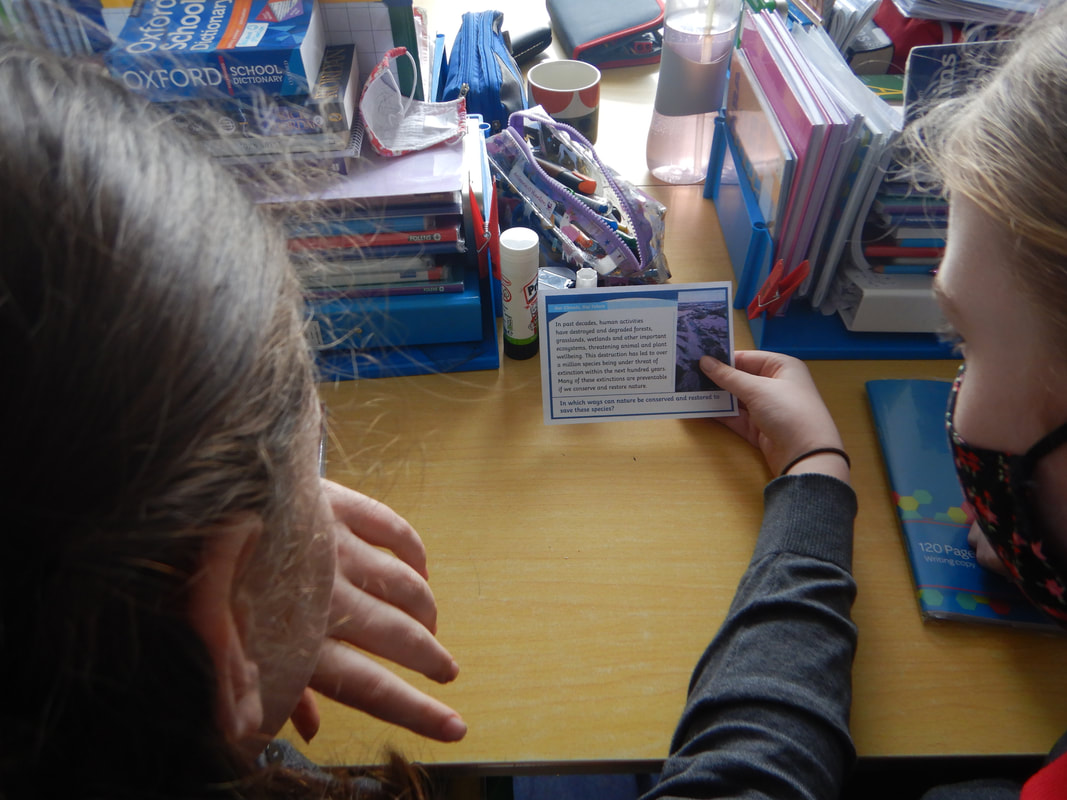
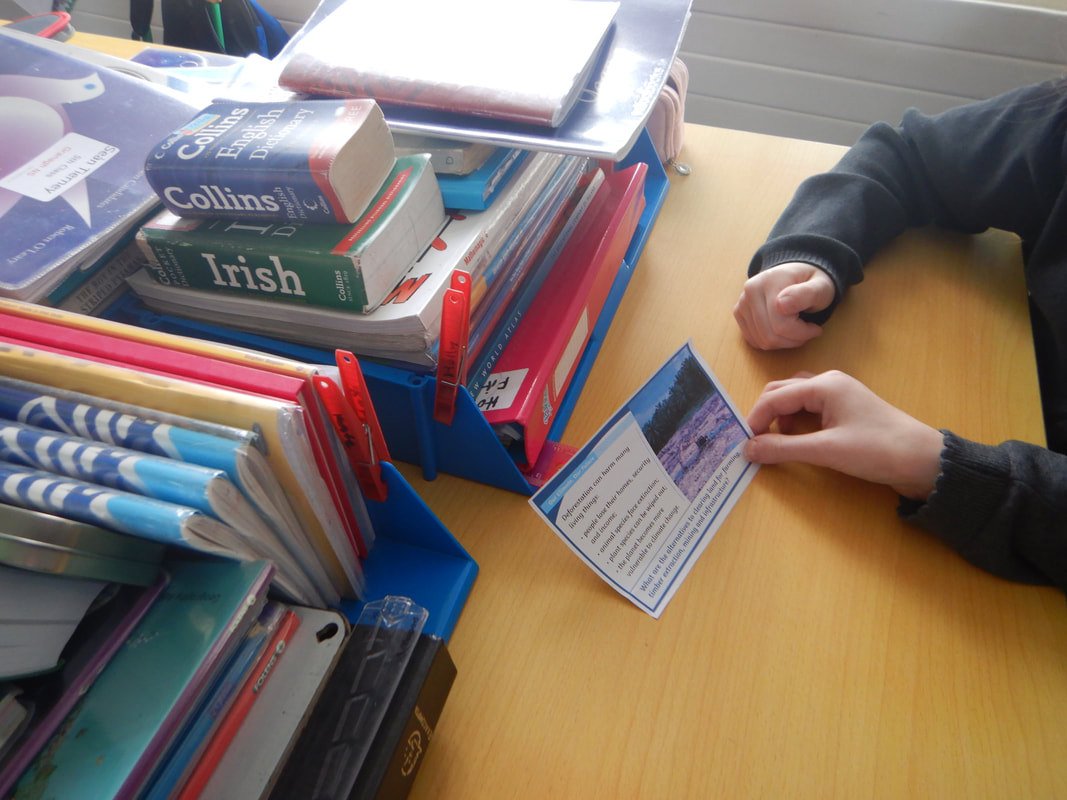
Environmental Awareness and Care - 5th and Sixth Class Investigation:
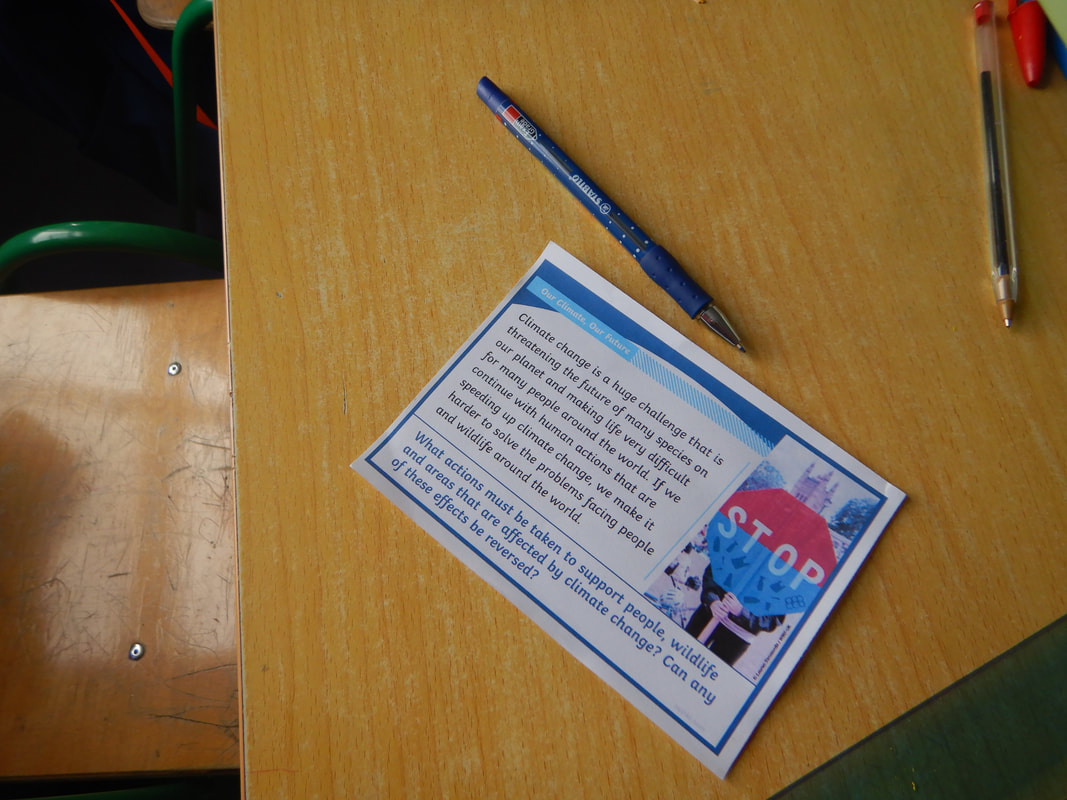
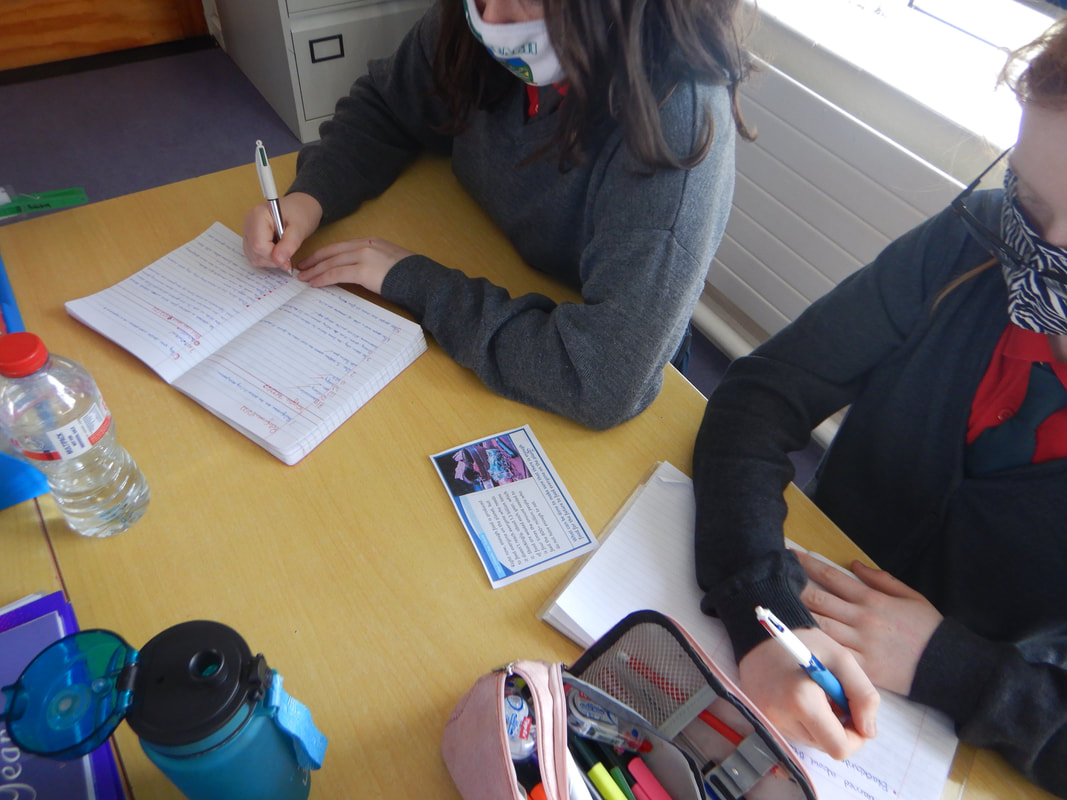
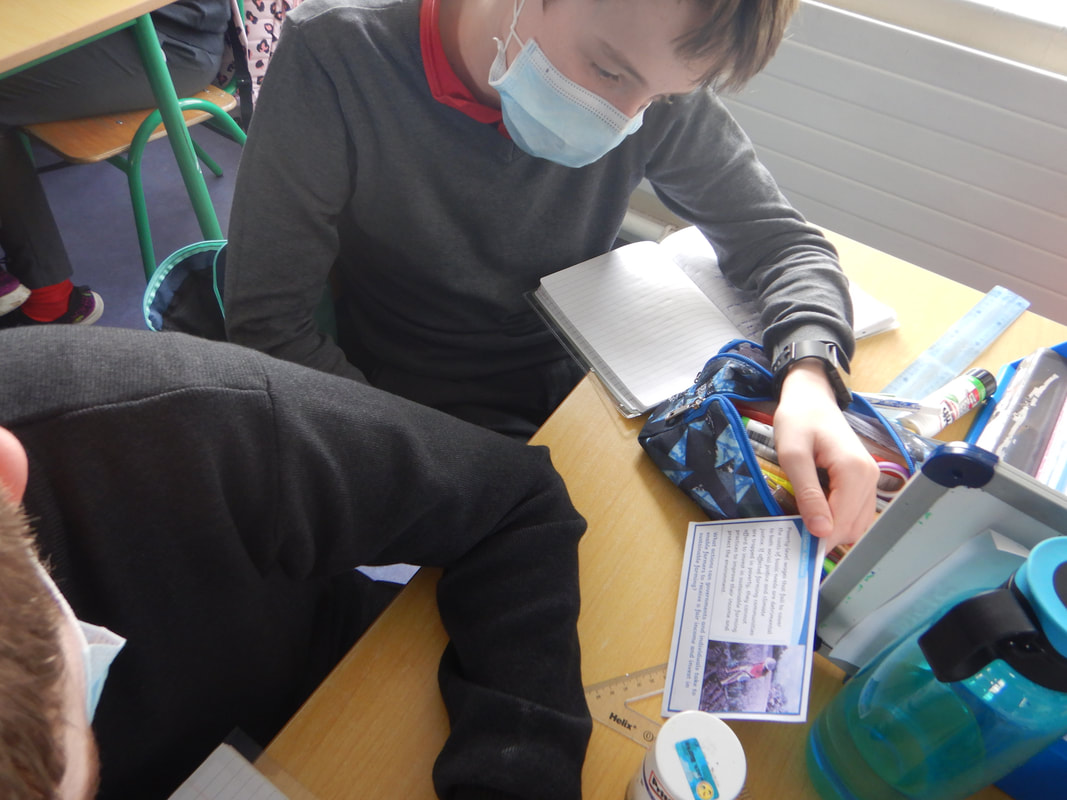
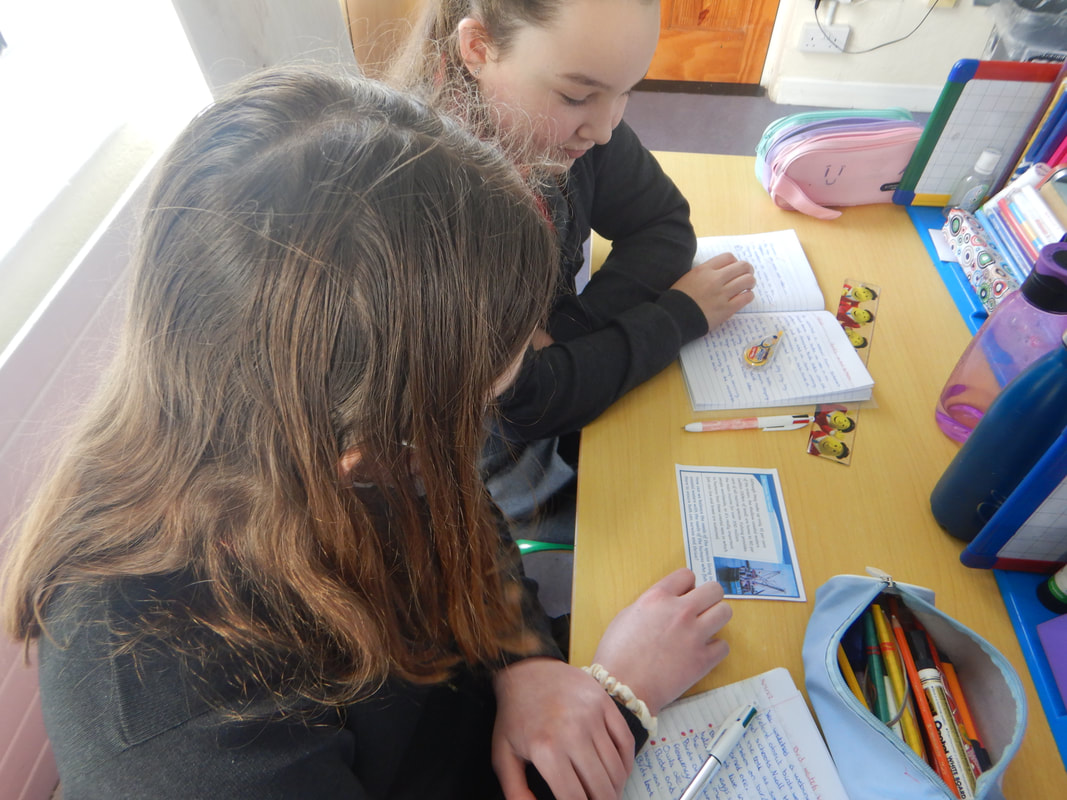
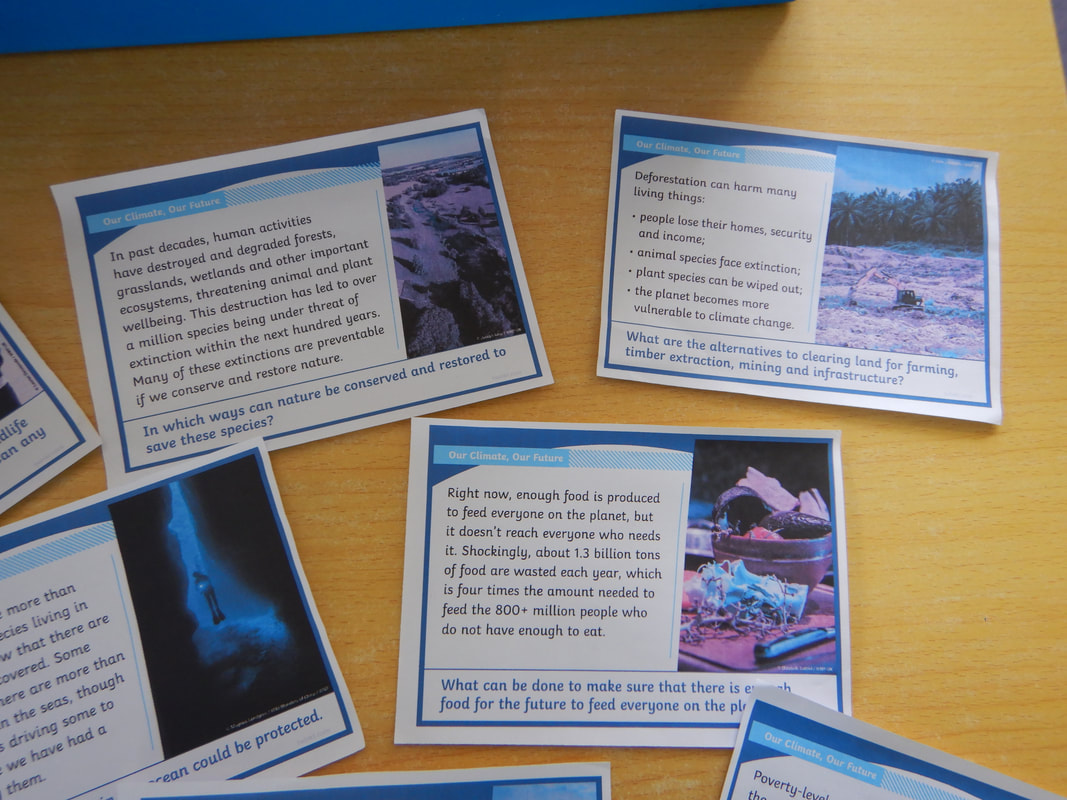
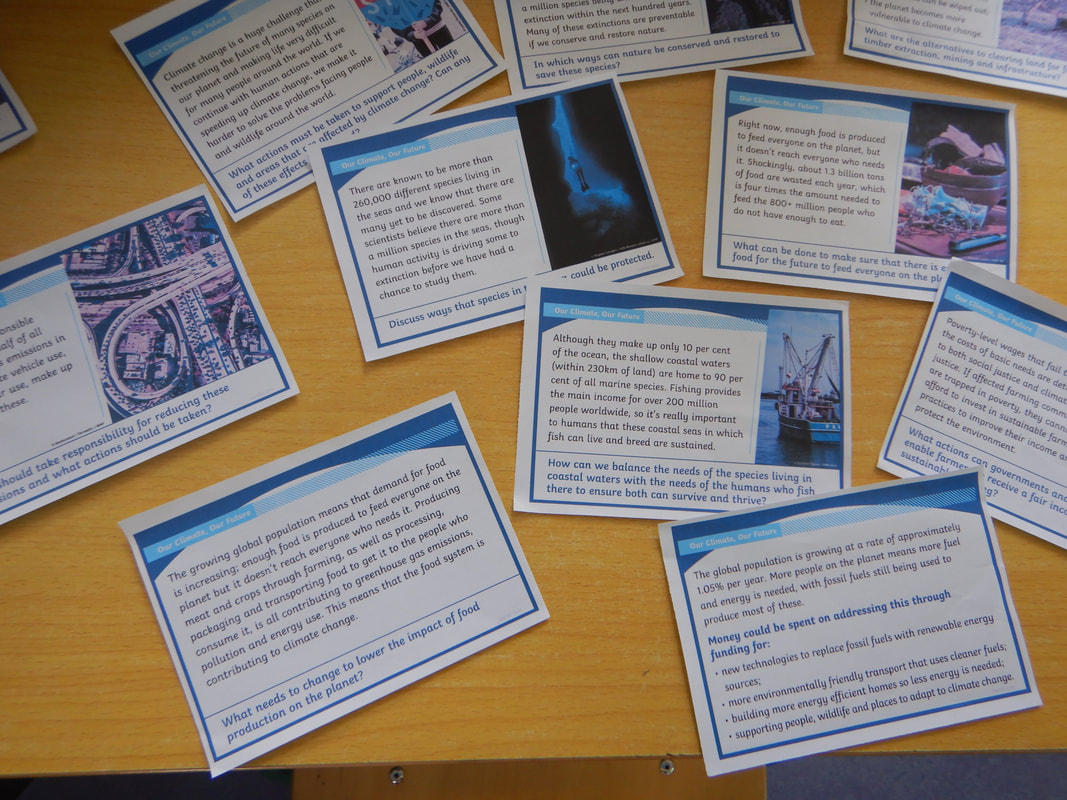
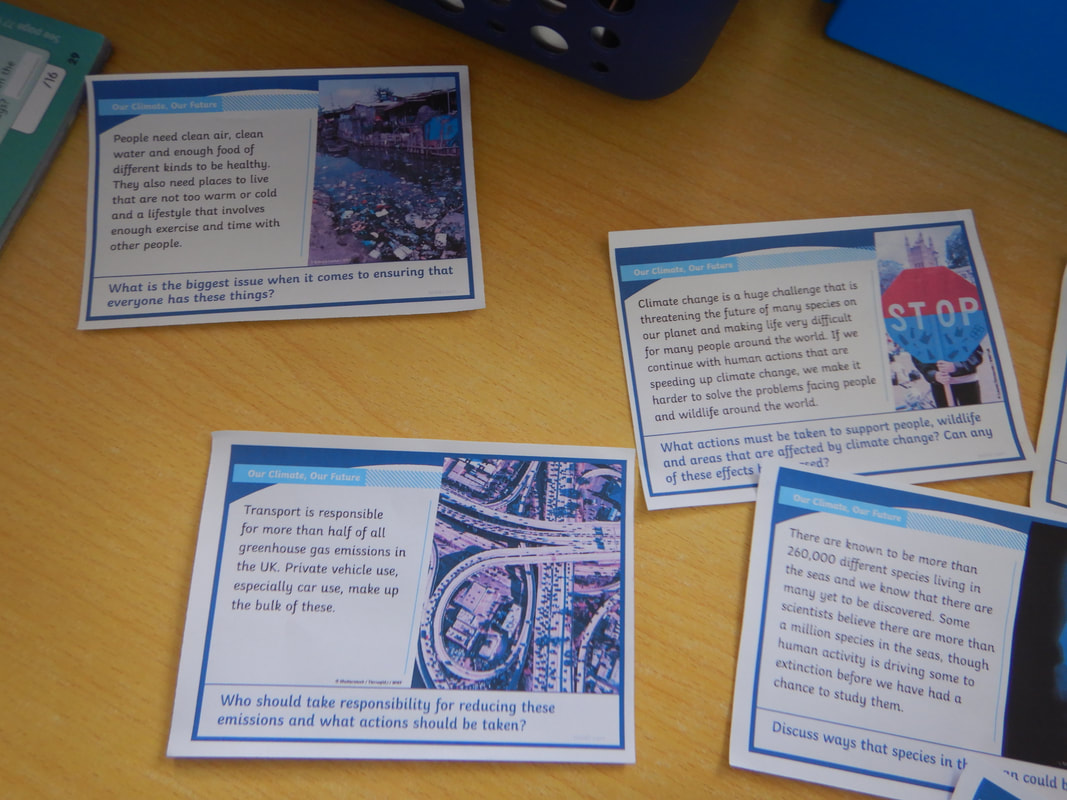
The pupils in 5th and 6th Class researched COP26 during the first week of November 2021. They worked in groups to identify the keys areas that they would like to see addressed by world leaders to protect the Earth.
The pupils watched the following video https://youtu.be/Gyk2UX1714s.
The pupils worked in pairs and posed questions to each other about how we can work together for the betterment of the earth. Issues discussed were Climate Change, deforestation, transport, reducing our carbon footprint, sustainable energy and reducing waste.
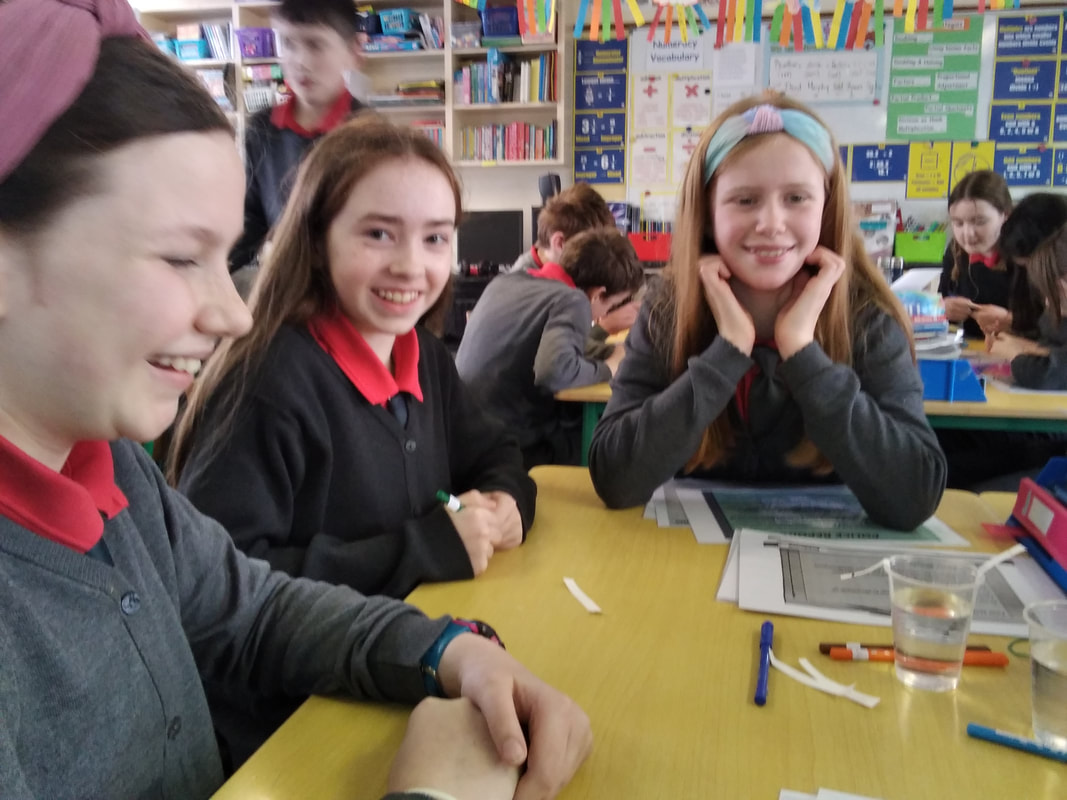
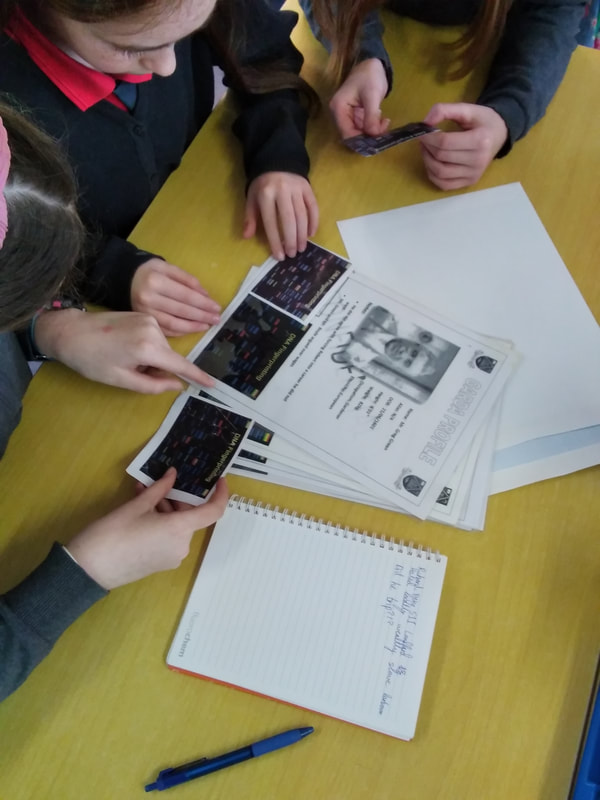
During this week, the pupils researched Gretta Thunberg and created a fact file on her.
The pupils in 5th and 6th Class researched COP26 during the first week of November 2021. They worked in groups to identify the keys areas that they would like to see addressed by world leaders to protect the Earth.
The pupils watched the following video https://youtu.be/Gyk2UX1714s.
The pupils worked in pairs and posed questions to each other about how we can work together for the betterment of the earth. Issues discussed were Climate Change, deforestation, transport, reducing our carbon footprint, sustainable energy and reducing waste.
During this week, the pupils researched Gretta Thunberg and created a fact file on her.
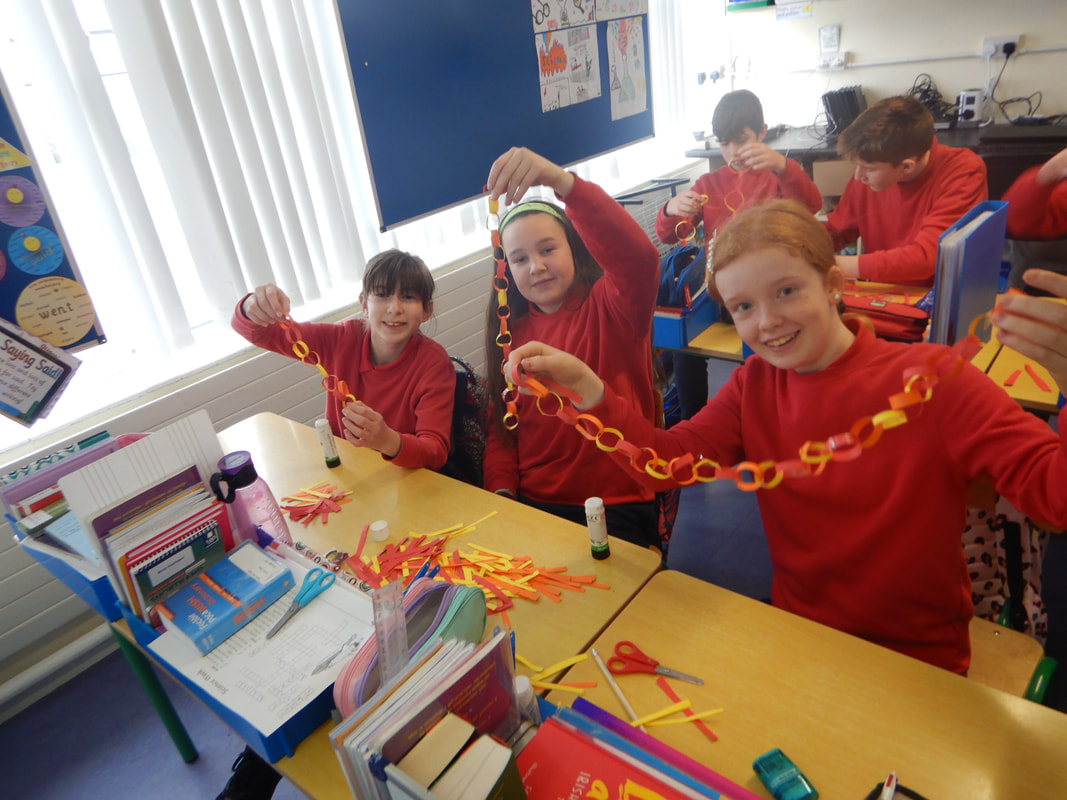
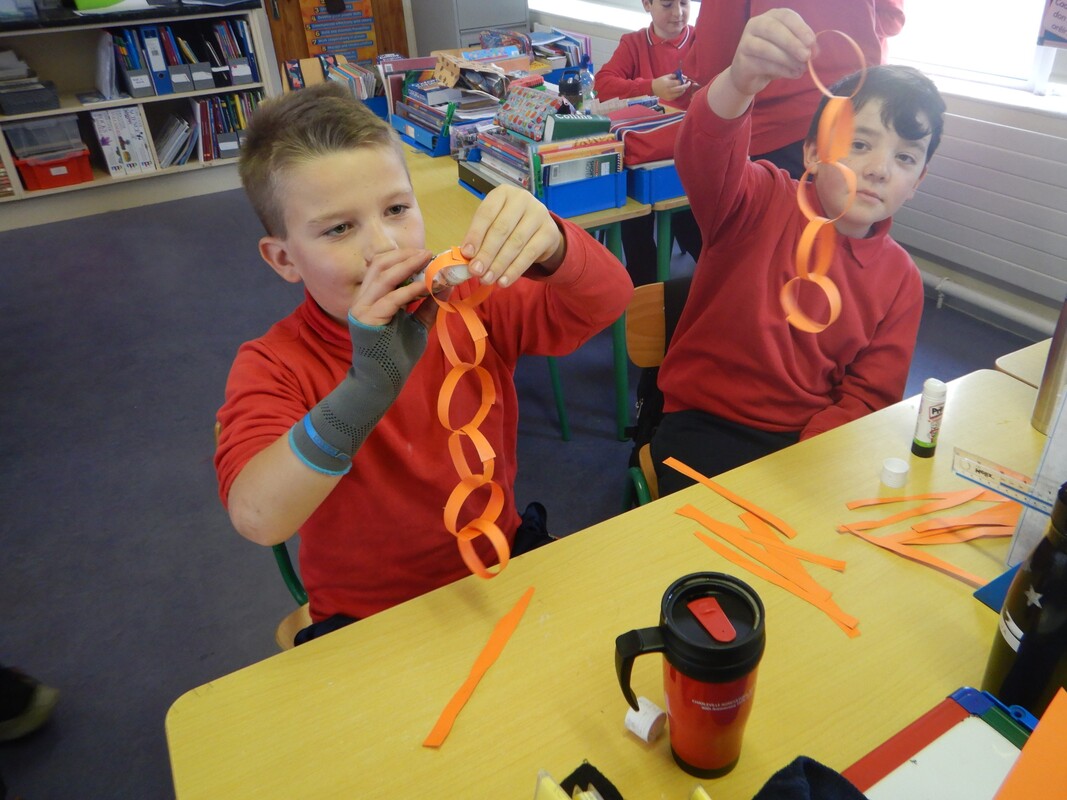
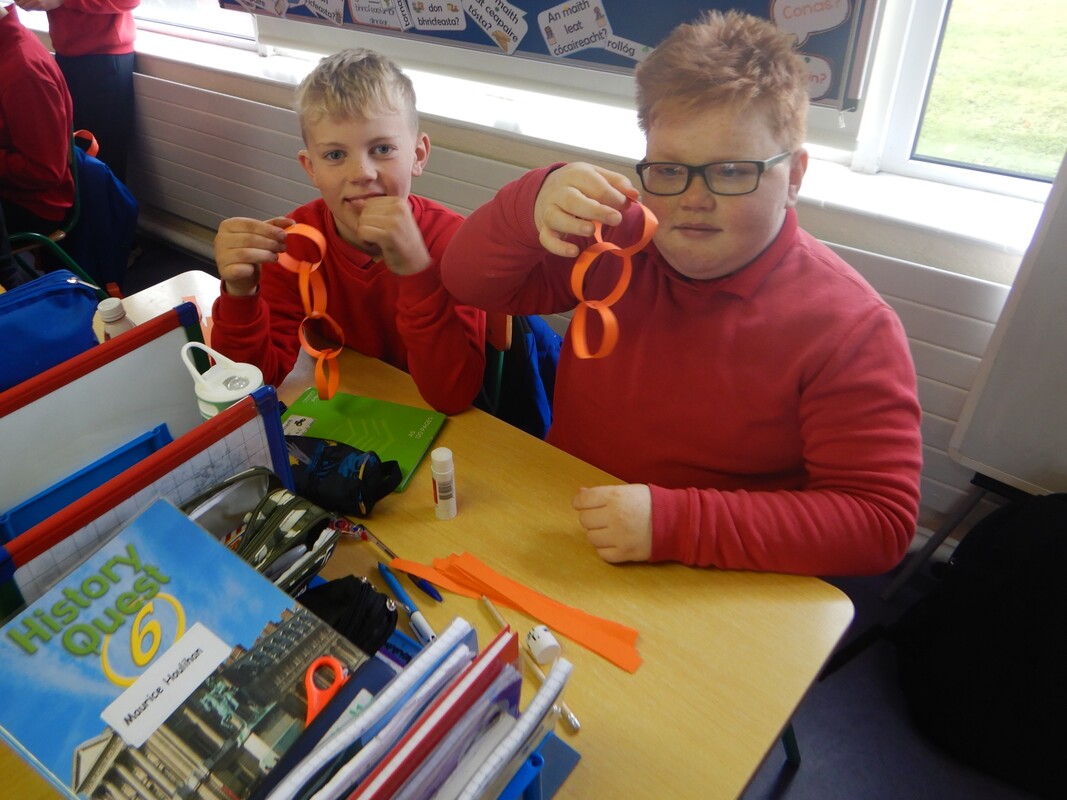
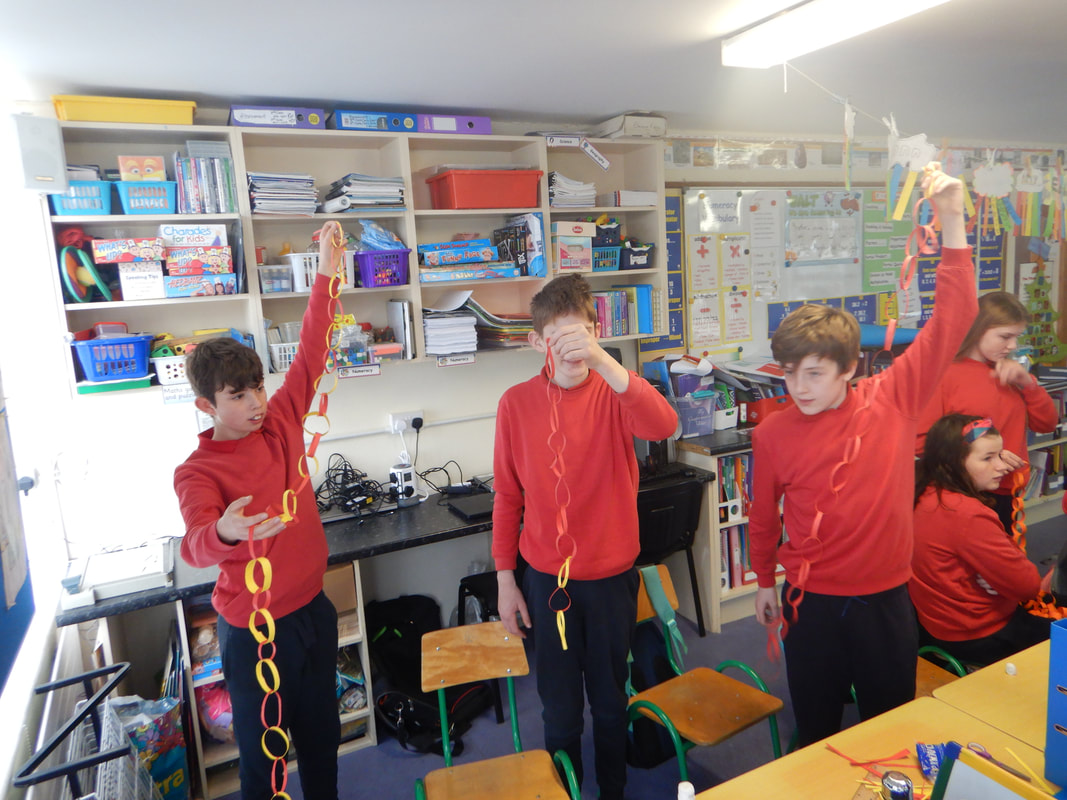
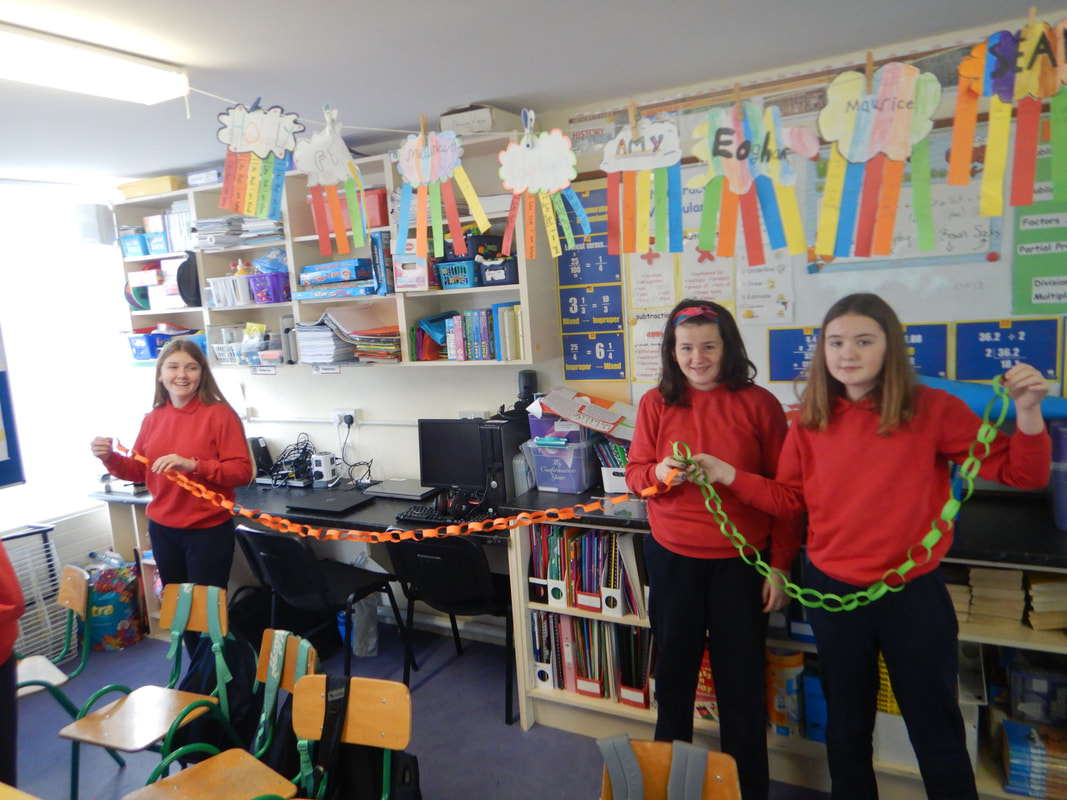
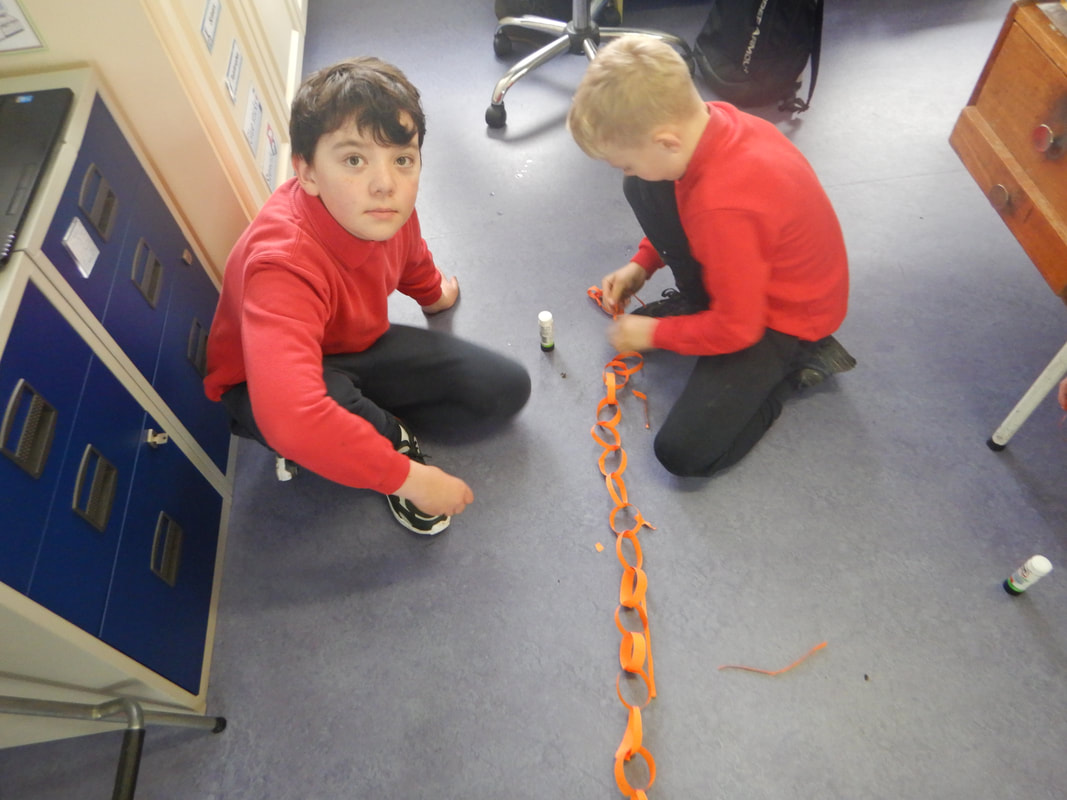
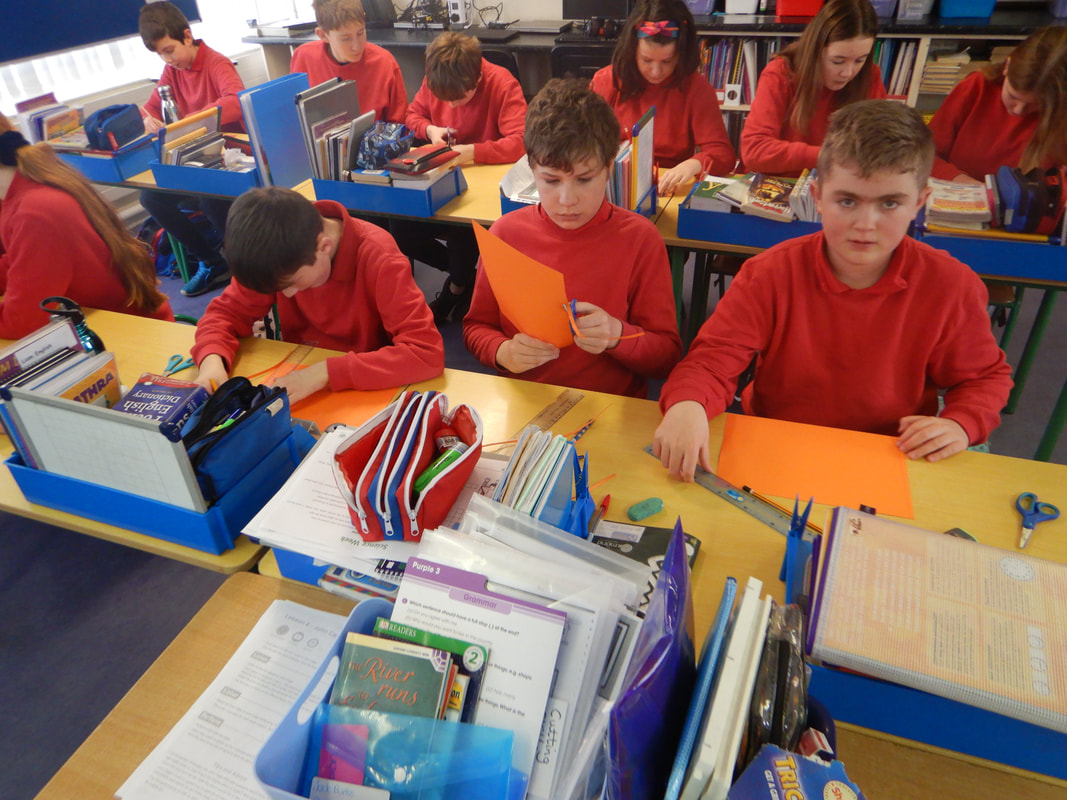
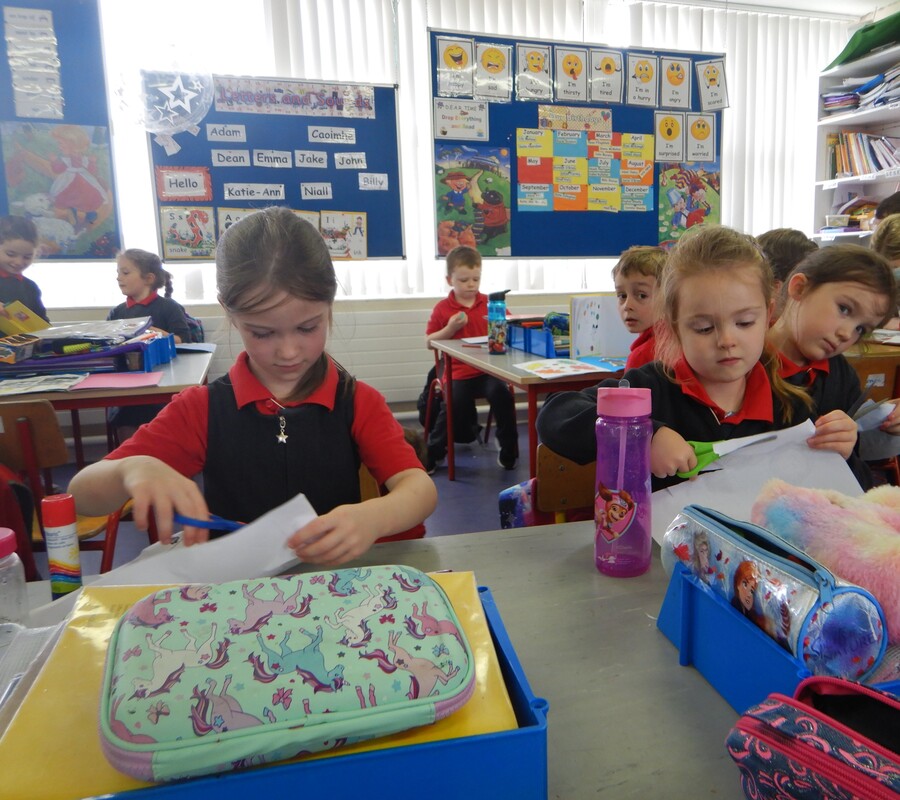
In one investigation exploring how we can reuse everyday materials, the pupils created paper chain decorations from the cut-off paper from our art activity.
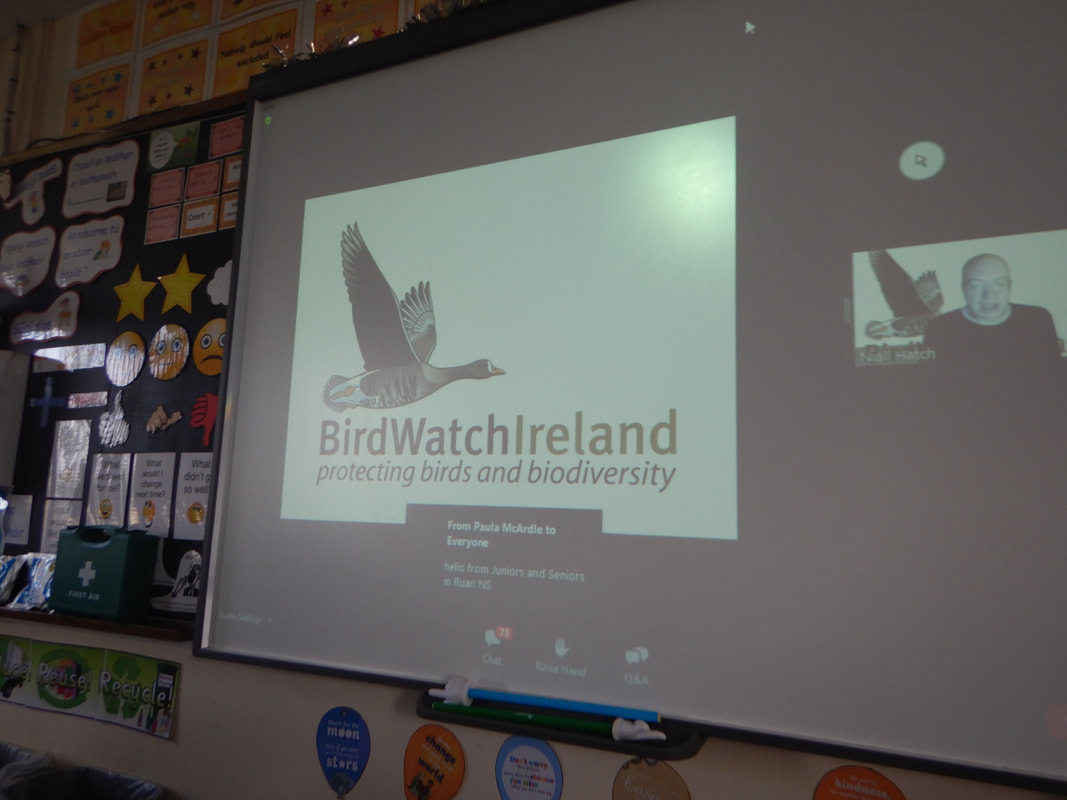
Environmental awareness and care: Bird-watch Ireland Webinar: Birds Around our School
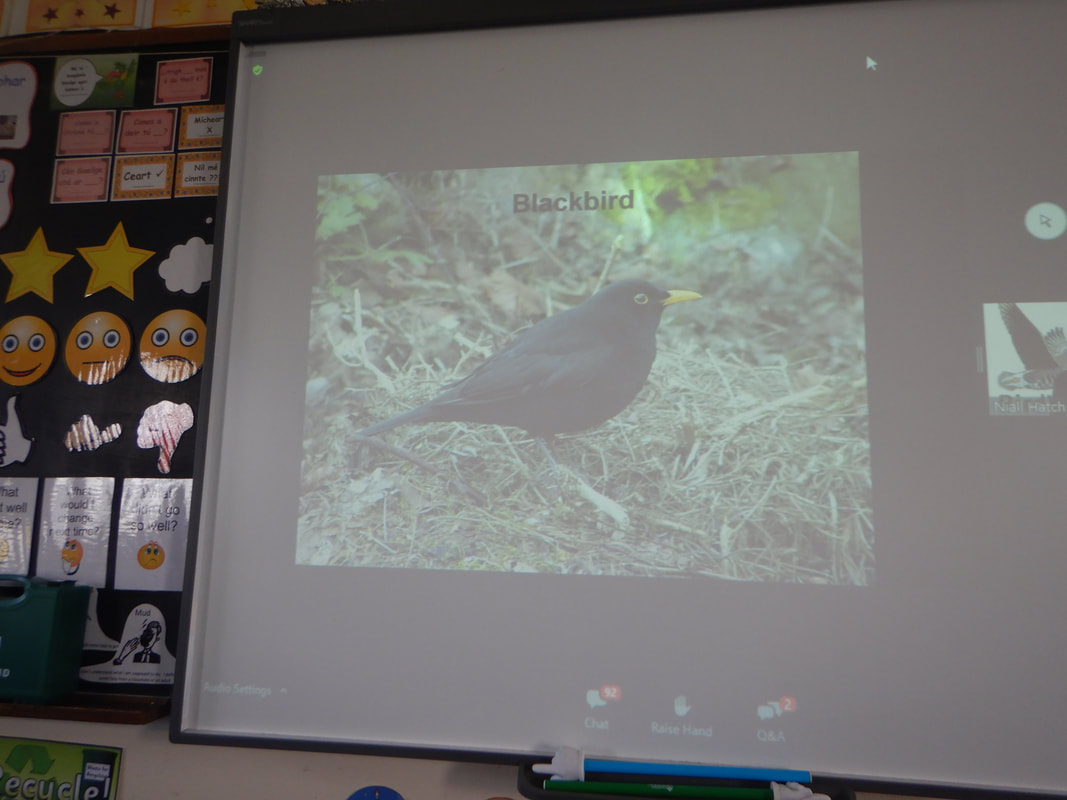
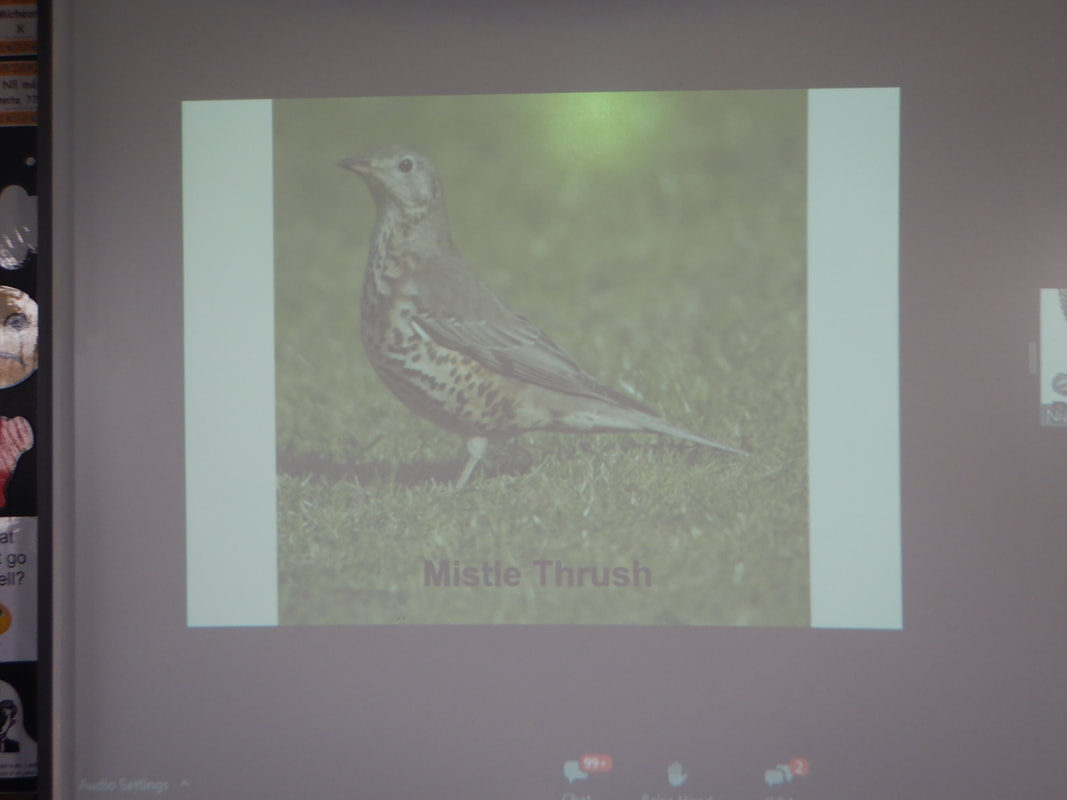
The pupils watched a webinar from Bird-watch Ireland about the birds we see in our gardens and schools. Niall Hatch was the presenter and he told us some amazing facts and information on birds. Some of the facts we learned are:
The pupils watched a webinar from Bird-watch Ireland about the birds we see in our gardens and schools. Niall Hatch was the presenter and he told us some amazing facts and information on birds. Some of the facts we learned are:
- Birds don’t live in nests, they only lay and hatch their eggs in them.
- The world is more colourful for birds.
- Birds and humans hear at the same frequency.
- Owls are pretty much colour blind.
- Birds and girls can see further either side than boys can!
- Birds look for worms through scanning the ground and listening to the movements of the worms in the earth.
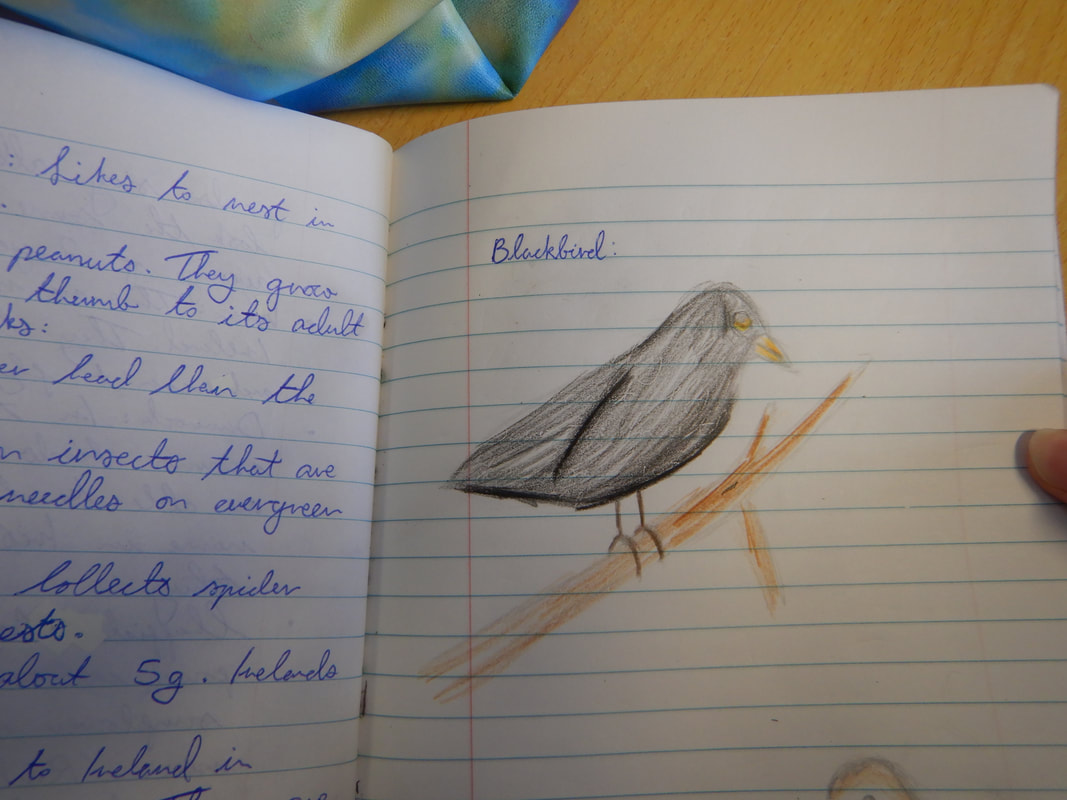
- Blackbirds: The colour of the male is dark / black however the female is more a dark brown.
- Song Thrush: Females don’t sing.
- Mistle Thrush: We learned that birds sing to claim and identify their territory. The Mistle Thrush has the strongest voice.
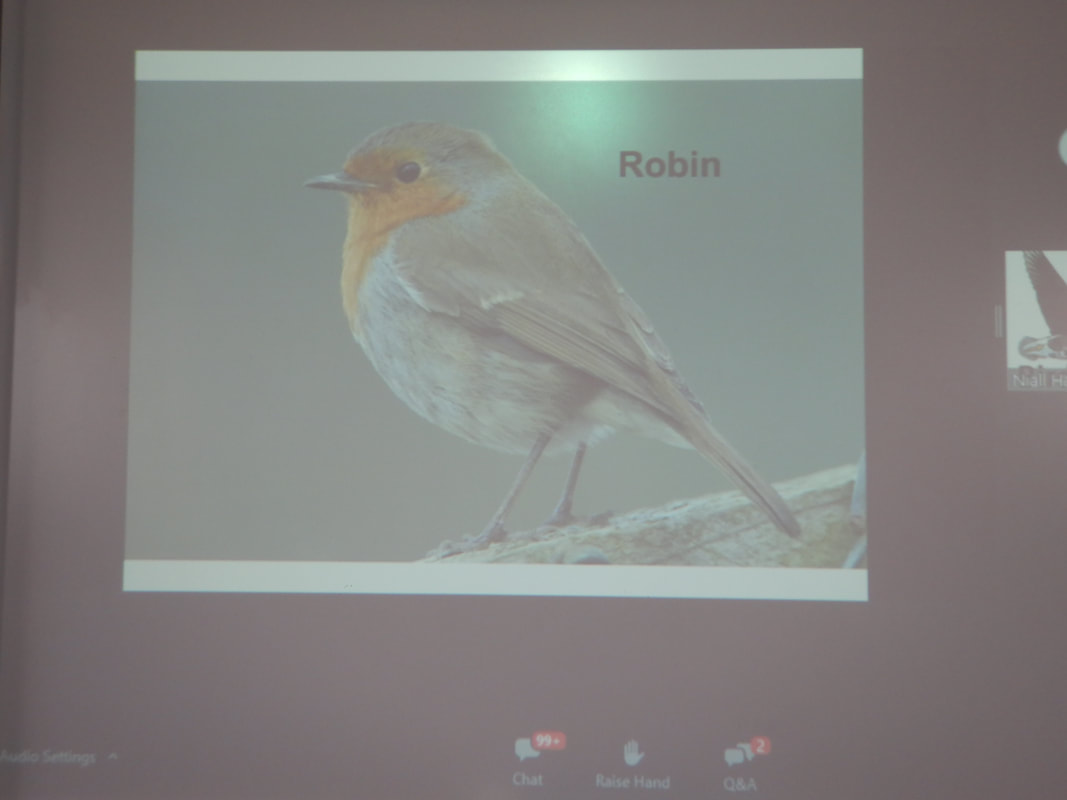
- Robin: The Robin eats food within the closest proximity to humans – they are very brave. Both the male and the female sing all year round. Both look the same.
- Wren: There are more wrens than people in Ireland. They have a really loud song and can’t fly very far.
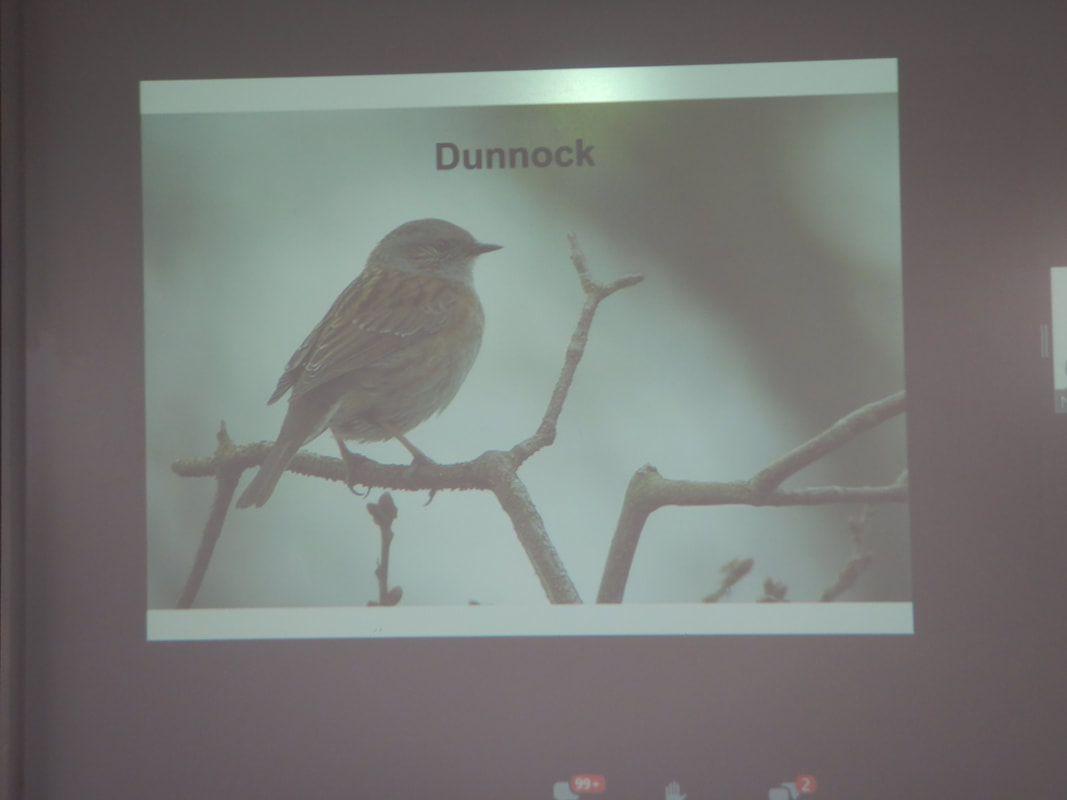
- Dunnock: In the top 10 of the most common birds in our gardens. They are able to hide from predators. Their name in Irish mean ‘brown little thing’.
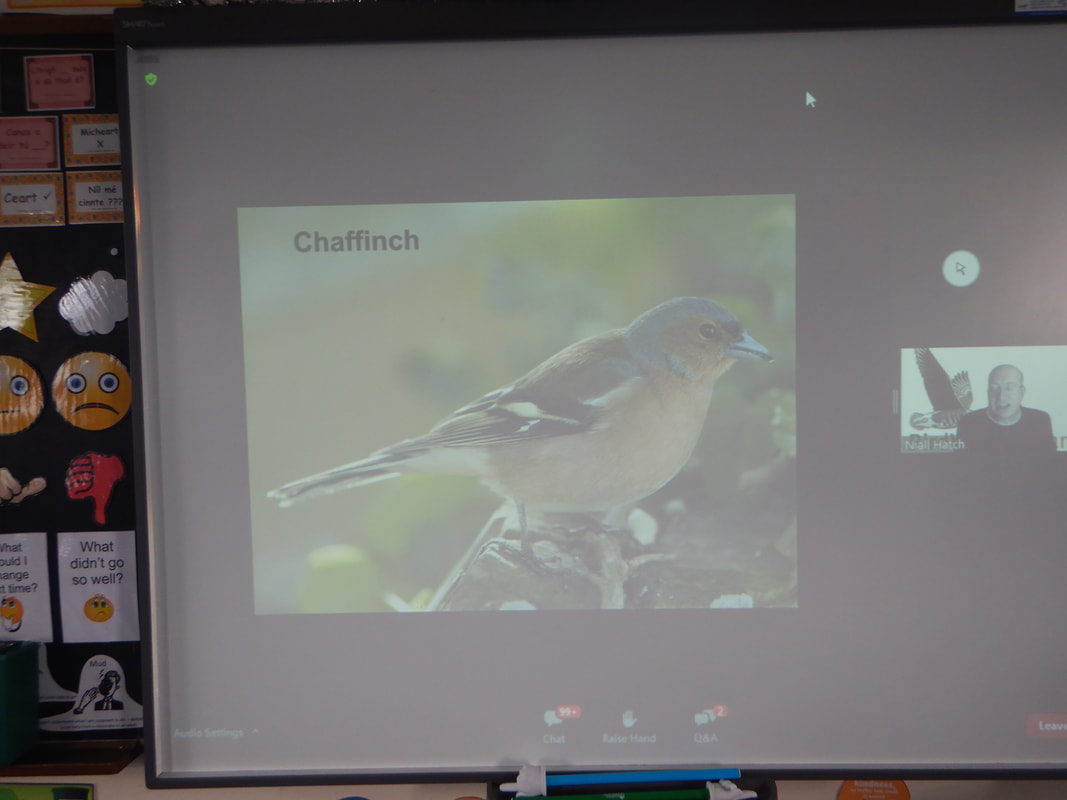
- Chaffinch: Most common bird in our garden. Loves sunflower seeds. Its name in Irish means ‘Red King’ due to the colour of its head. This bird makes a ‘fink’ noise.
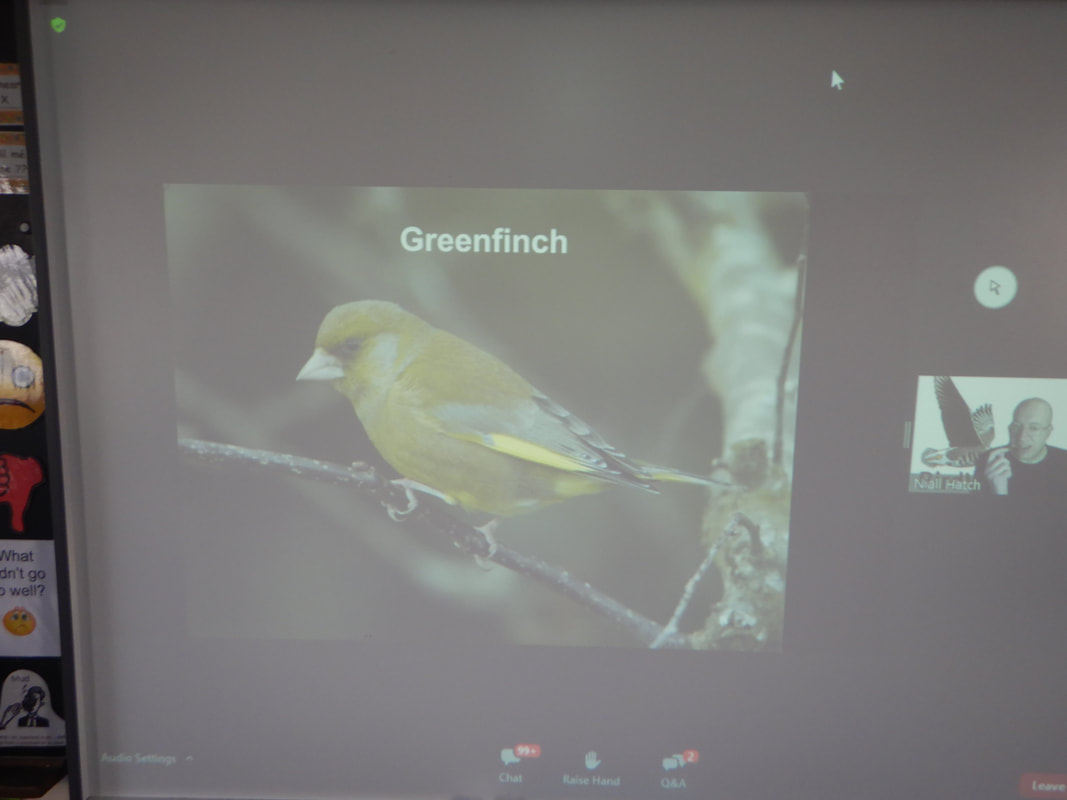
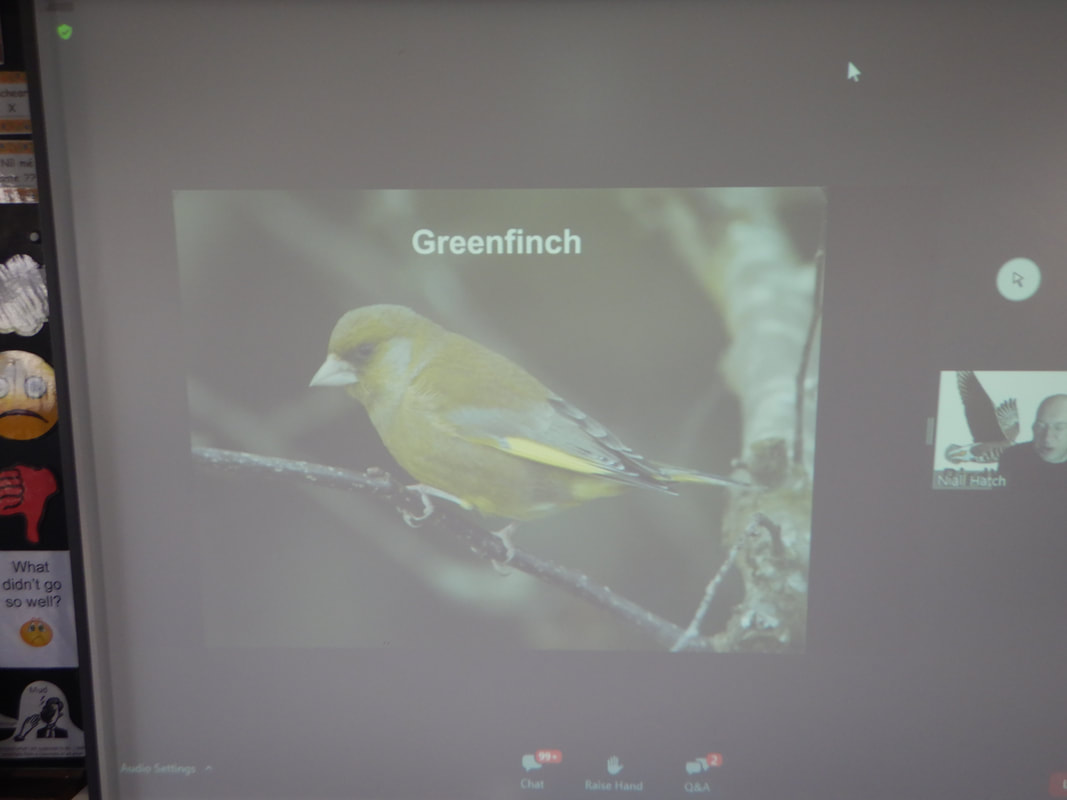
- Greenfinch: This bird has a pale pink beak and crushes seeds. Its number are declining due to disease.
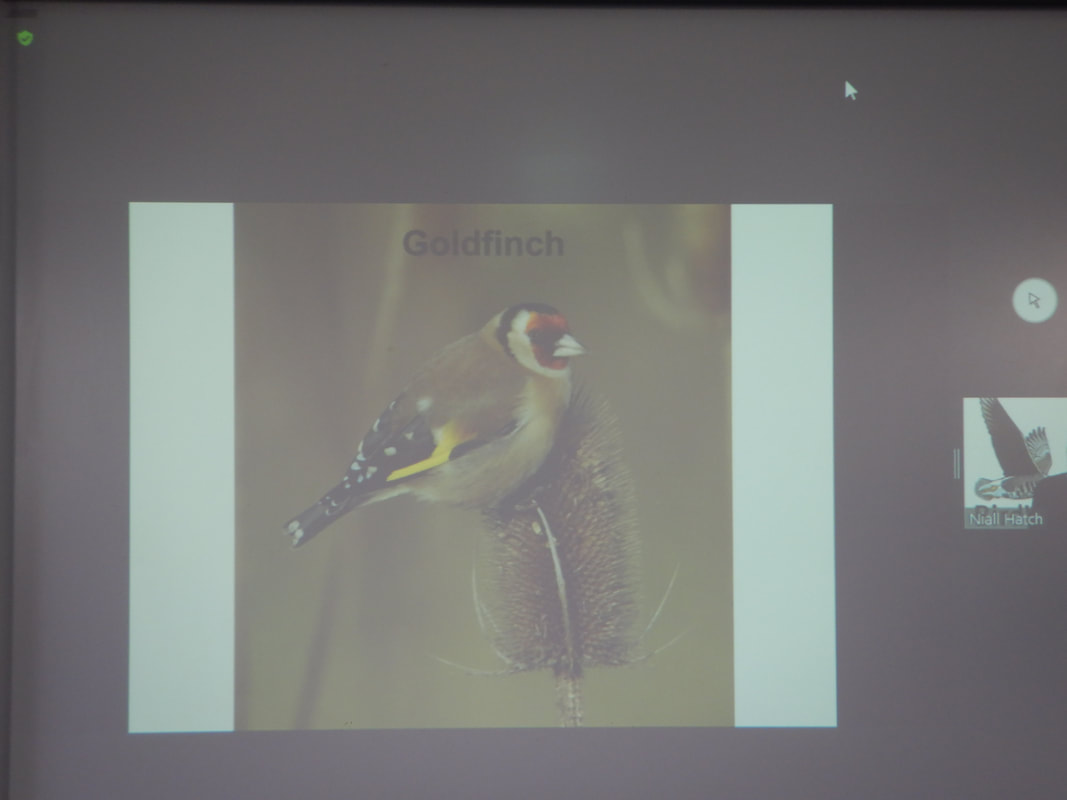
- Goldfinch: Its name means ‘Flame of the Woods’.
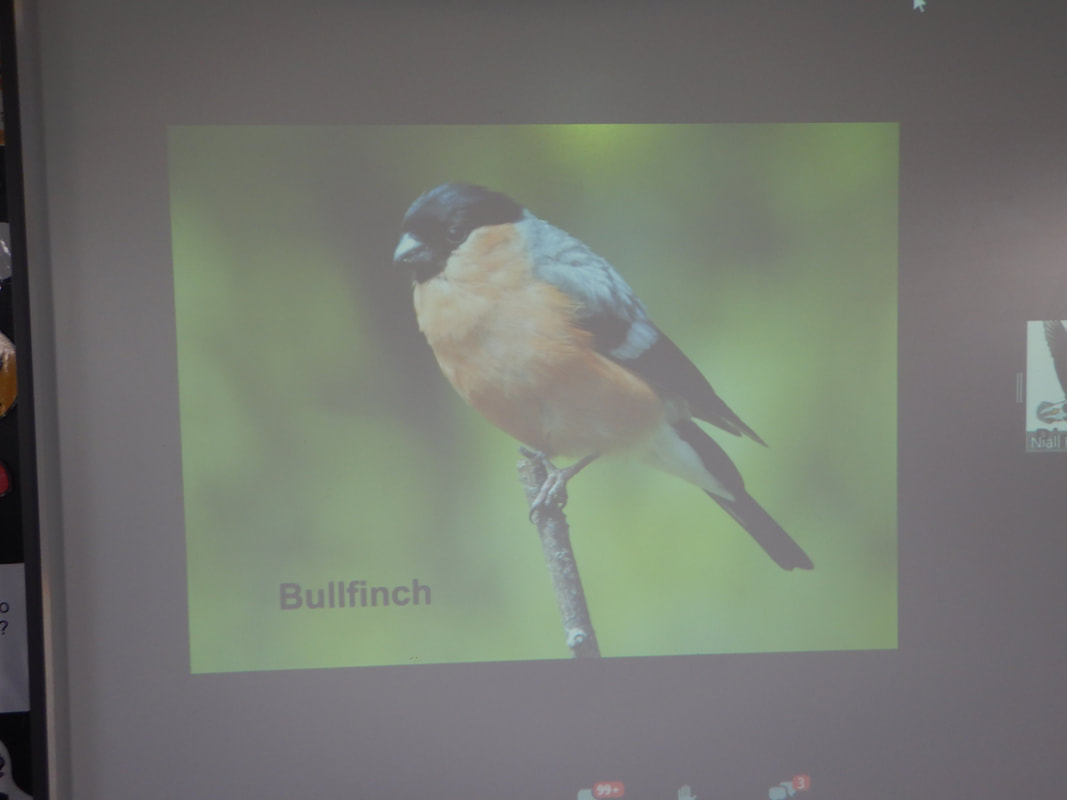
- Bullfinch: Loves seeds of flowers including dandelions and blossoms.
- House Sparrow: Likes to nest in holes in walls.
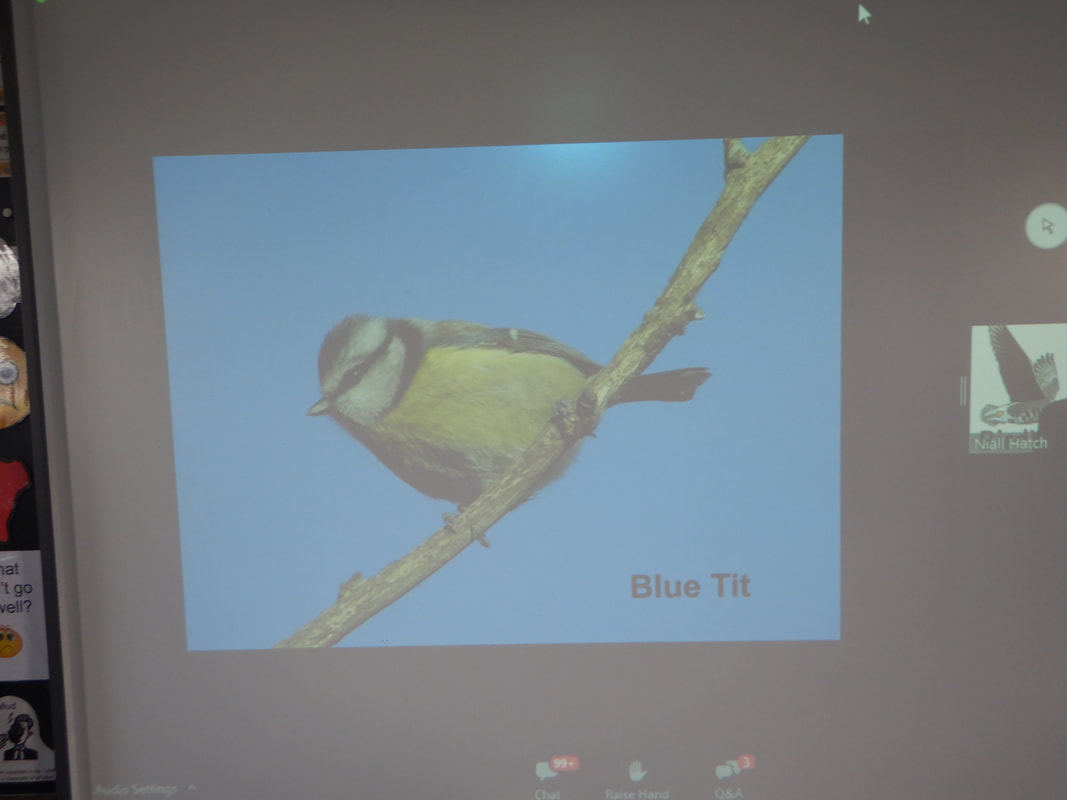
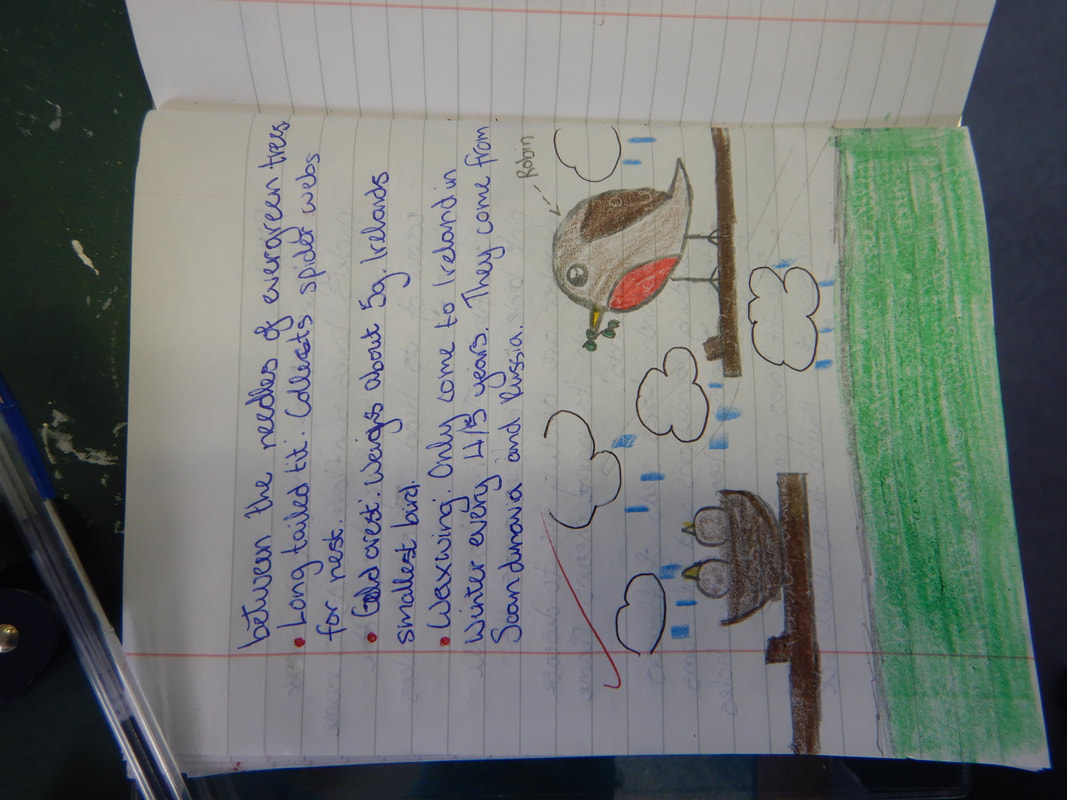
- Blue-tit: Loves peanuts. Grows from the size of a thumb to its adult size in two weeks.
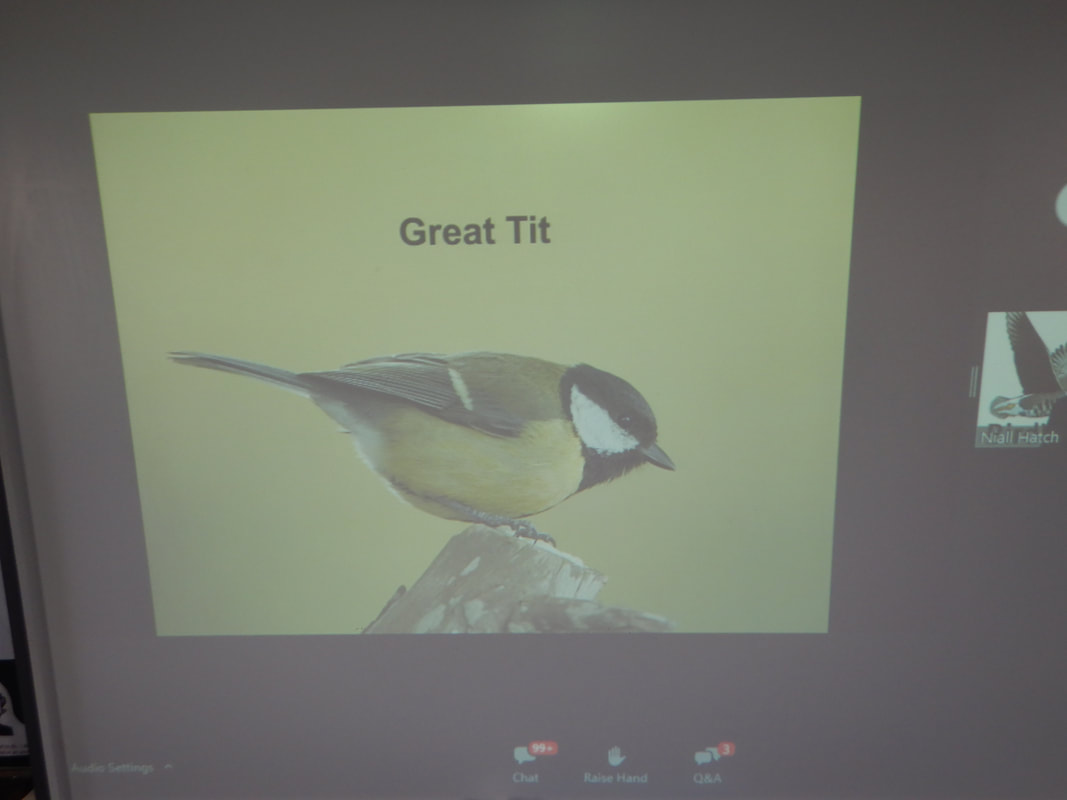
- Great tit: Darker head than the Blue-tit.
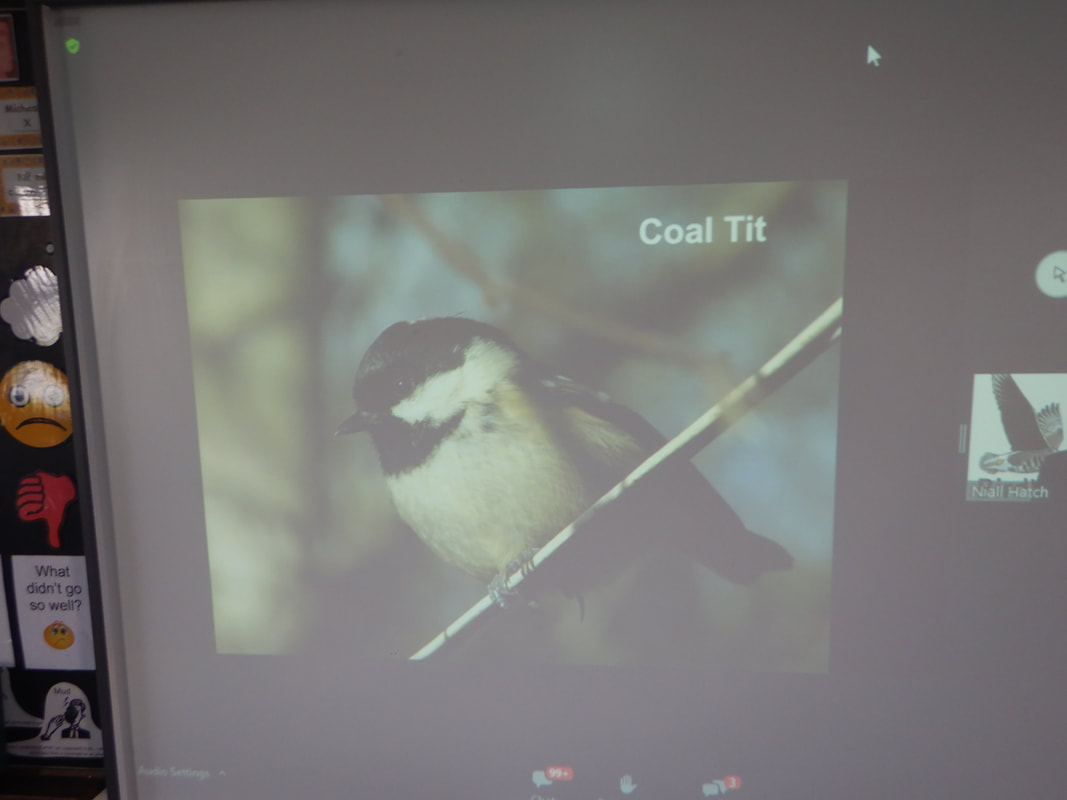
- Coal Tit: Feeds on insects that are in between the needles on evergreen trees.
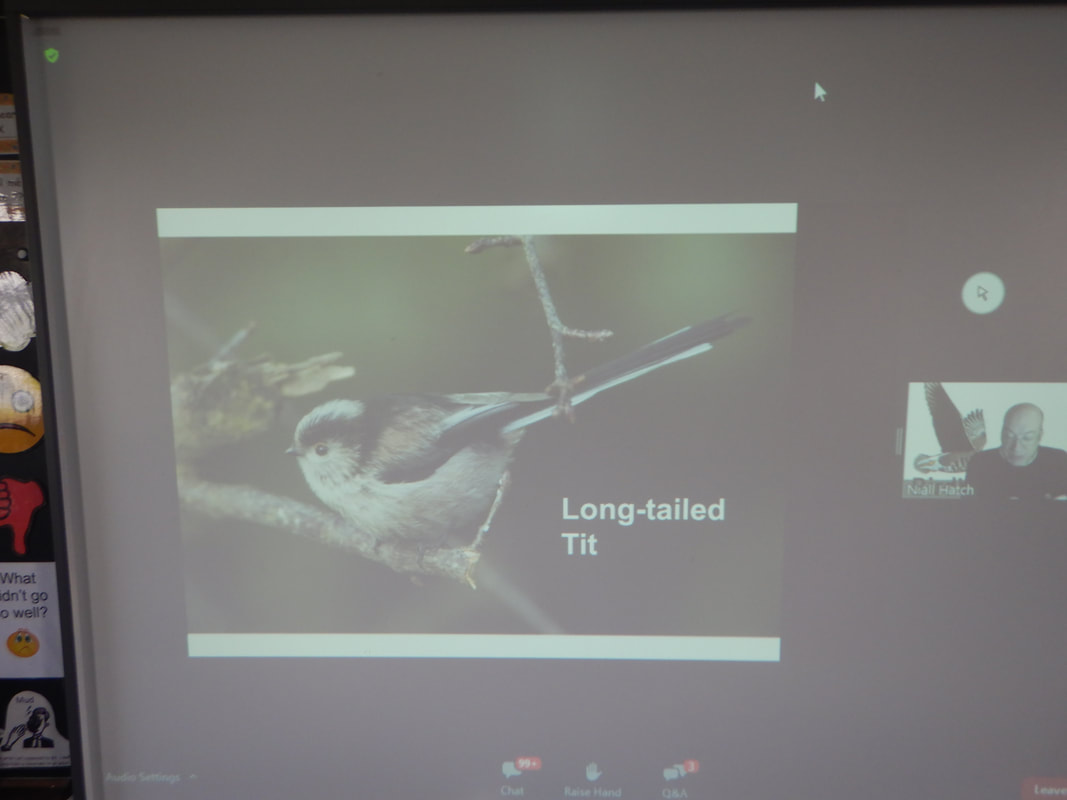
- Long-Tailed Tit: Collects spider web for their nests.
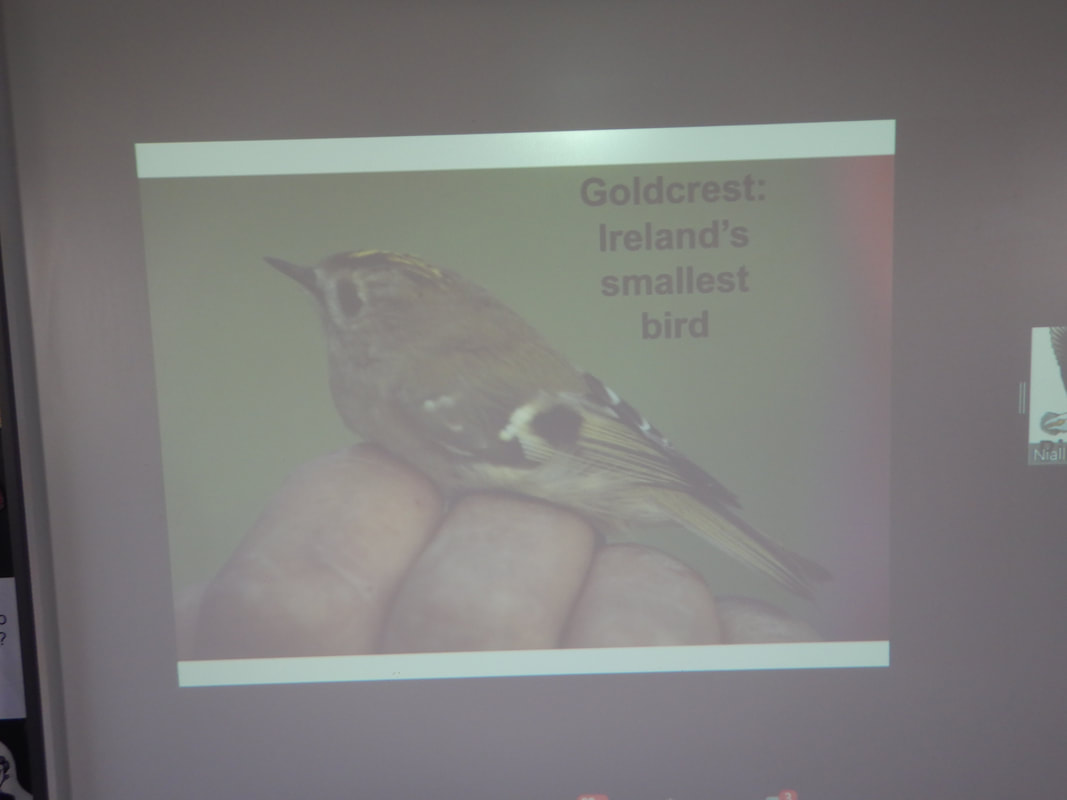
- Goldcrest: Weighs about 5g. Ireland’s smallest bird.
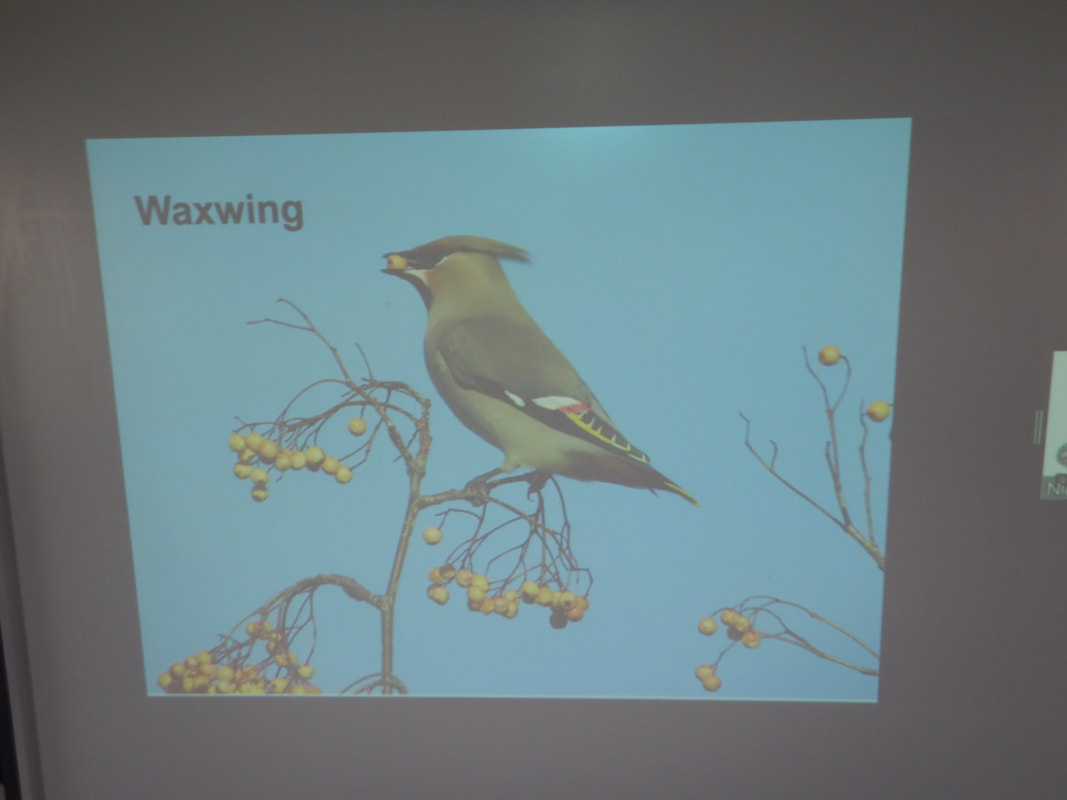
- Waxwing: Only come to Ireland in winter every 4/5 years. They come from Scandinavia and Russia.


2. Participation in Space Week 2021
Junior and Senior Infants
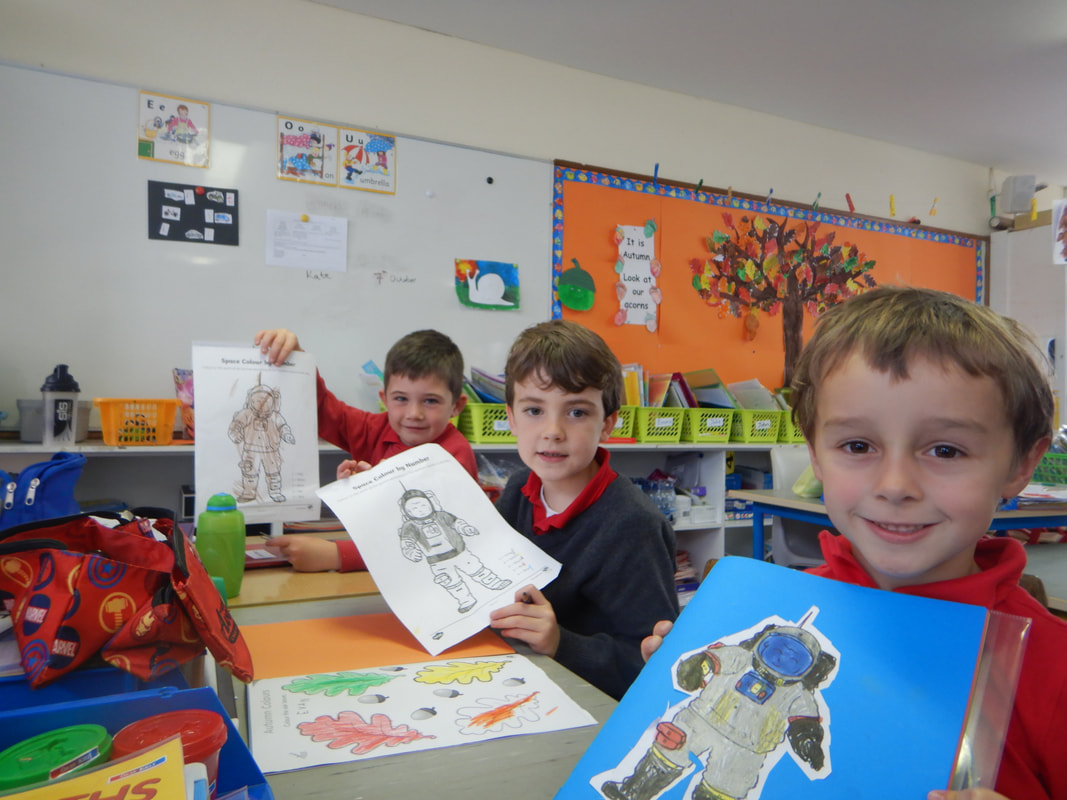
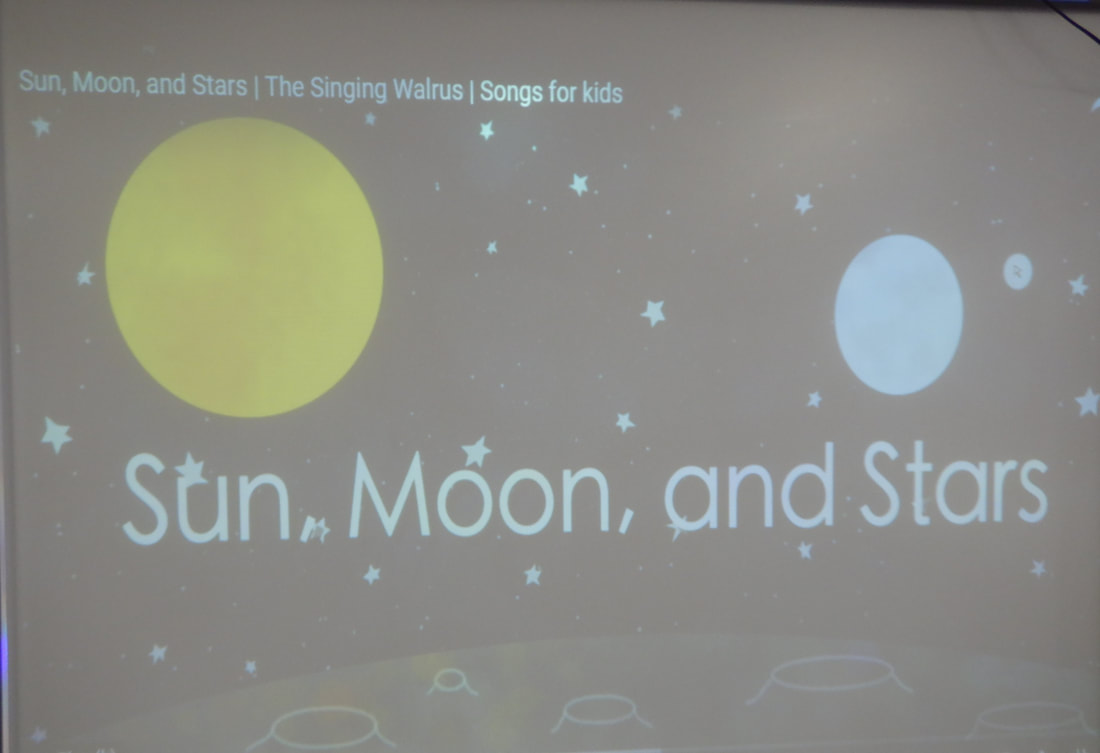
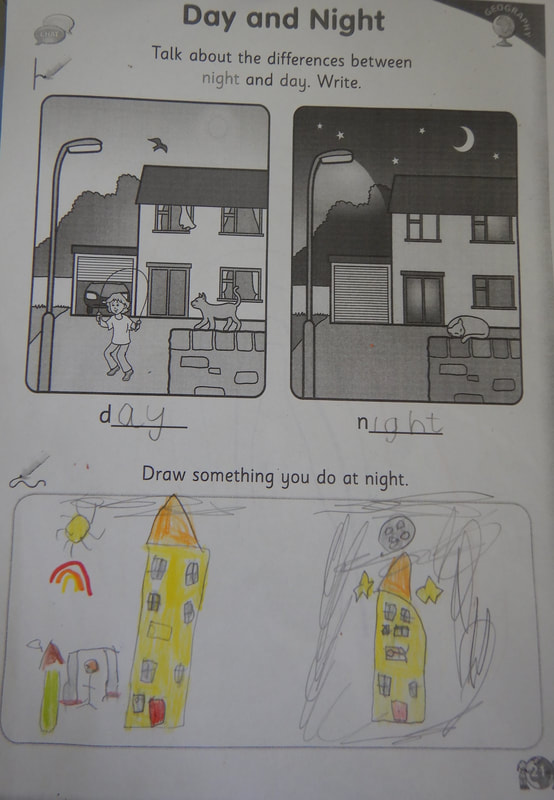
During Space Week we learned about the Sun Moon and Stars and about how they give us day and night.
Up in space during the day we see the Sun. It’s hot and bright. It gives us day. At night it’s dark because the Sun is gone. Instead at night we see the Moon and Stars. The Stars are big and small. They’re far and near. The Sun is also a Star. At night we see the Moon. The Moon is in different shapes.
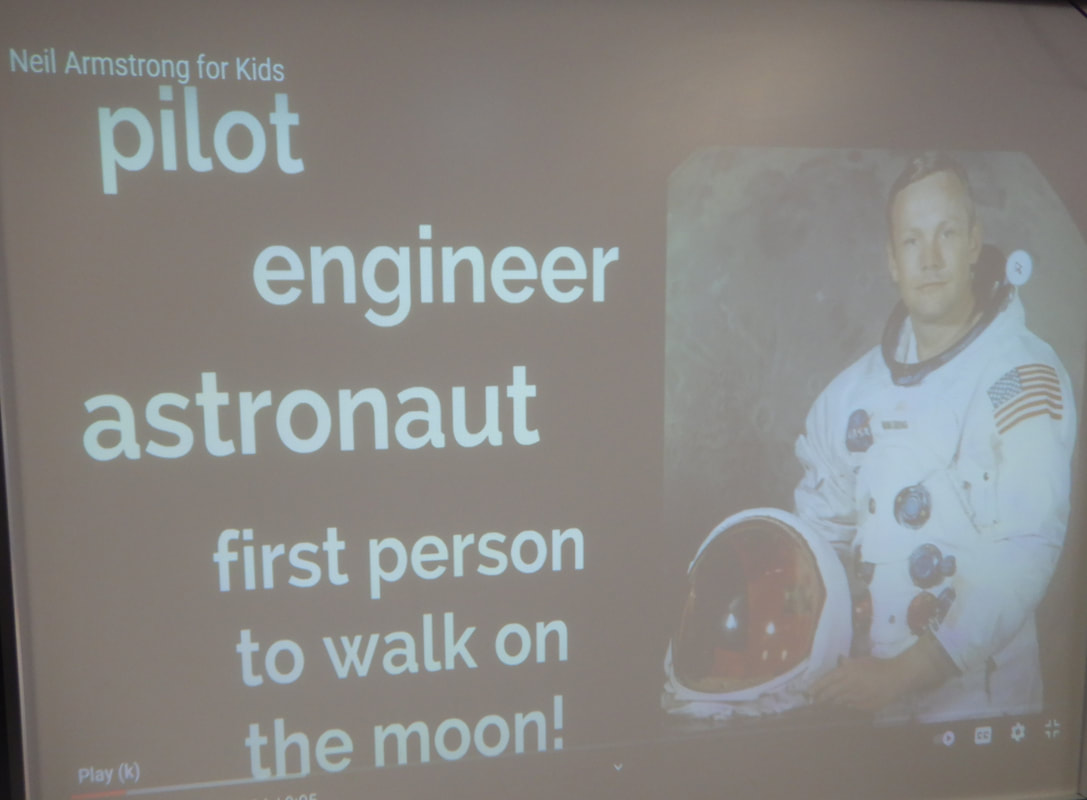
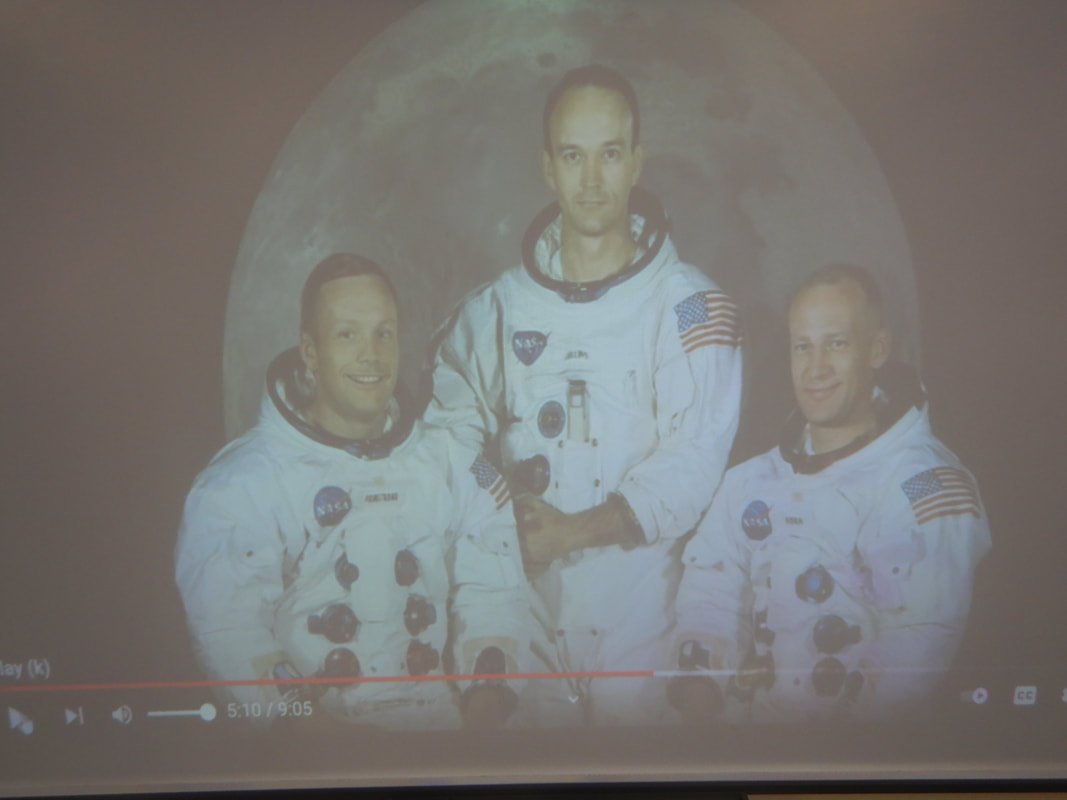
We also learned about Neil Armstrong. He was an American was the first person to walk on the Moon. He was a pilot, an engineer and an astronaut. He and two other men launched from Earth in 1969. It was one of the greatest moments in history. Humans had made it to the Moon. When Neil Armstrong was on the Moon he was as light as a feather. He left the American flag on the Moon.
Junior and Senior Infants
During Space Week we learned about the Sun Moon and Stars and about how they give us day and night.
Up in space during the day we see the Sun. It’s hot and bright. It gives us day. At night it’s dark because the Sun is gone. Instead at night we see the Moon and Stars. The Stars are big and small. They’re far and near. The Sun is also a Star. At night we see the Moon. The Moon is in different shapes.
We also learned about Neil Armstrong. He was an American was the first person to walk on the Moon. He was a pilot, an engineer and an astronaut. He and two other men launched from Earth in 1969. It was one of the greatest moments in history. Humans had made it to the Moon. When Neil Armstrong was on the Moon he was as light as a feather. He left the American flag on the Moon.

|
1st, 2nd, 3rd and 4th Class
|
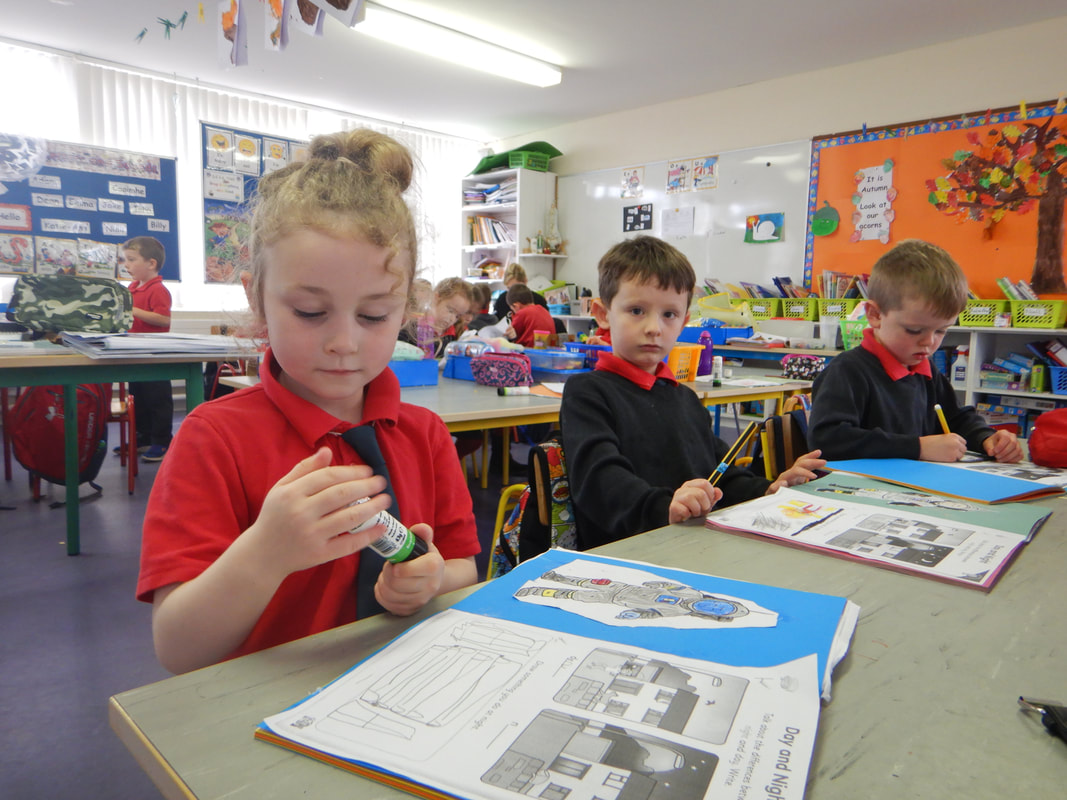
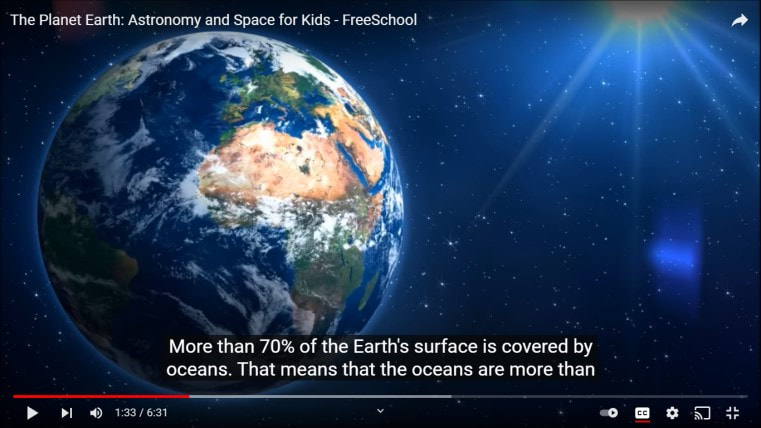
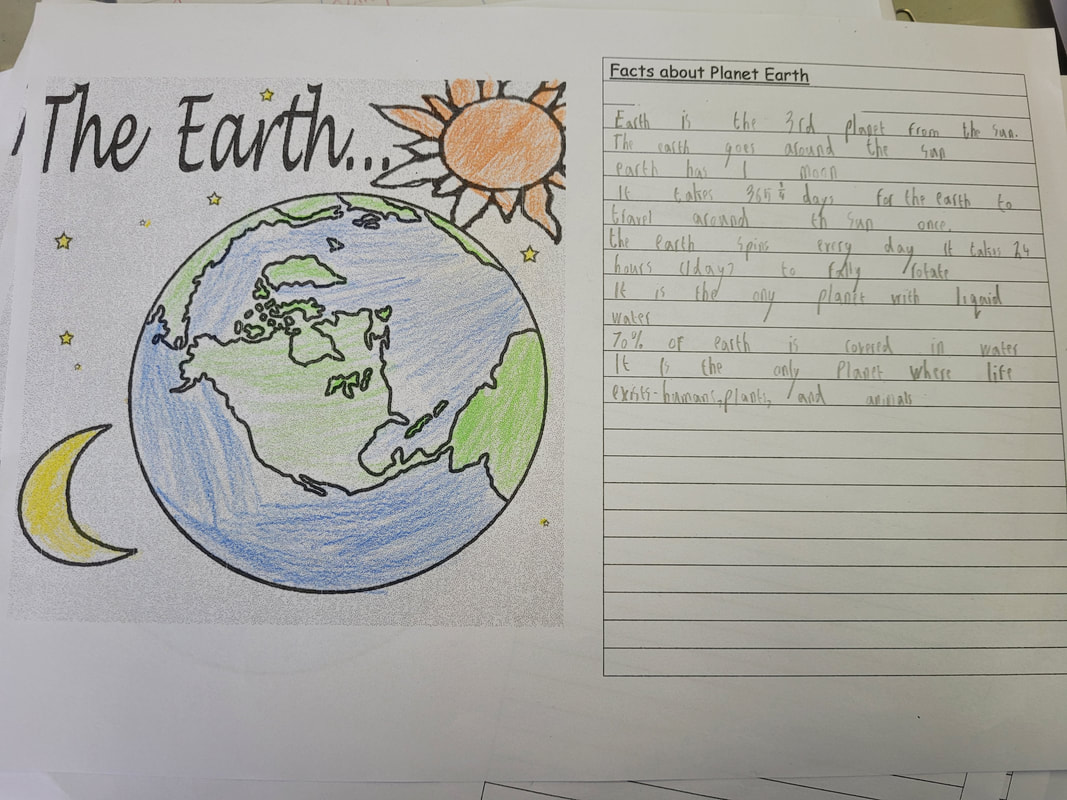
We watched a video about our Planet Earth and learned many interesting facts.
We discussed the important facts from the video and recorded them on worksheets. We learned that the Earth rotates around the sun and that it takes a whole year for the Earth to completely orbit the Sun. We also learned about the Sun and recognised the sun as a source of heat and light. We learned about the position of the sun when rising and setting and the changing lengths of day and night during the seasons. We discussed how it is Autumn in Ireland and Spring in Australia. |
5th and 6th Class
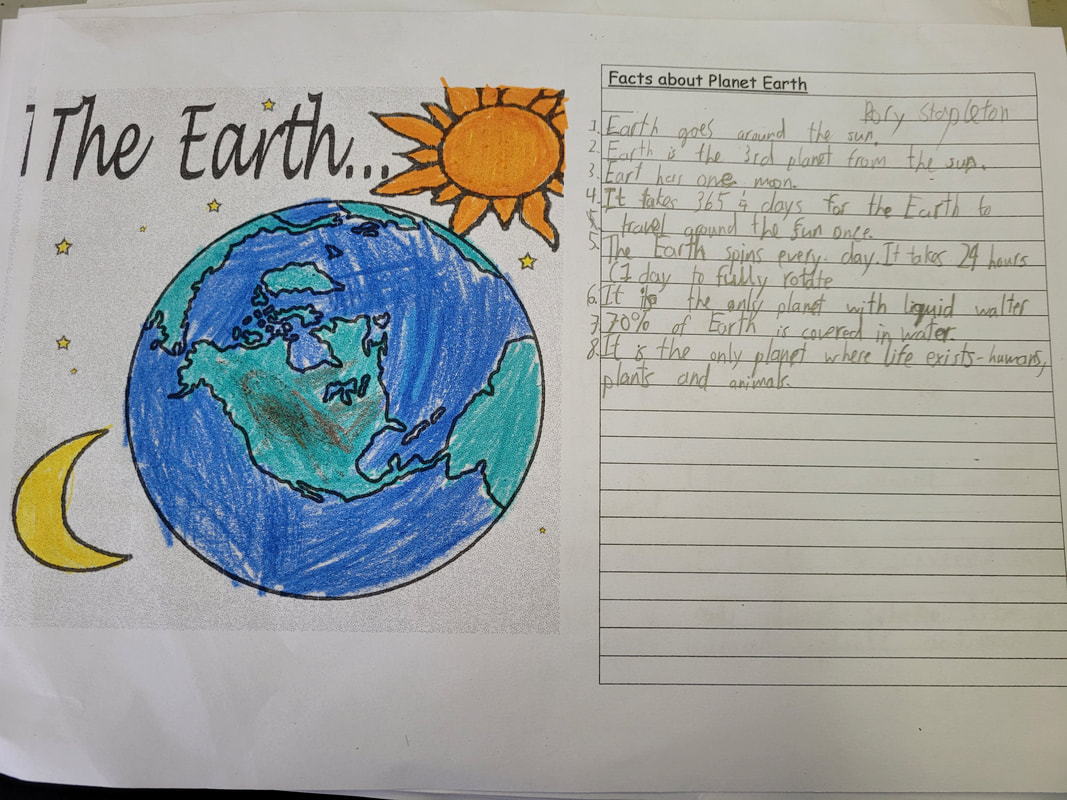
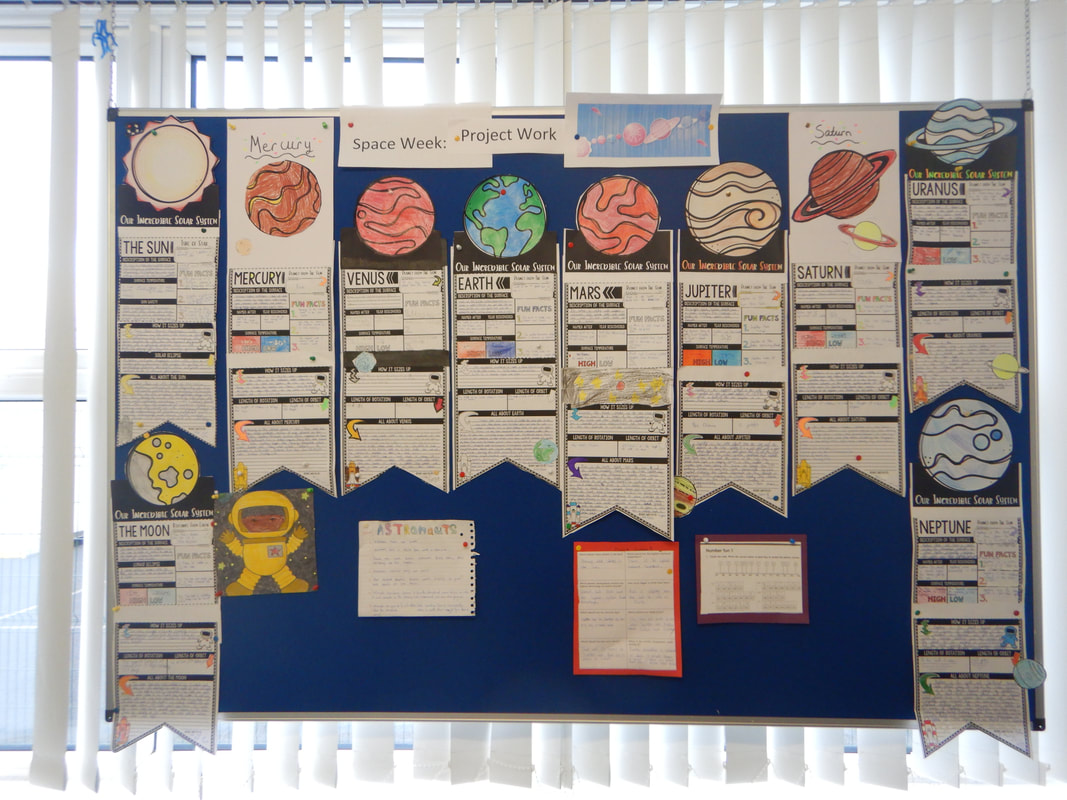
The pupils learned about the solar system, constellations, the universe and facts about the planets during Space Week. They created fact files, in groups, on each of the planets, as well as the moon and the sun.
The pupils learned about the solar system, constellations, the universe and facts about the planets during Space Week. They created fact files, in groups, on each of the planets, as well as the moon and the sun.
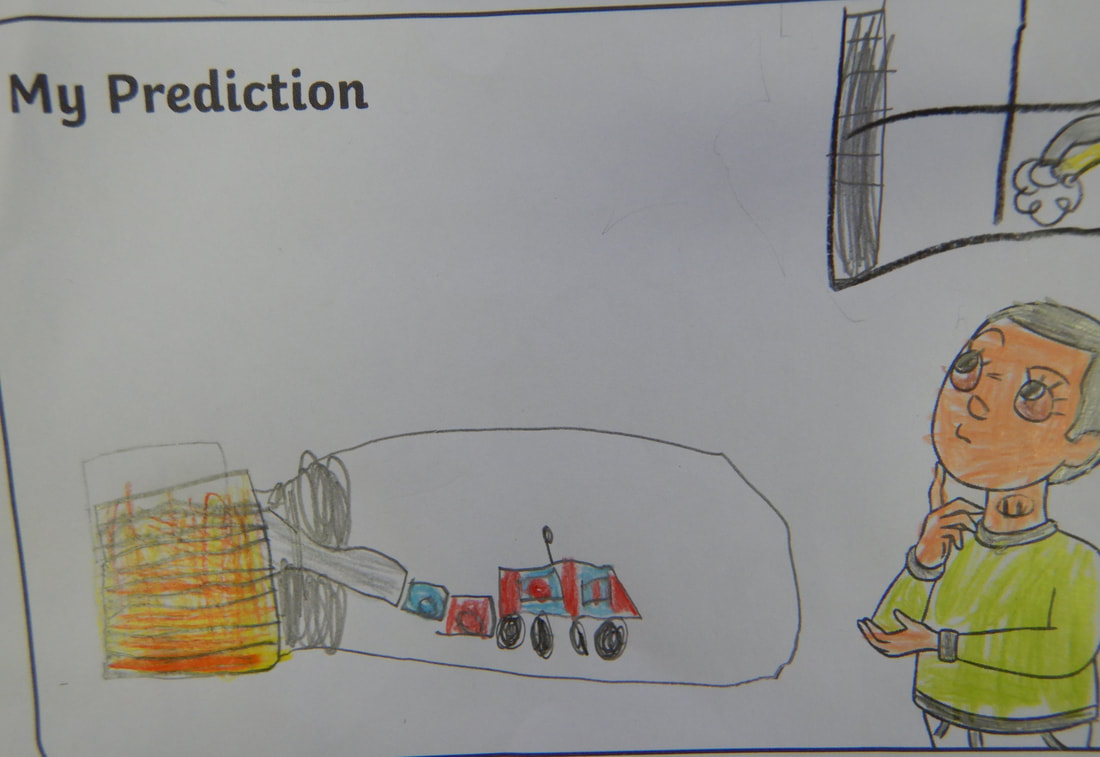
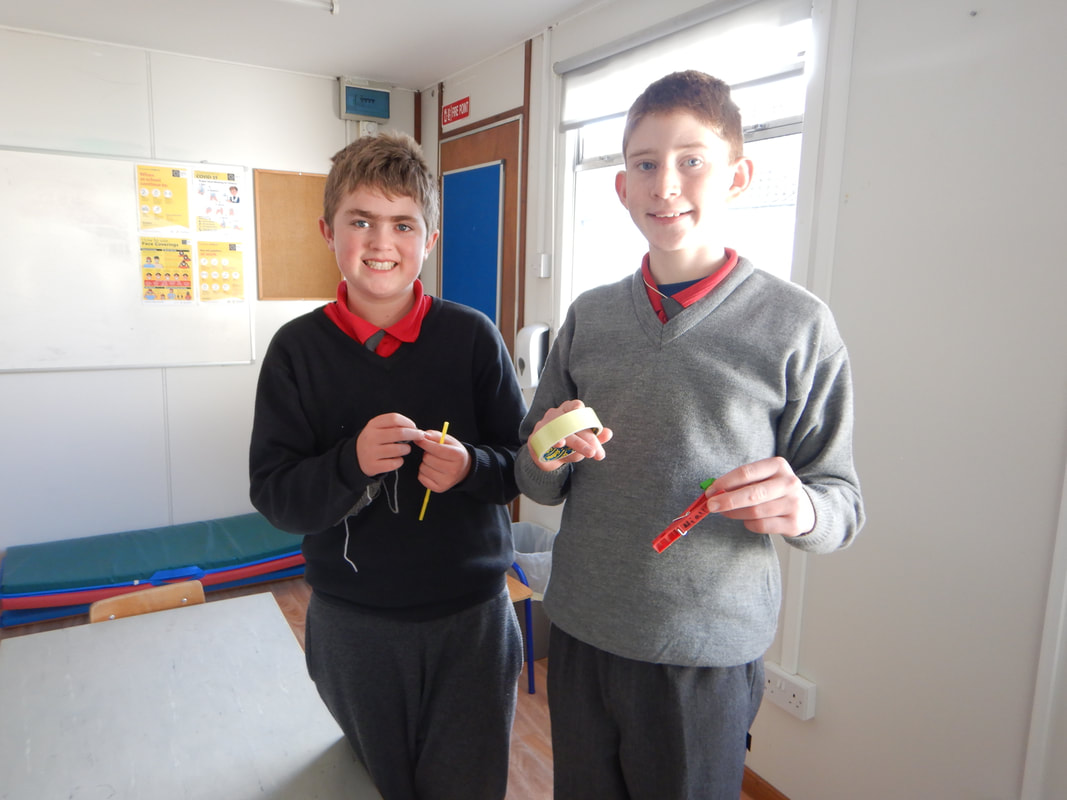
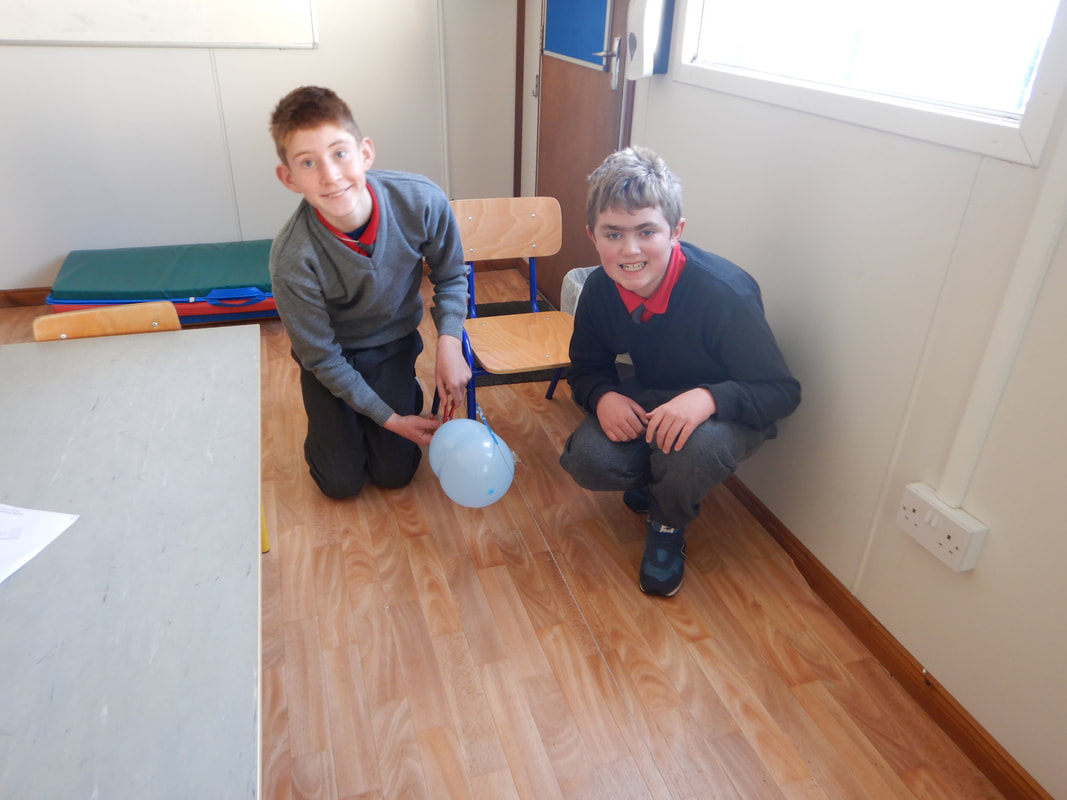
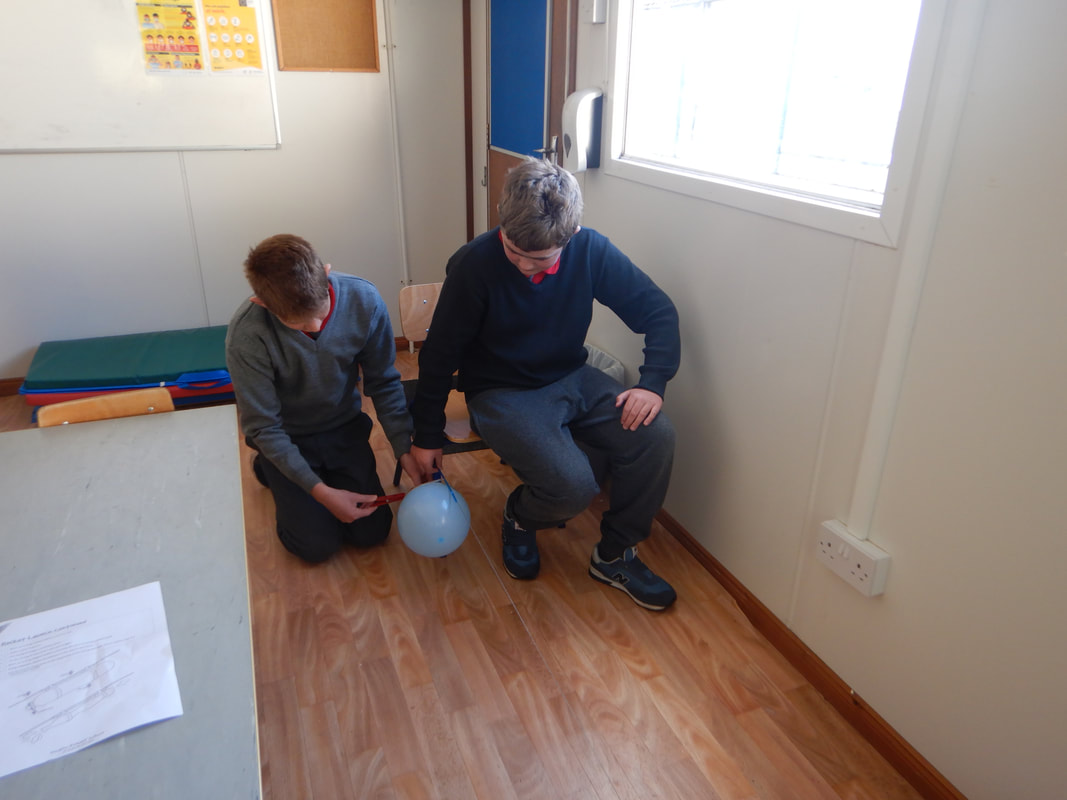
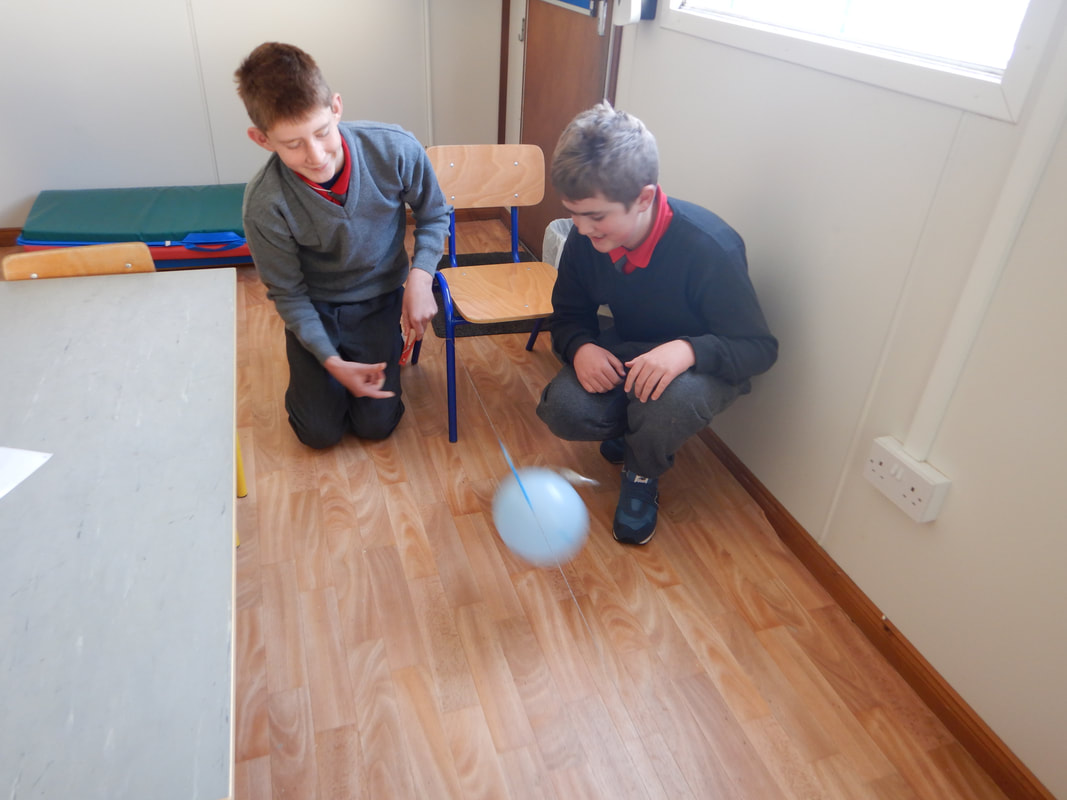
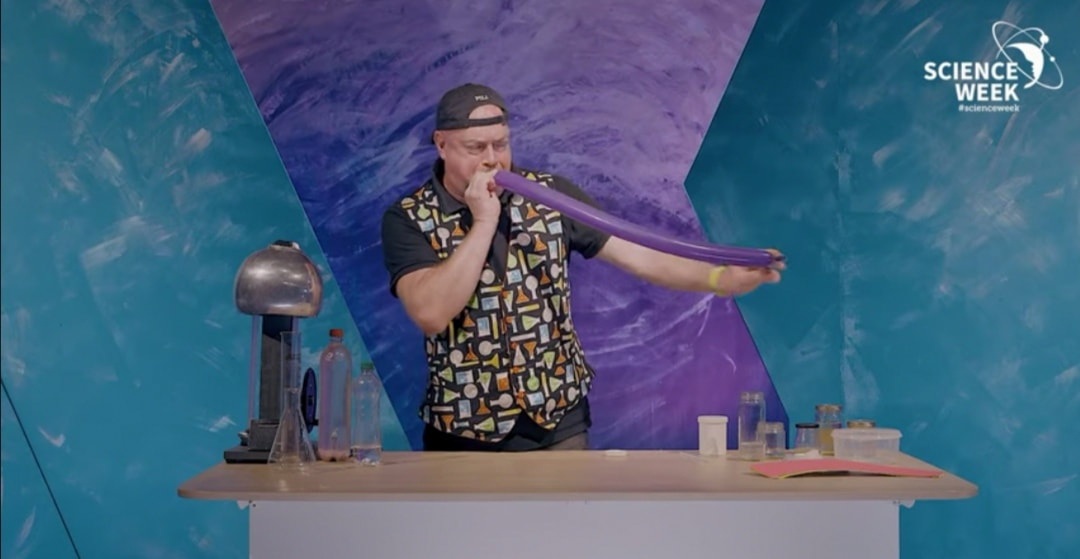
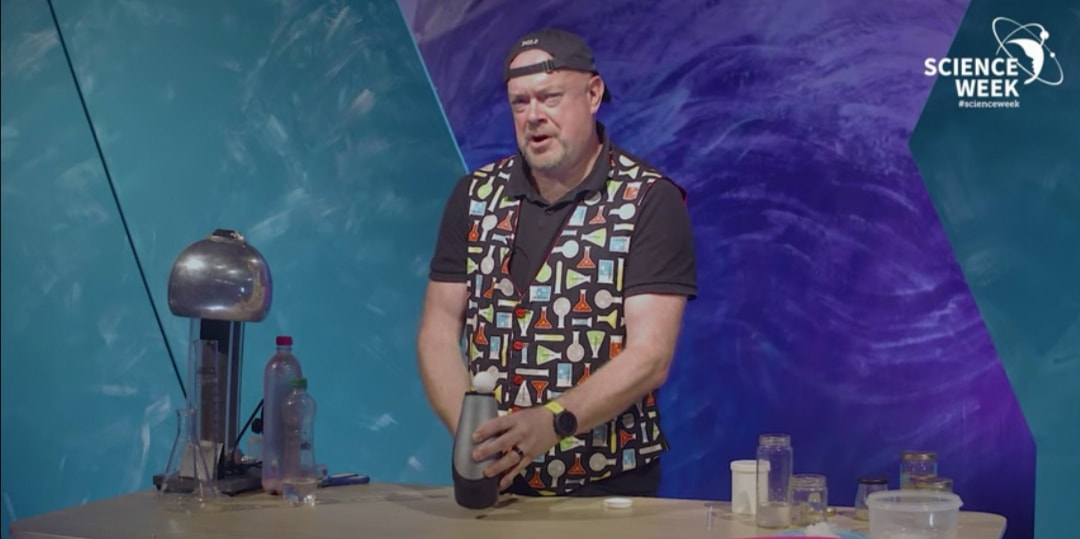
Rocket Experiment:
The pupils used the skills of investigating and experimenting to explore how rockets work. The made rockets using balloons and string. The pupils learned that when they let go of the balloon along the length of string, the air coming out of the back of the balloon pushed the balloon forward - similar to how hot burning gases rushing out of the back of a rocket pushes them forwards.
The pupils used the skills of investigating and experimenting to explore how rockets work. The made rockets using balloons and string. The pupils learned that when they let go of the balloon along the length of string, the air coming out of the back of the balloon pushed the balloon forward - similar to how hot burning gases rushing out of the back of a rocket pushes them forwards.
For Art, the pupils drew the solar system, noting the order in which the planets are from the sun, and the distance of the planets from the sun, and from each other, as well as which planets have rings around them. The pupils learned the mnemonic My Very Educated Mother Just Served Us Noodles to remember the order of the planets.
3. Participation in Science Week 2021
Junior and Senior Infants
During science week we visited Fota Island on you tube and learnt about the giraffe. They learned the following facts:
The giraffe is very tall.
The giraffe has a very long neck.
It has only seven bones in its neck the same as us.
It is so tall that it can see its predators far away.
It has very long legs. The giraffe can run very fast.
It drinks water every few days.
The giraffe has lovely spots on its body.
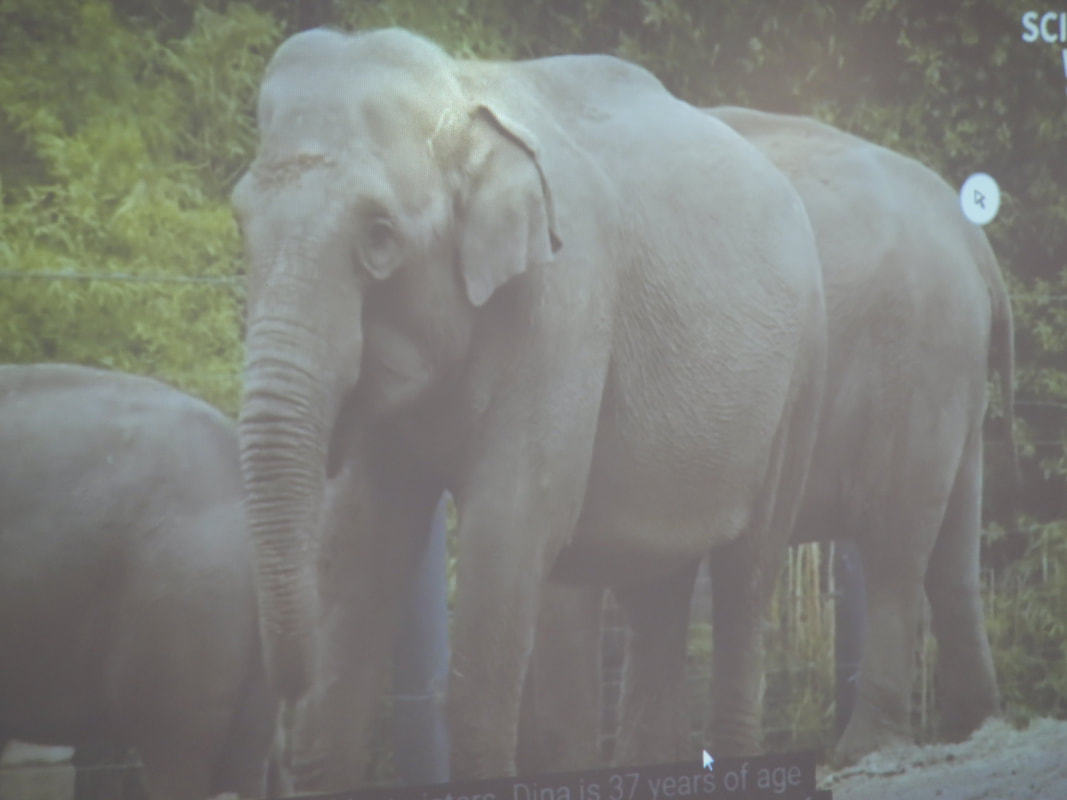
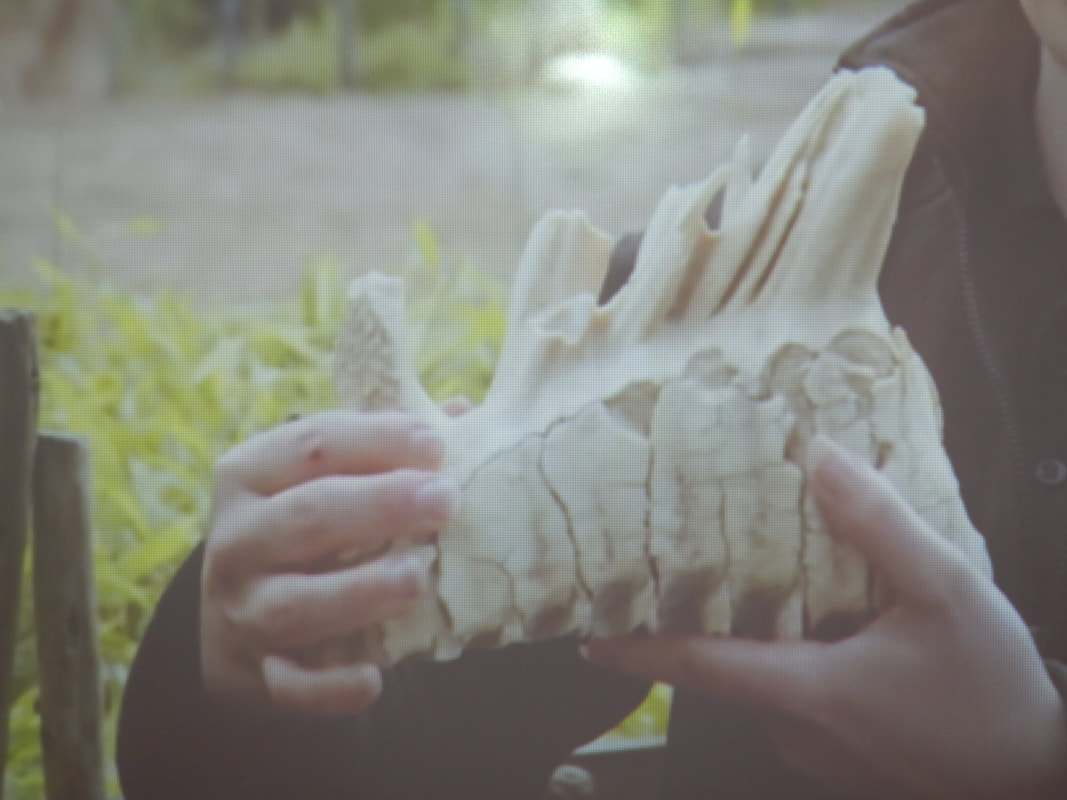
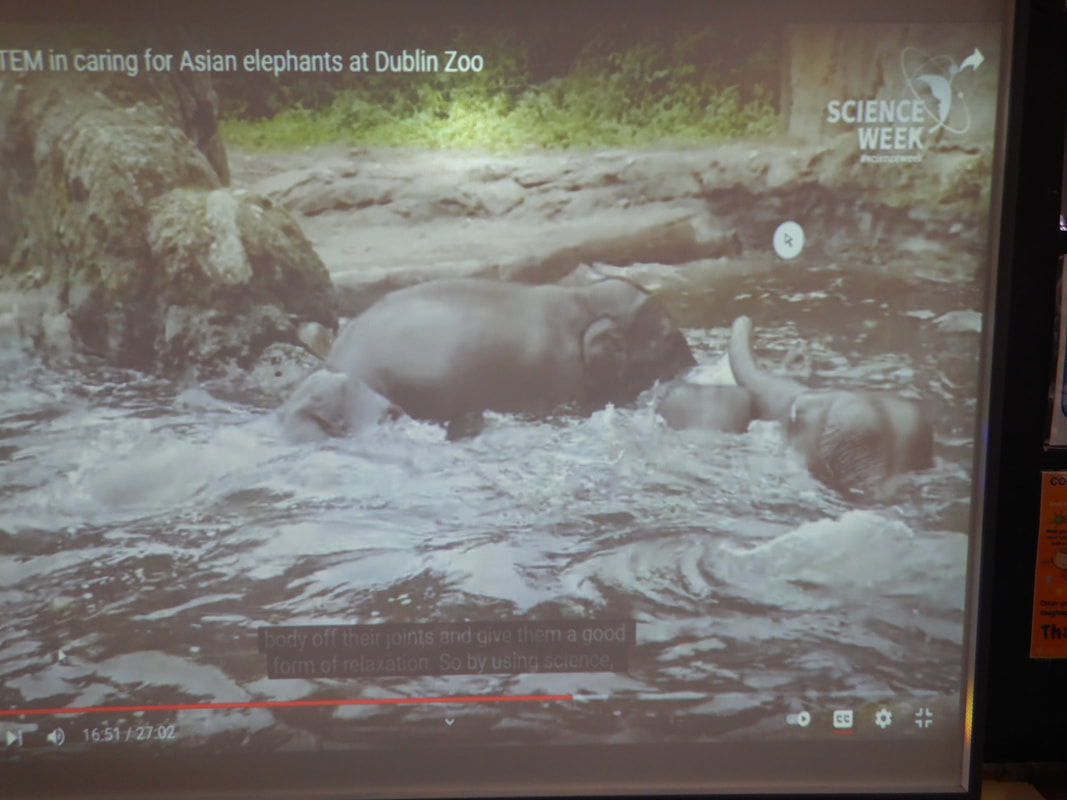
We also visited Dublin Zoo on you tube and learnt about the Asian Elephant. This is what we learned:
Elephants are social animals. They love being with other elephants and talking to each other.
A group of elephants is called a herd of elephants.
A baby elephant is called a calf.
A male elephant is called a bull.
A female elephant is called a cow.
Elephants are mammals.
Elephants have tusks.
During science week we visited Fota Island on you tube and learnt about the giraffe. They learned the following facts:
The giraffe is very tall.
The giraffe has a very long neck.
It has only seven bones in its neck the same as us.
It is so tall that it can see its predators far away.
It has very long legs. The giraffe can run very fast.
It drinks water every few days.
The giraffe has lovely spots on its body.
We also visited Dublin Zoo on you tube and learnt about the Asian Elephant. This is what we learned:
Elephants are social animals. They love being with other elephants and talking to each other.
A group of elephants is called a herd of elephants.
A baby elephant is called a calf.
A male elephant is called a bull.
A female elephant is called a cow.
Elephants are mammals.
Elephants have tusks.
First, Second, Third and Fourth Classes
We watched 2 very interesting videos during Science based on The Giraffe and the Elephant. The videos were very engaging and the children enjoyed taking part in the discussions. We learned many interesting facts which the children later recorded in their copybooks. We discussed how these animals are becoming endangered species and how we can help to look after them.
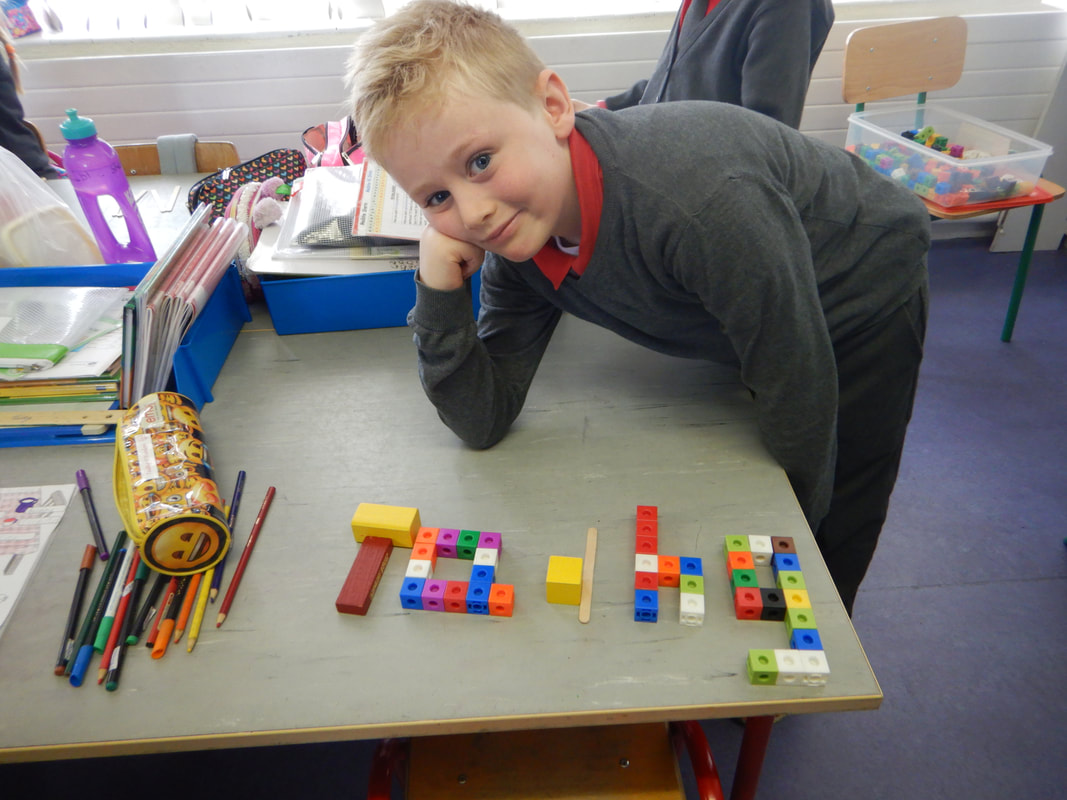
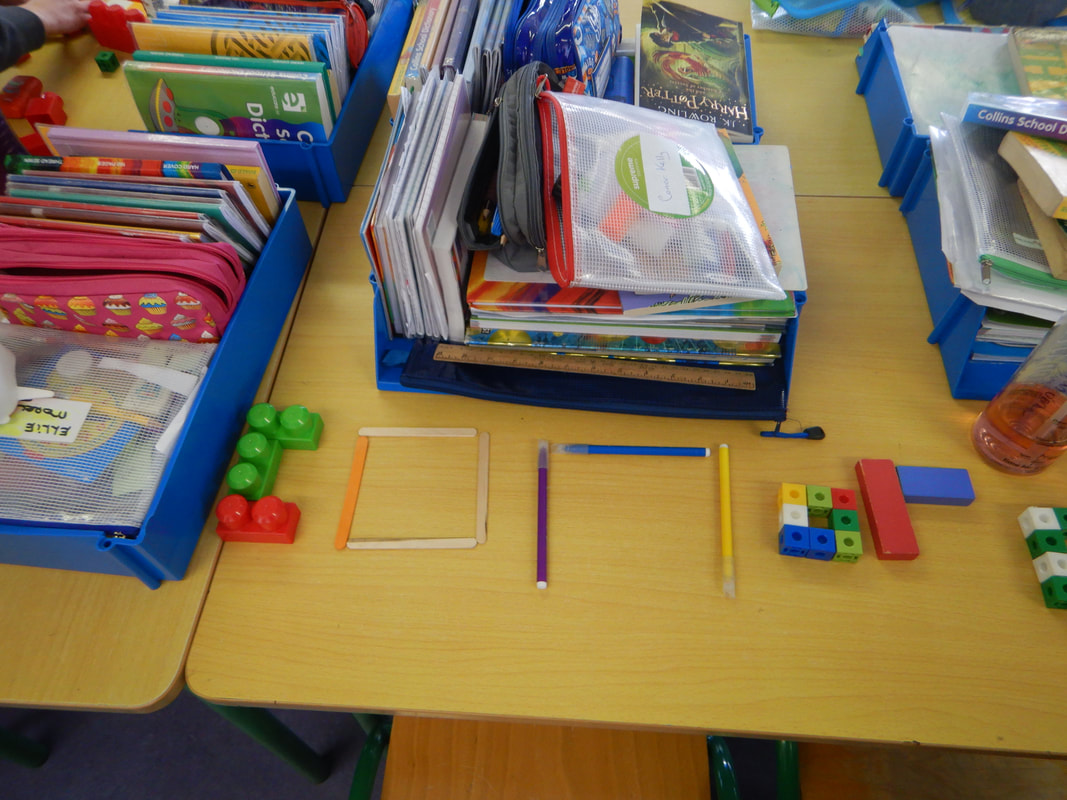
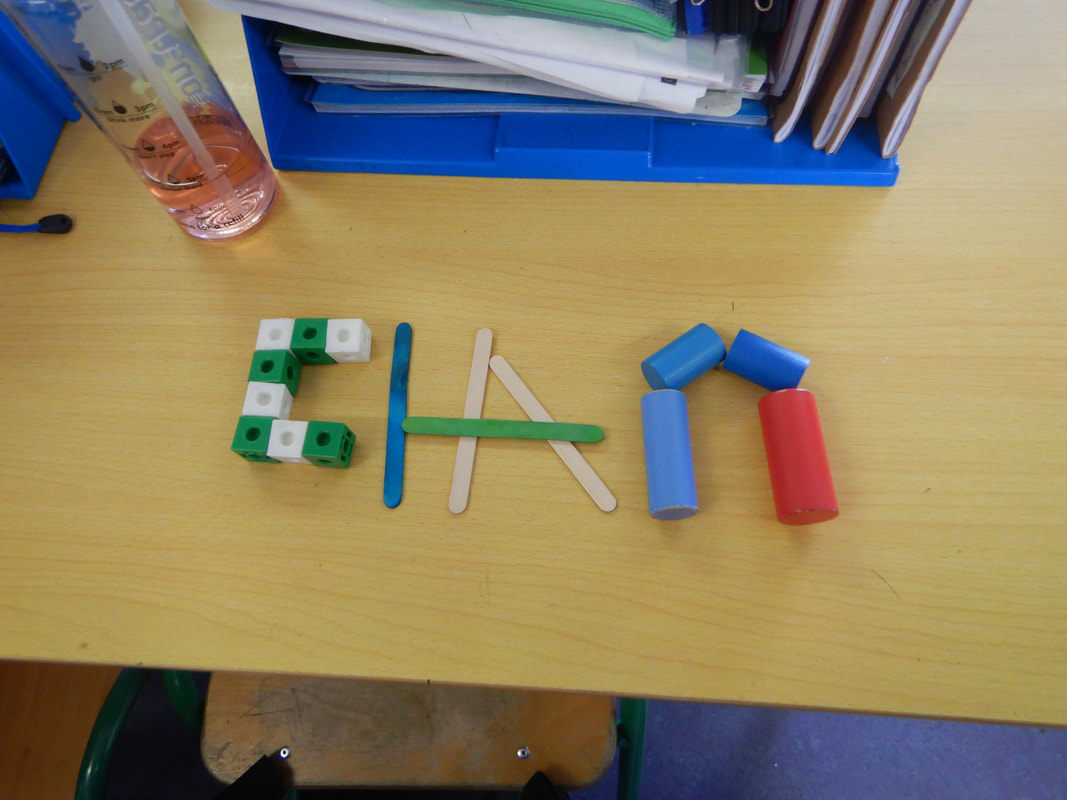
1st, 2nd, 3rd and 4th class also took part in STEM challenges during science week. They carried out 2 challenges over the week and had lots of fun!
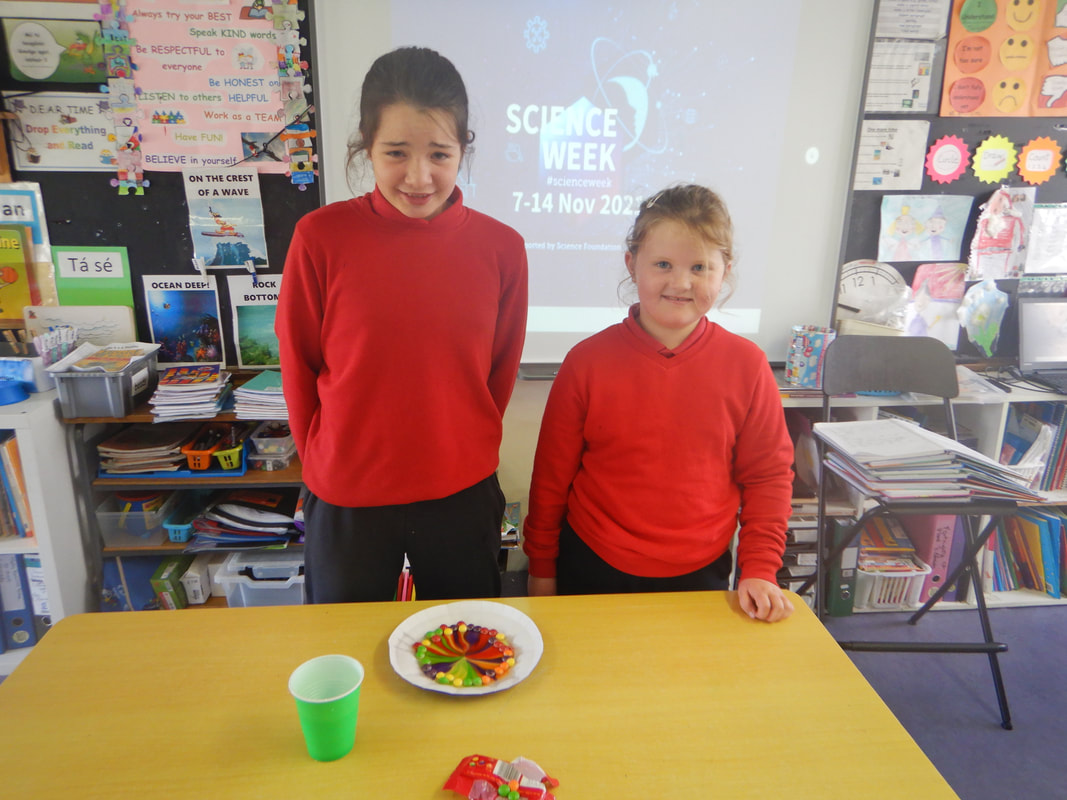
Science Showcase
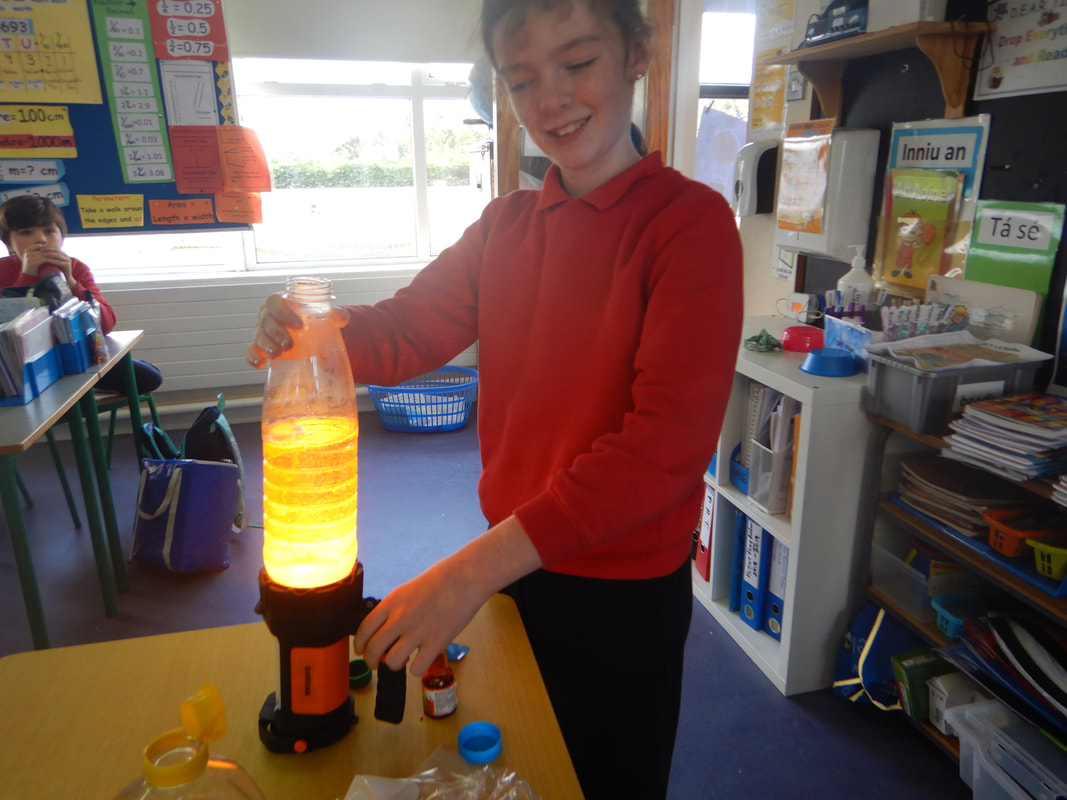
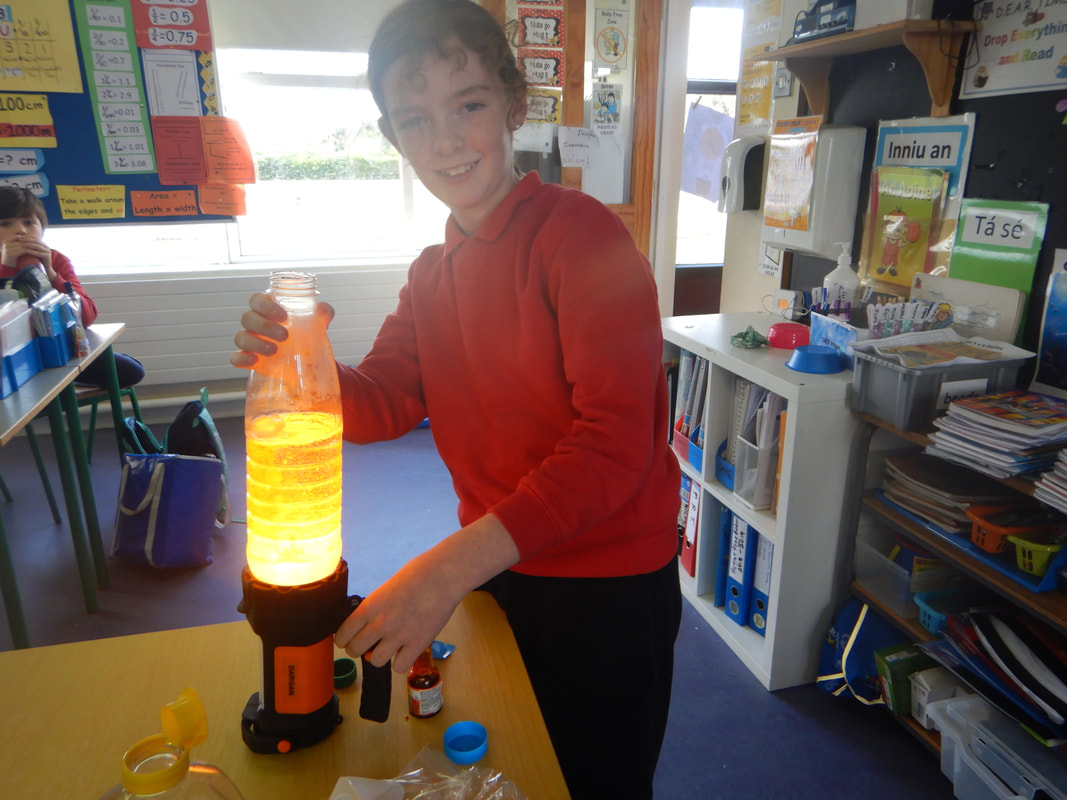
On Friday the children showcased experiments they had tried out at home. The children loved showing their experiments to their classmates and did a very good job explaining what was happening. There was a wide range of experiments shown, from walking colours to creating lava lamps, so the showcase was a real treat for us all. We thoroughly enjoyed it and learned a lot!
We watched 2 very interesting videos during Science based on The Giraffe and the Elephant. The videos were very engaging and the children enjoyed taking part in the discussions. We learned many interesting facts which the children later recorded in their copybooks. We discussed how these animals are becoming endangered species and how we can help to look after them.
1st, 2nd, 3rd and 4th class also took part in STEM challenges during science week. They carried out 2 challenges over the week and had lots of fun!
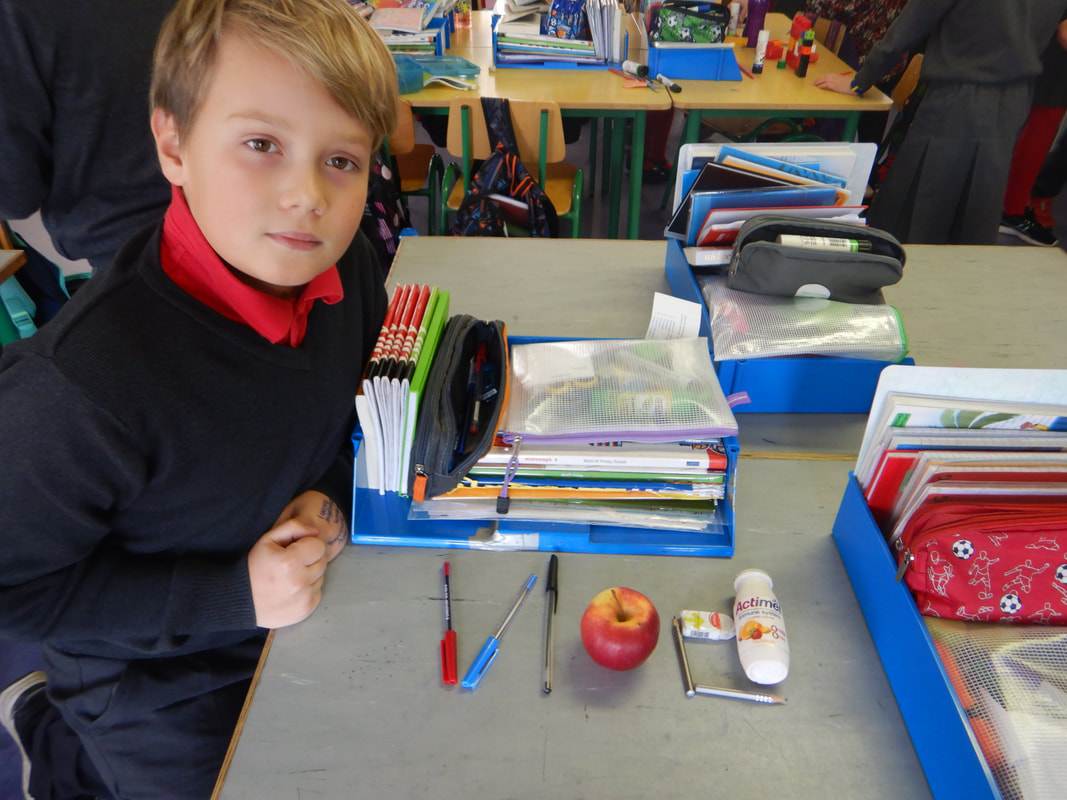
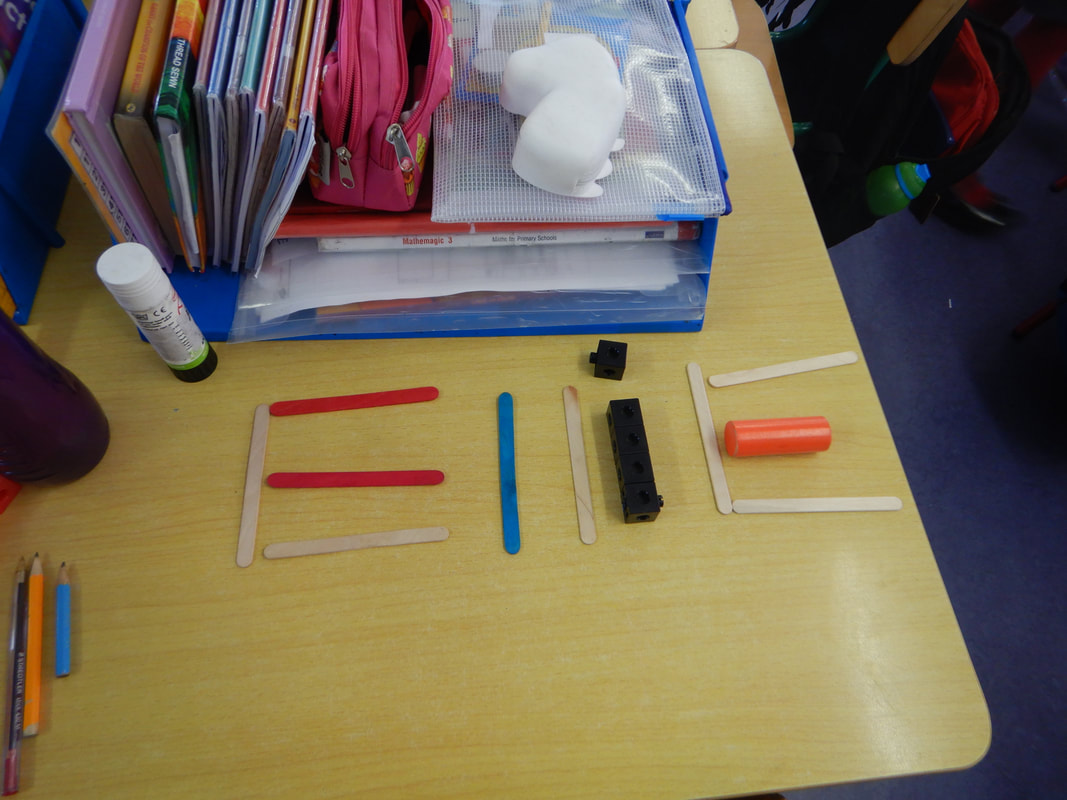
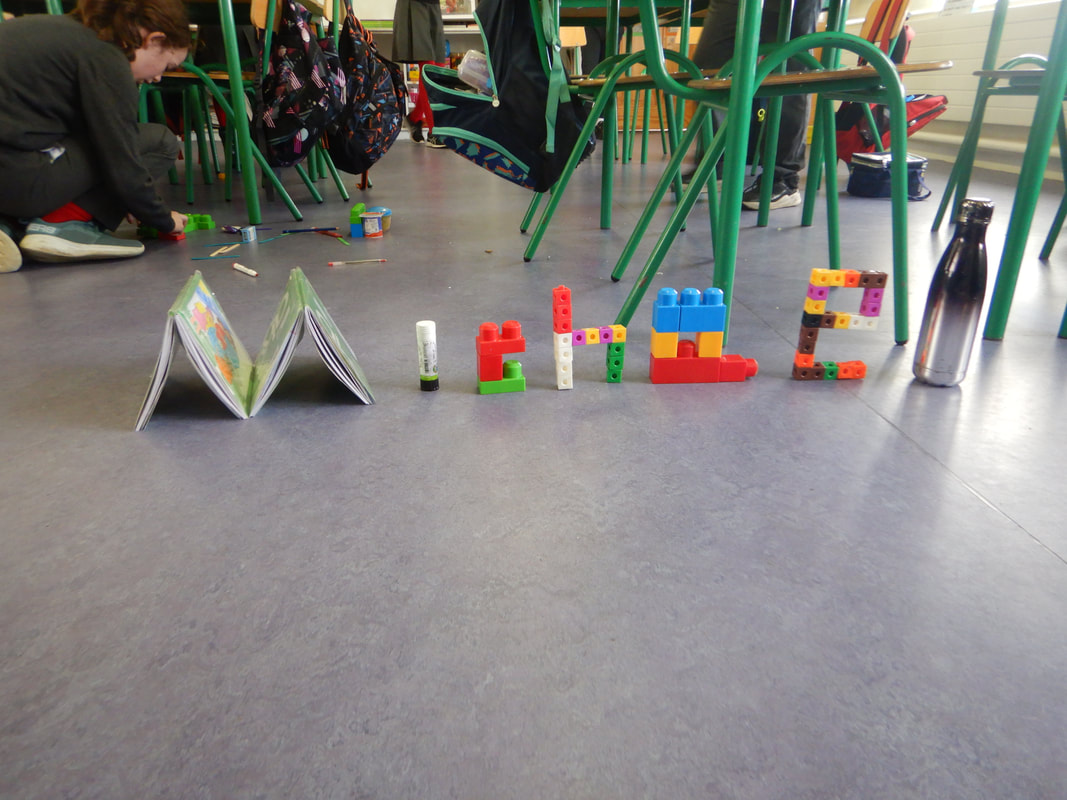
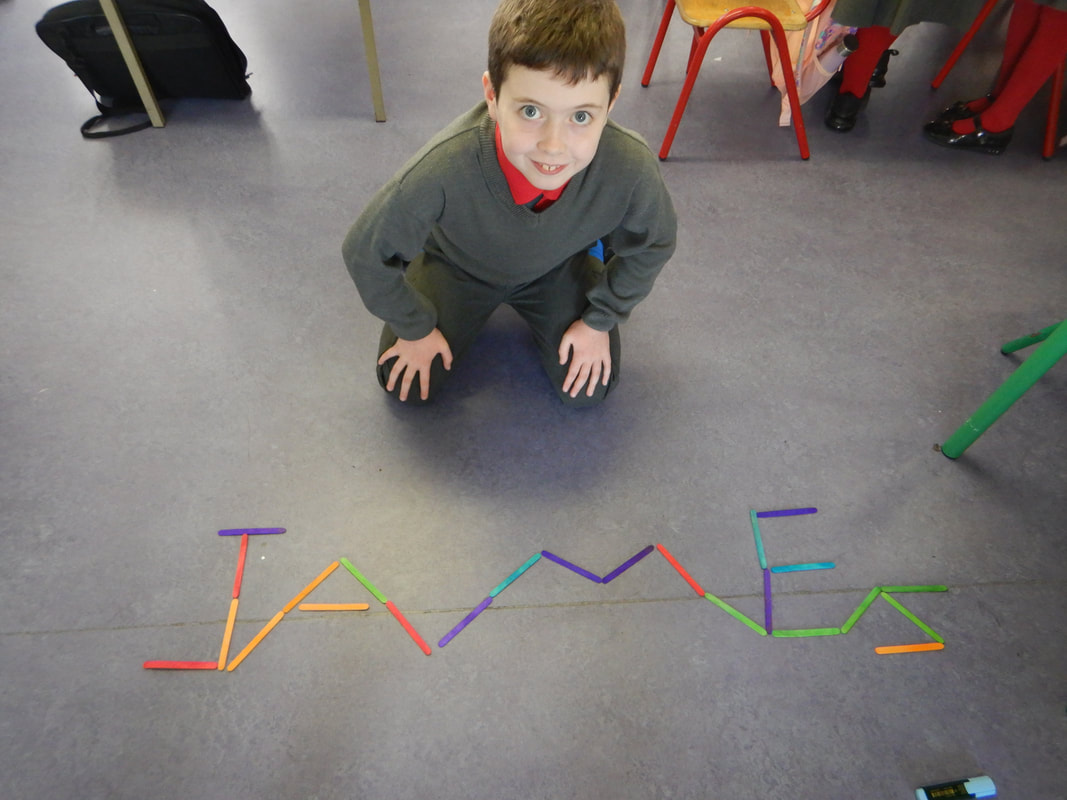
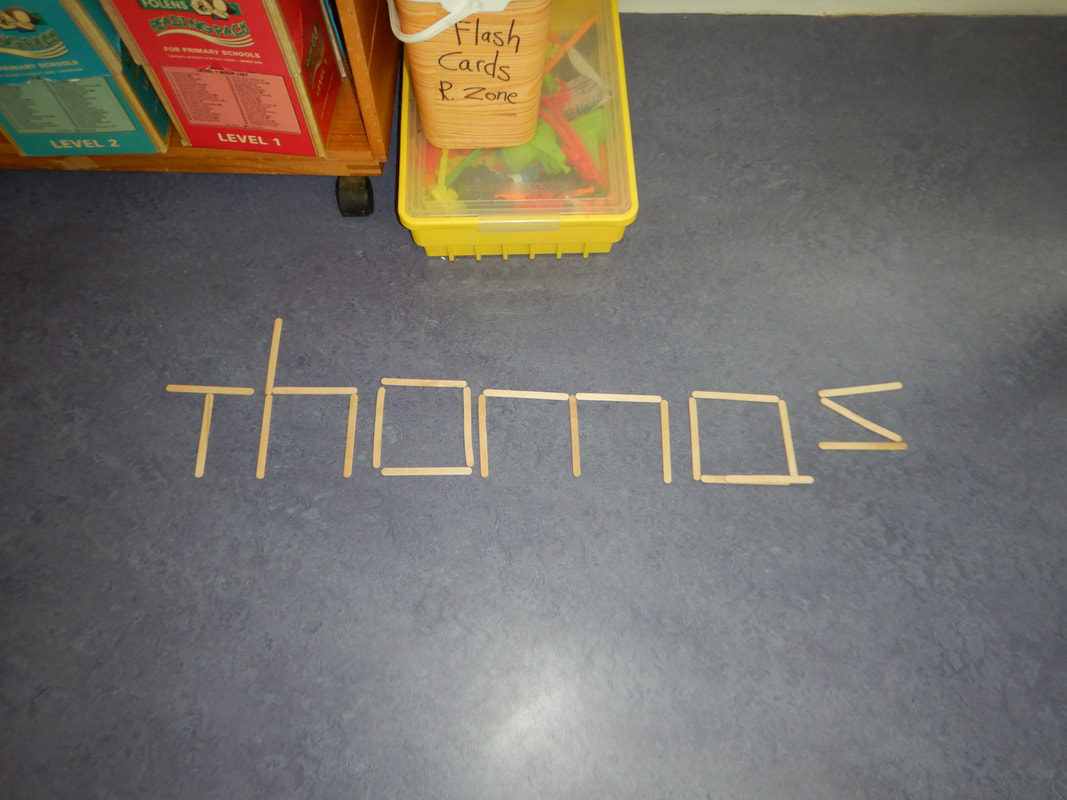
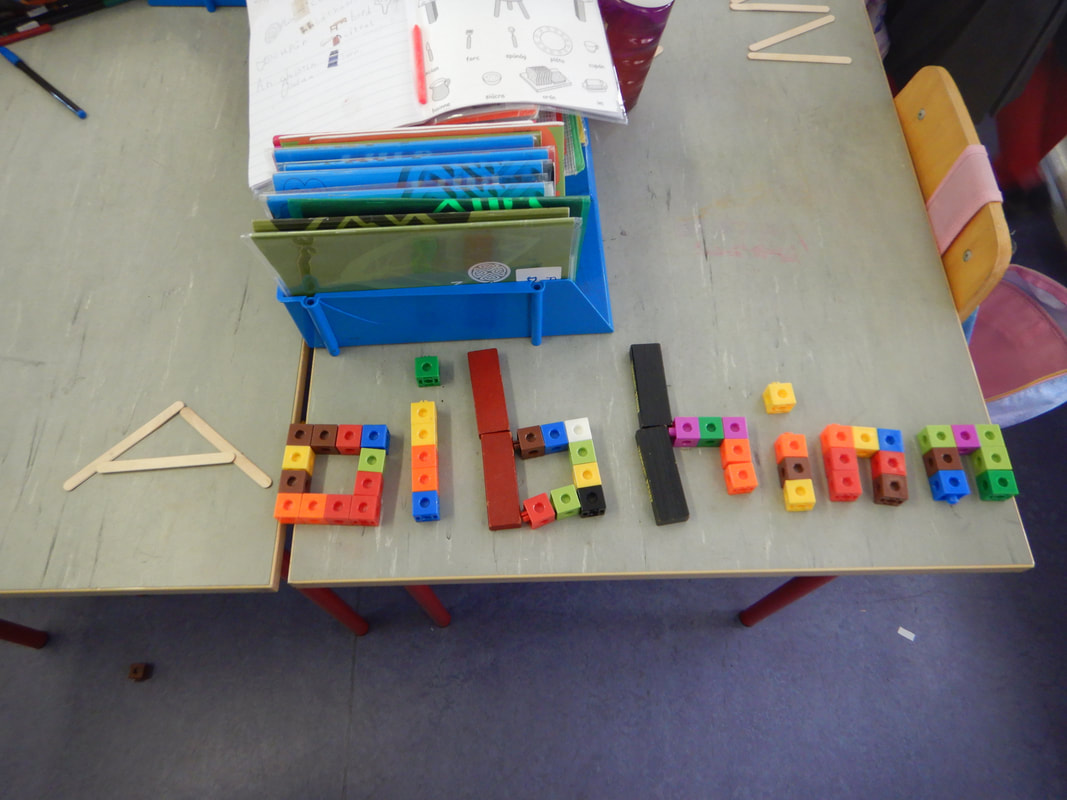
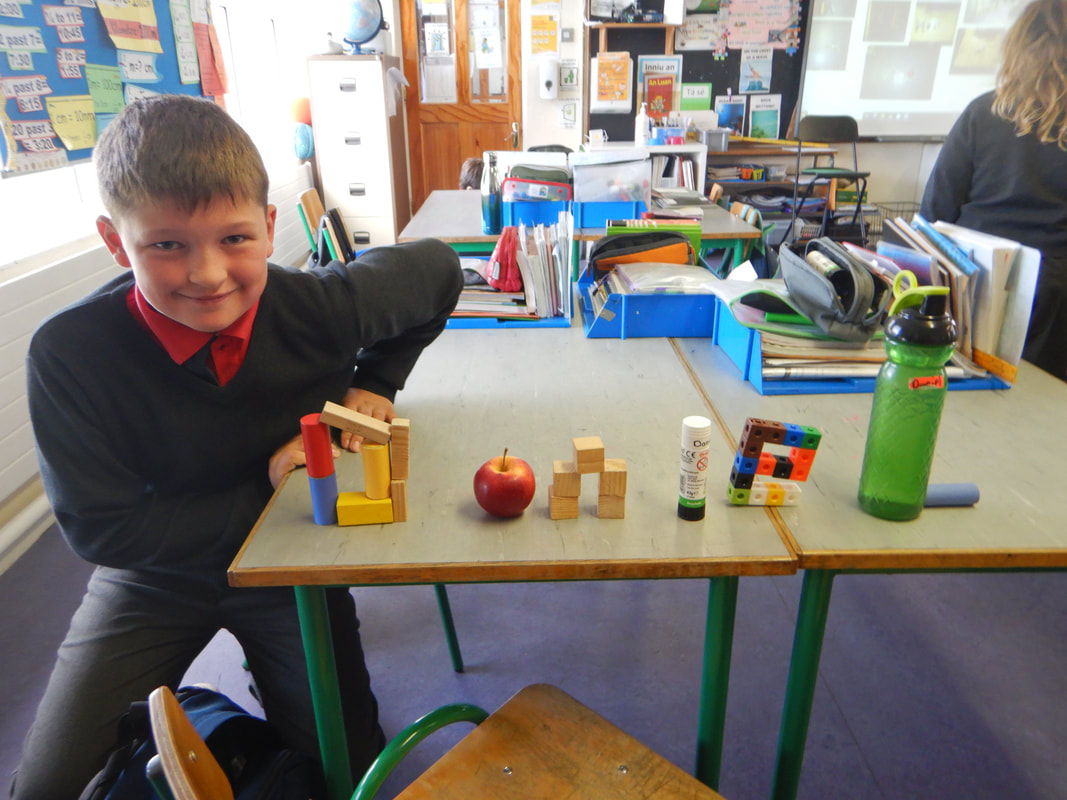
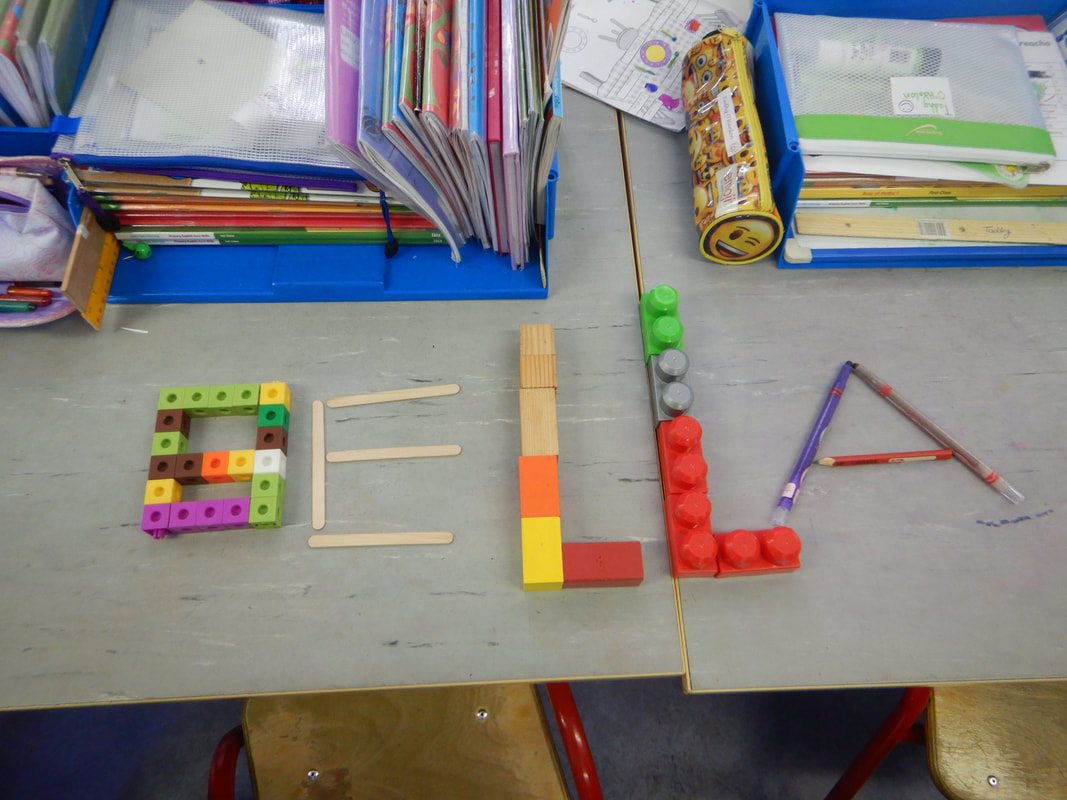
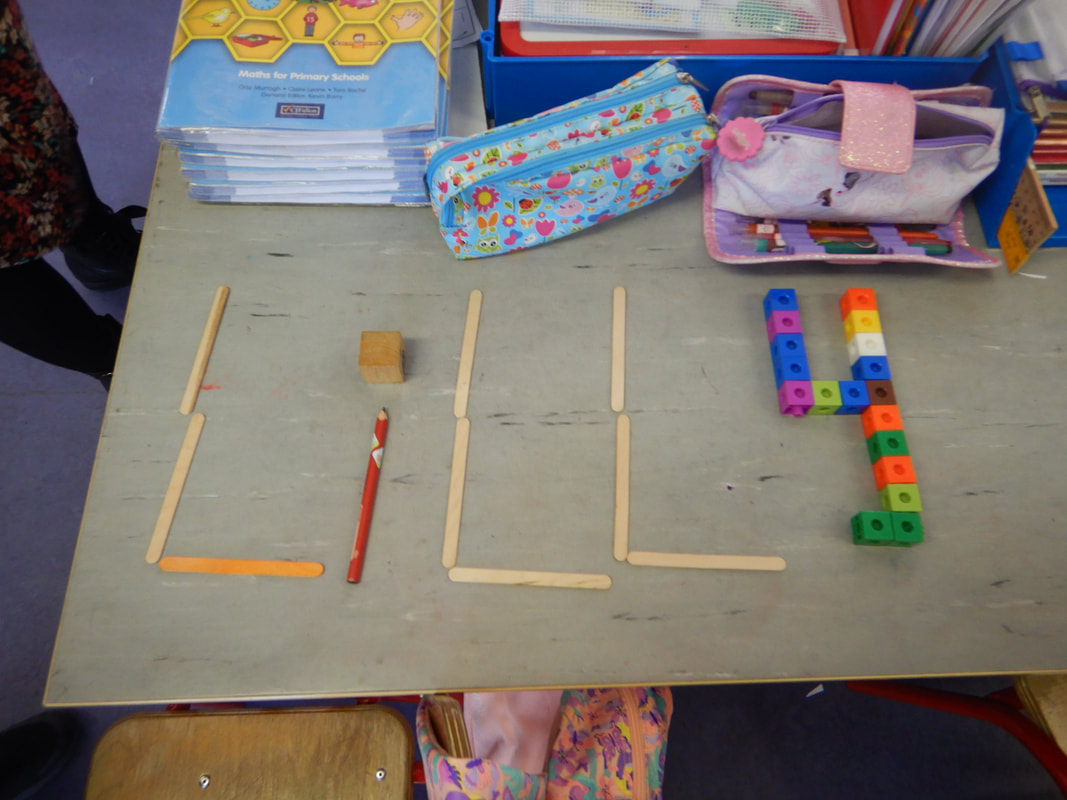
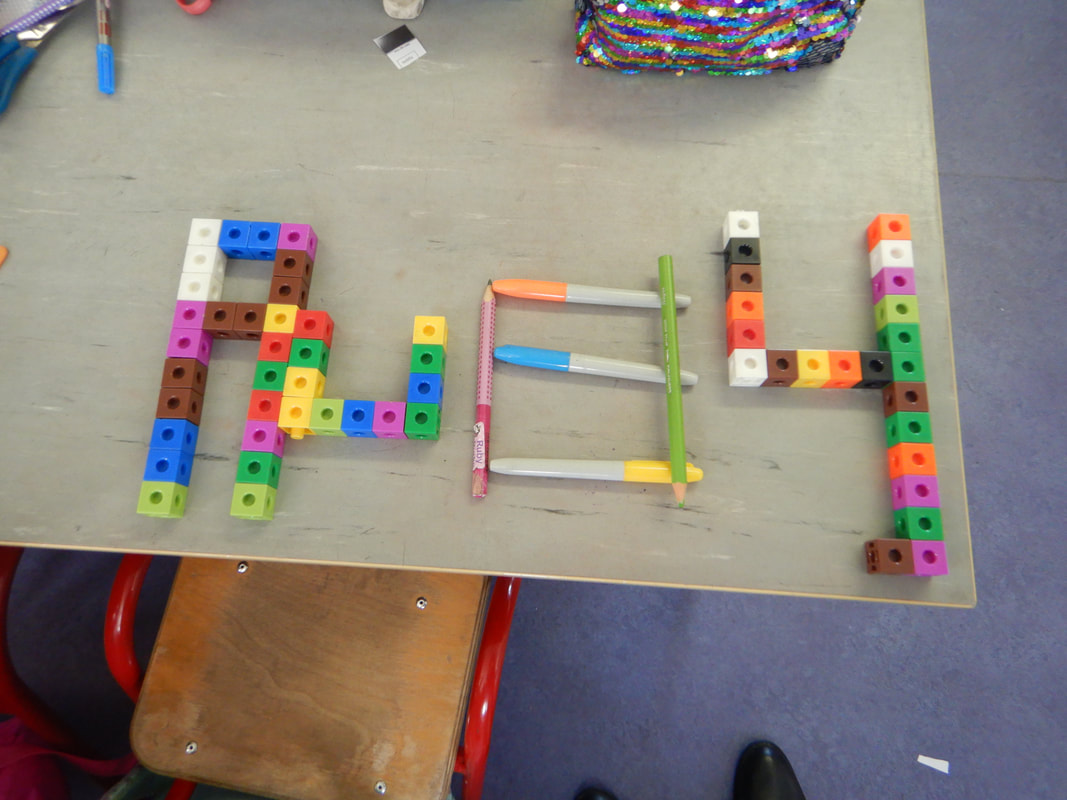
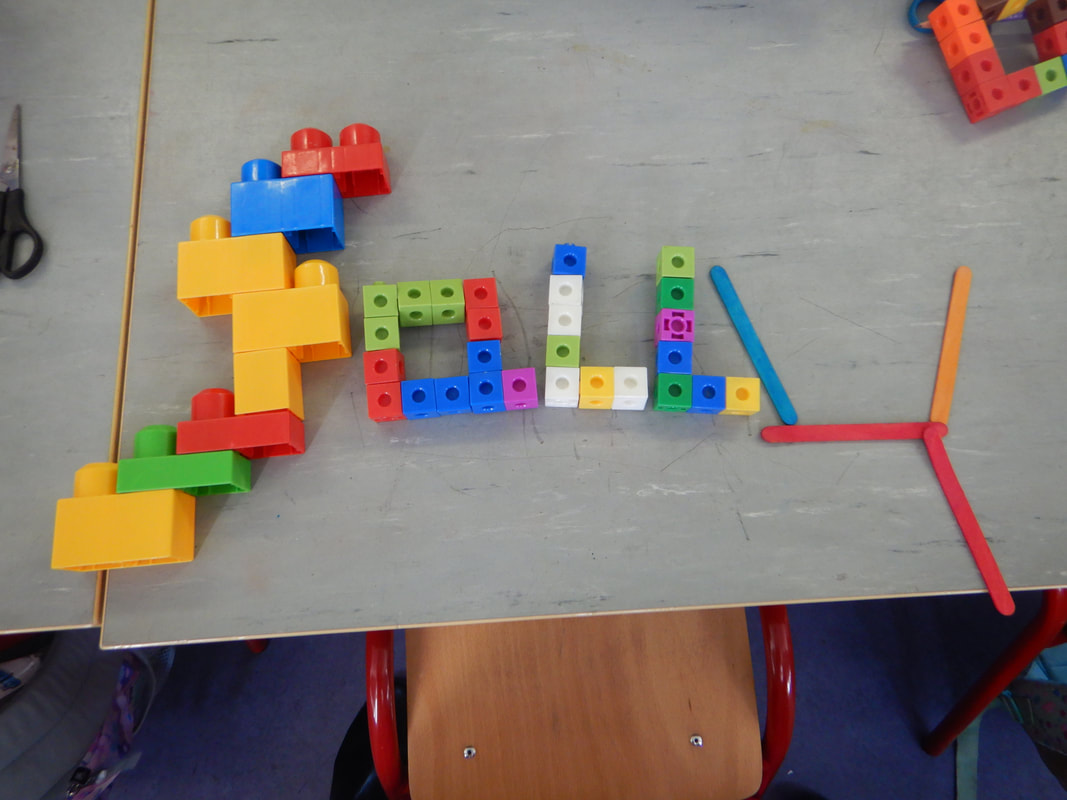
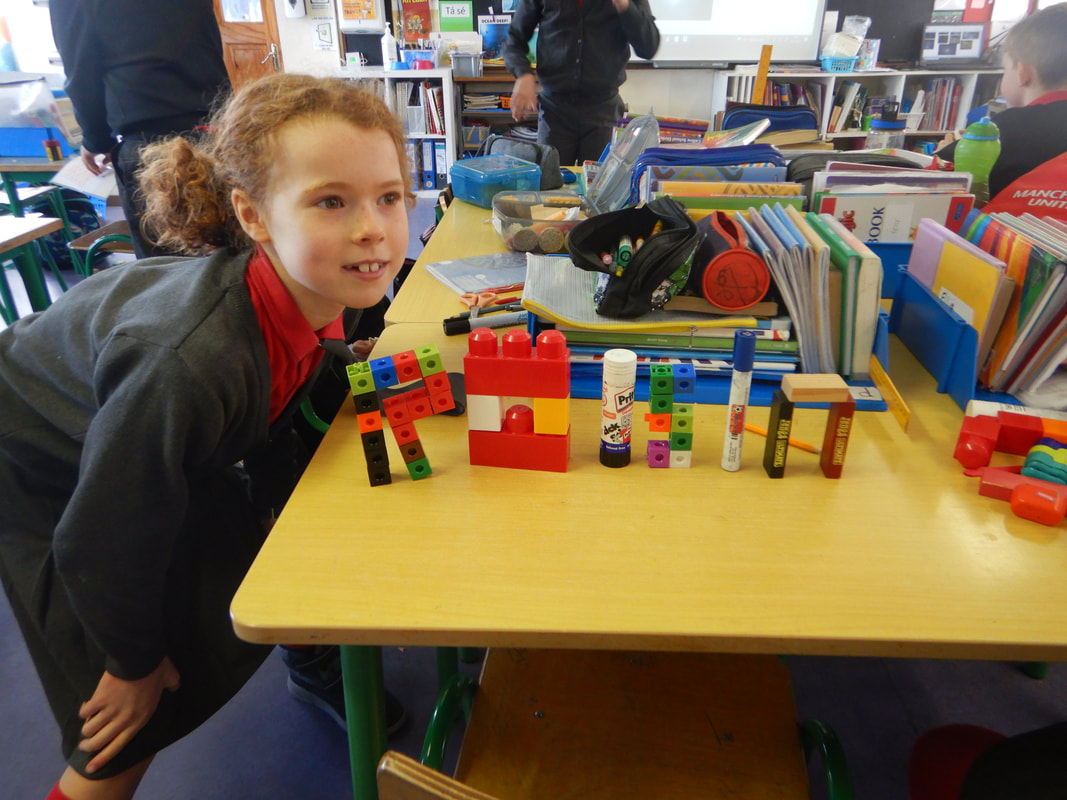
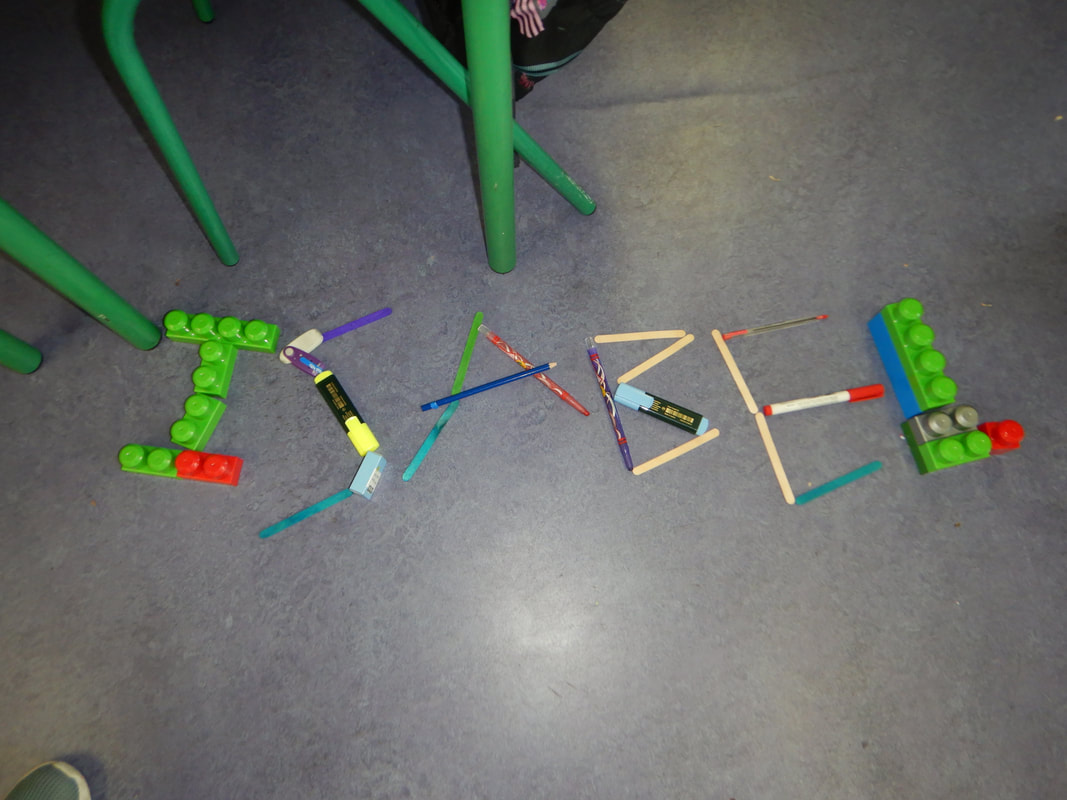
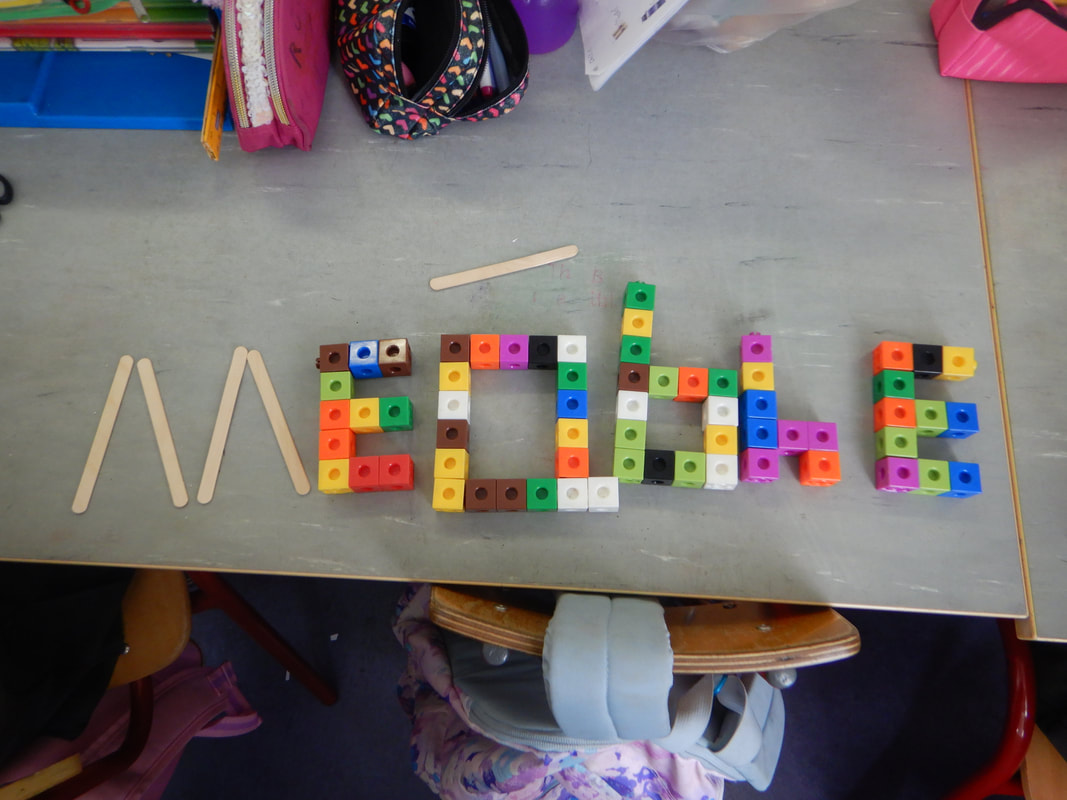
- Build your name in 3D: The children used 3D objects in the classroom to build their names in 3D. They thoroughly enjoyed this and were very creative!
- 2nd-4th class: Build a paper tower that can hold one of your shoes for 20 seconds. The children first planned and designed their towers before creating. They were given 10 sheets of paper and they had to use all 10 pages when creating the tower. They needed to come up with the best way to make the tower strong enough. They then evaluated by testing how much weight their tower could hold.
- 1st class- Build enclosure to hold one of your toy animals. The first class carefully planned their enclosures and used lego, blocks and cubes to create them. They had lots of fun and discussed how they may need to adjust the enclosure to suit animals of various shapes and sizes.
Science Showcase
On Friday the children showcased experiments they had tried out at home. The children loved showing their experiments to their classmates and did a very good job explaining what was happening. There was a wide range of experiments shown, from walking colours to creating lava lamps, so the showcase was a real treat for us all. We thoroughly enjoyed it and learned a lot!


Fifth and Sixth Class
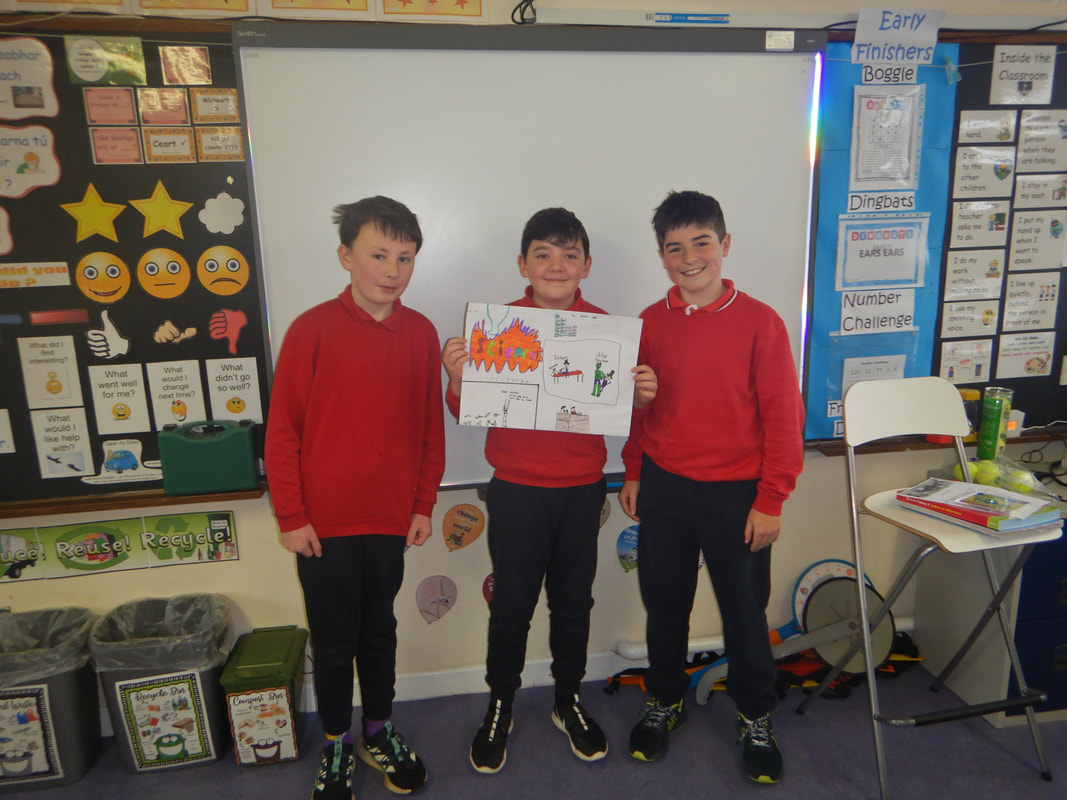
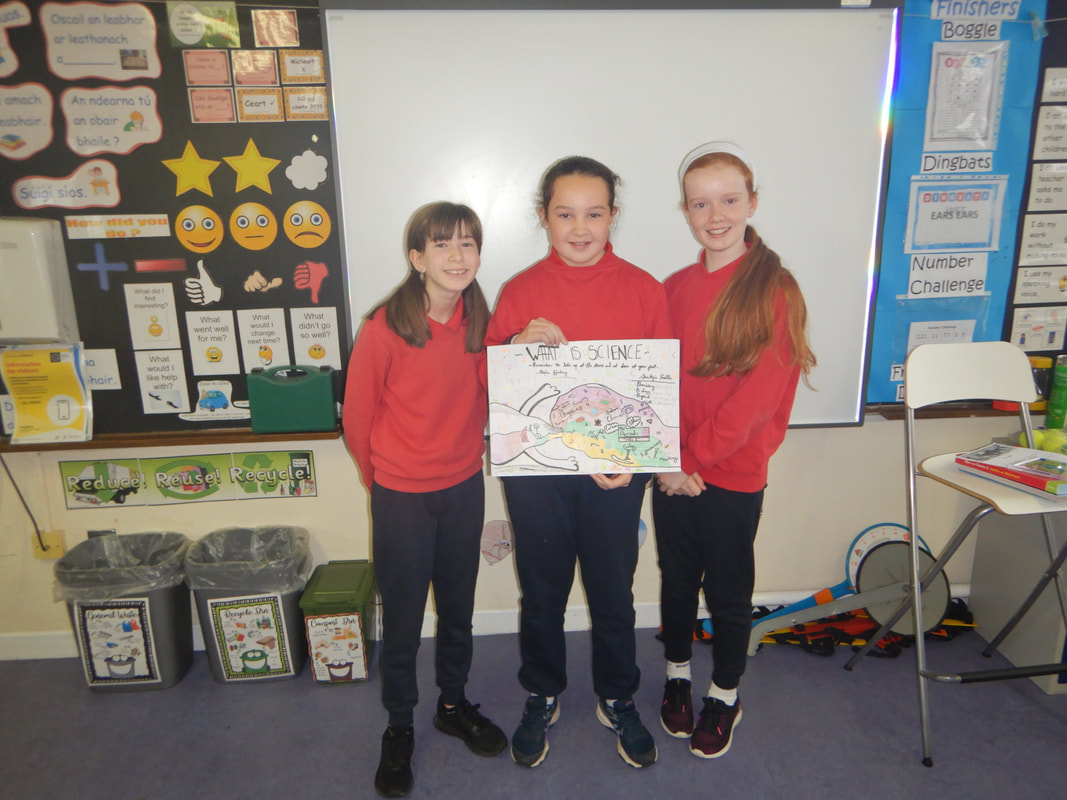
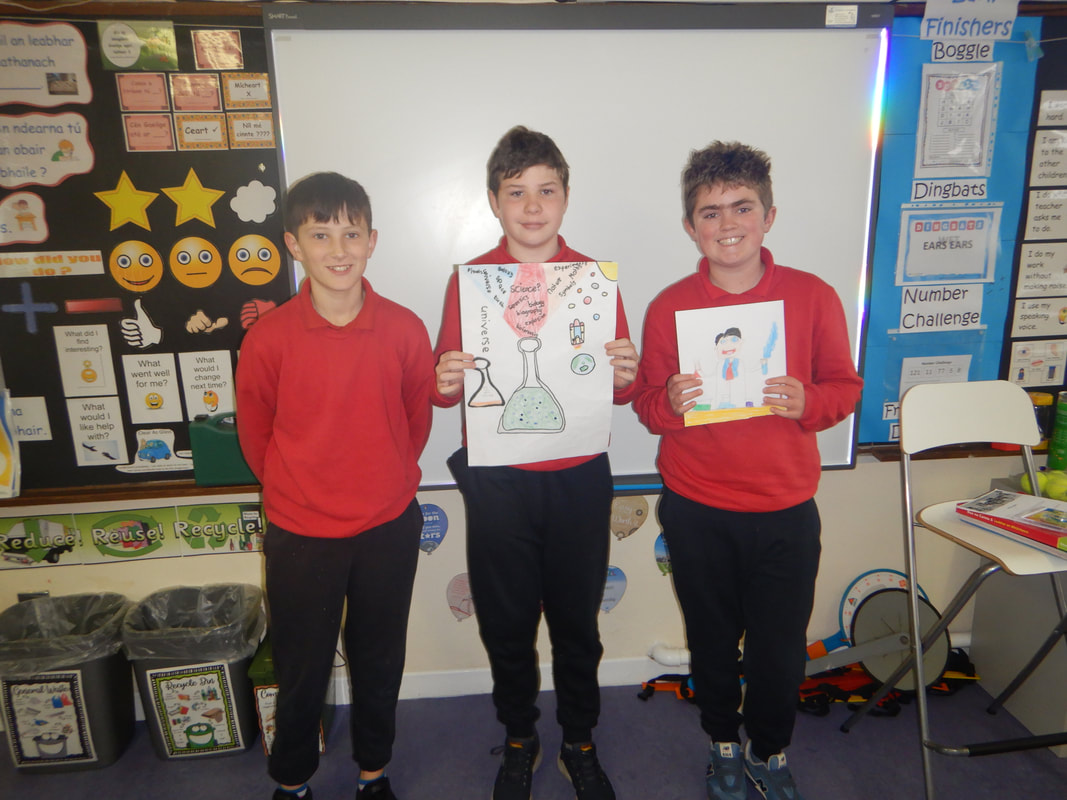
During Science week 5th and 6th Class completed lots of activities:
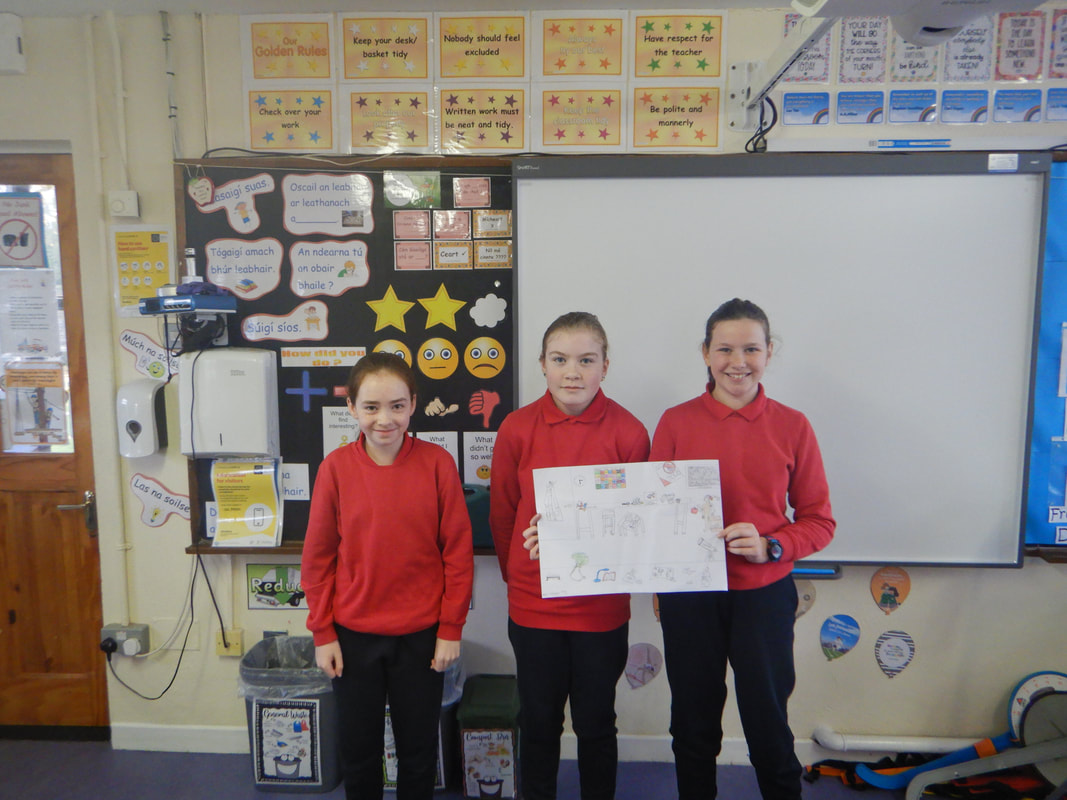
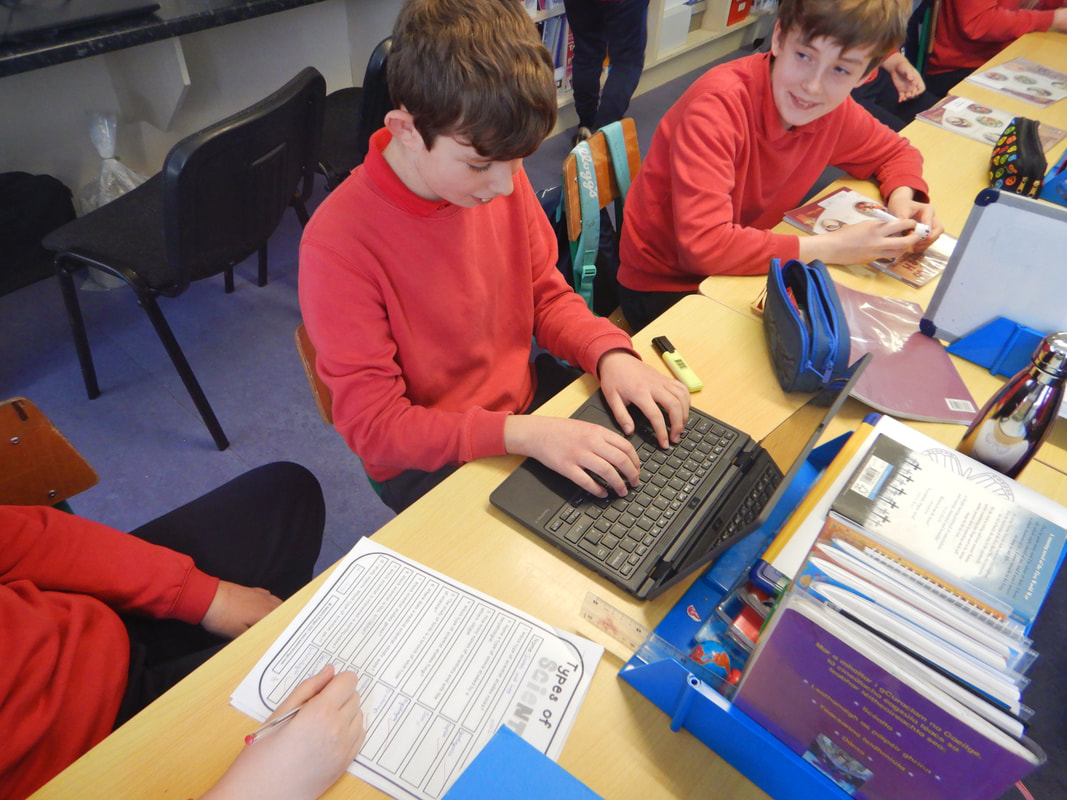
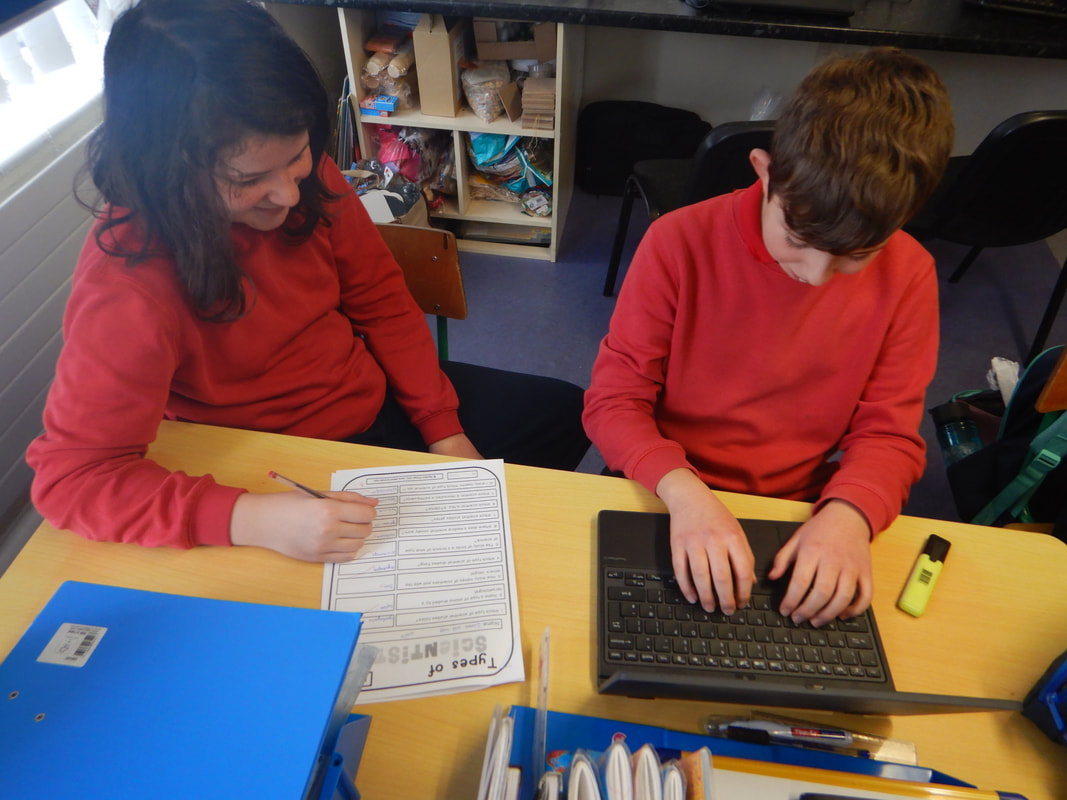
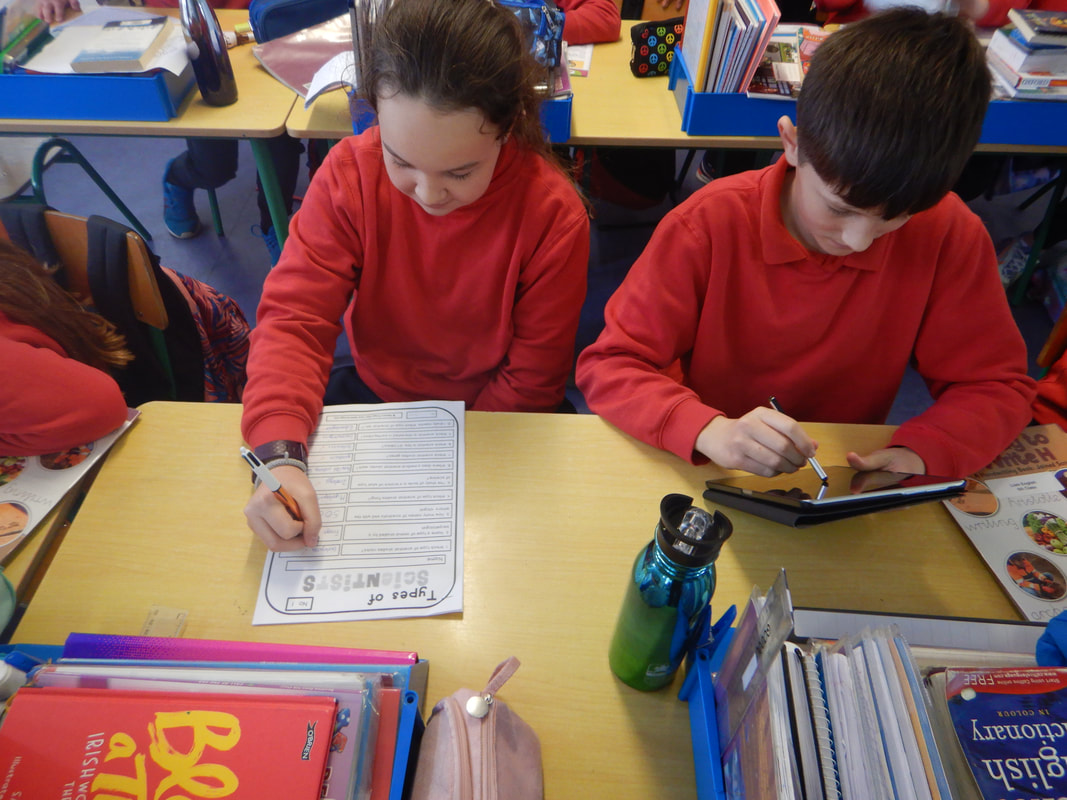
1. They brainstormed the word 'Science' and then watched the video 'What is Science'.
2. The researched Marie Curie and Albert Einstein.
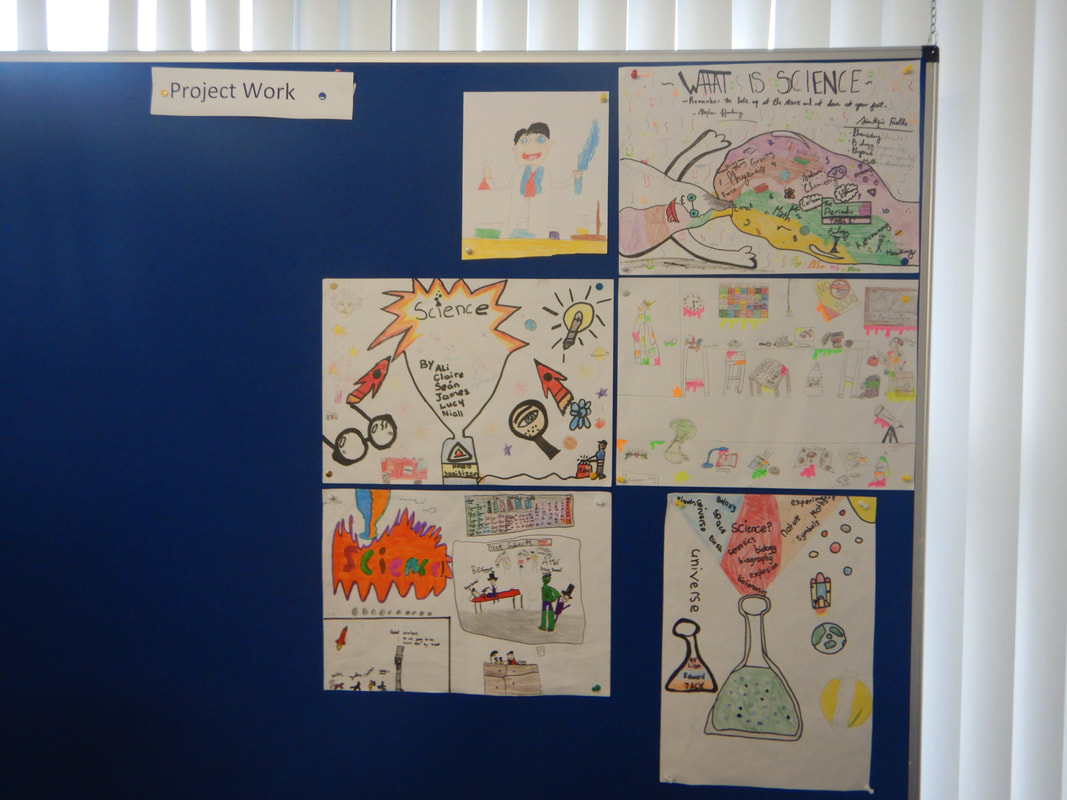
3. They created posters depicting who a Scientist is and their role.
4. The took part in a whole-class Science Quiz.
5. Completed a research Science Trail.
6. Watched the following videos: Science all Around with Niall O' Dwyer and Think before your Flush.
7. Learned about Density.
What is a Scientist Posters and Science Investigative Quiz
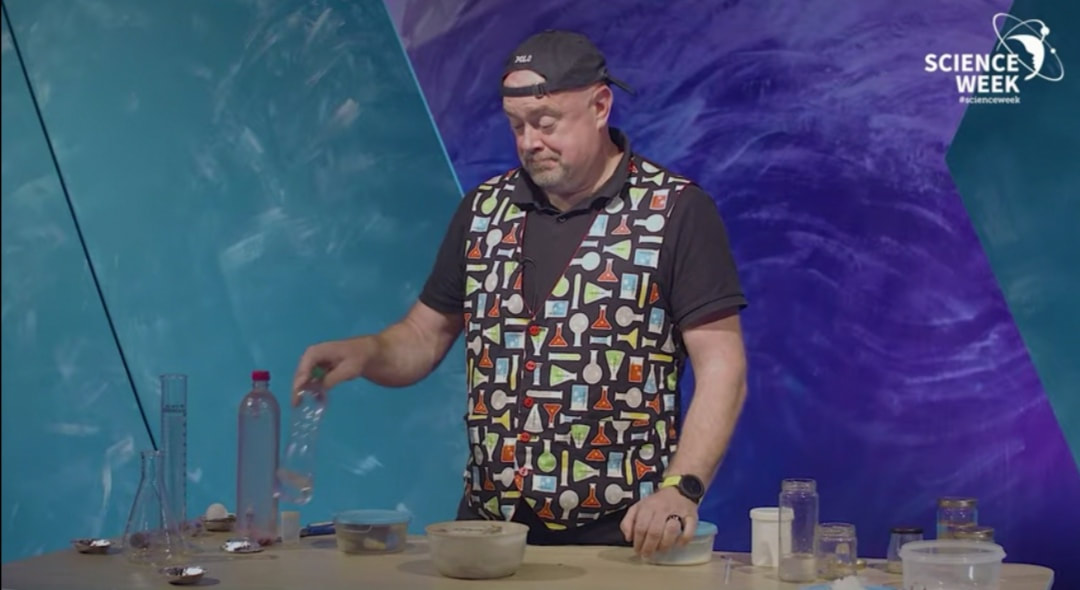
Science Video:
The pupils watched the video, 'Science All Around Us' with Niall O' Dwyer.
The pupils learned about:
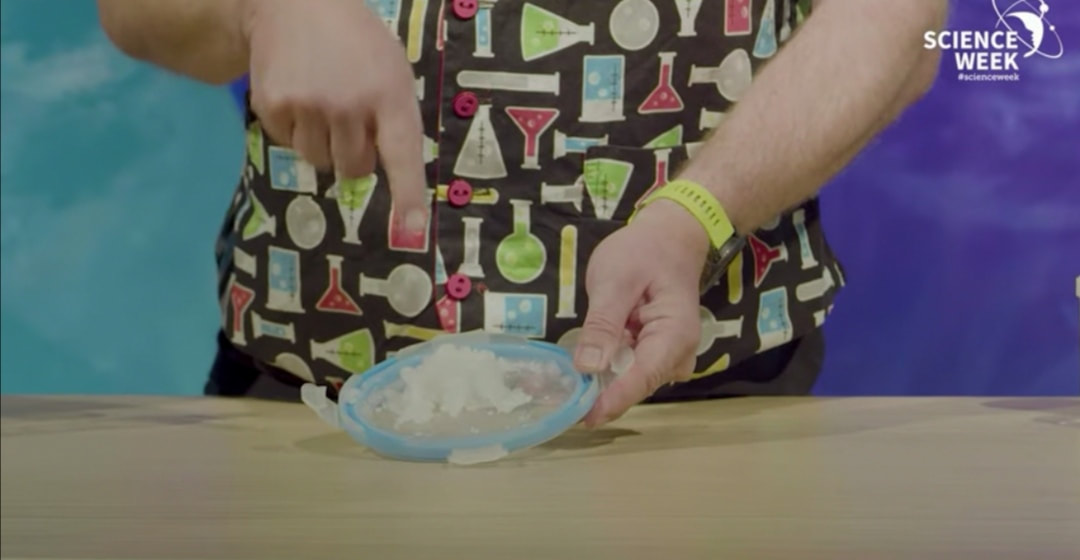
1. Optical illusions and the tricks they can play on our eyes.
2. Orbeez and the fact that they are made of water, and soak up water. They learned that polymers are the real name for plastics. Next, the pupils looked at a powder form of polymers and learned that this is used in nappies and in fake snow. The pupils found this really interesting, especially how plastics absorb water.
Recycling was discussed, and how to make nappies more recyclable.
3. The experiment on comparing sections of a circle and how their sizes were the same. They learned that the outside circle is bigger than the inner circle.
4. How to make air 'wobble'. This was the pupils favourite experiment! They bit down on the end of the straw and cut a 'v' shape at the end, squeezed the top and blew in to it. The pupils learned the connection between this experiment and tin whistles. By changing the length of the straw, the length of the air was changed, therefore producing different sounds. The shorter the straw the higher the frequency/higher the pitch.
5. Balancing a ball on top of a straw. This was a really fun experiment where the pupils blew on the bottom of the straw to balance the paper ball over the top.
6. Static electricity. Niall demonstrated on Rocky how static electricity works by rubbing the balloon on Rocky's hair.
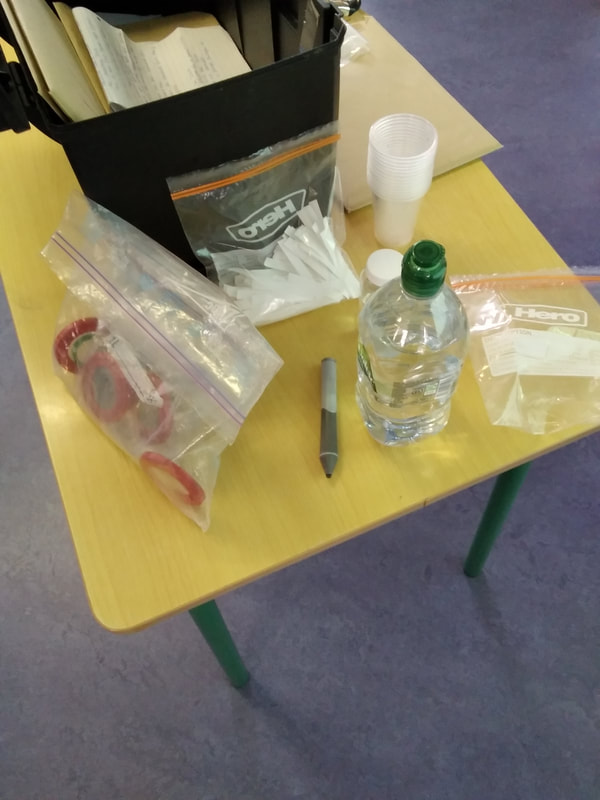
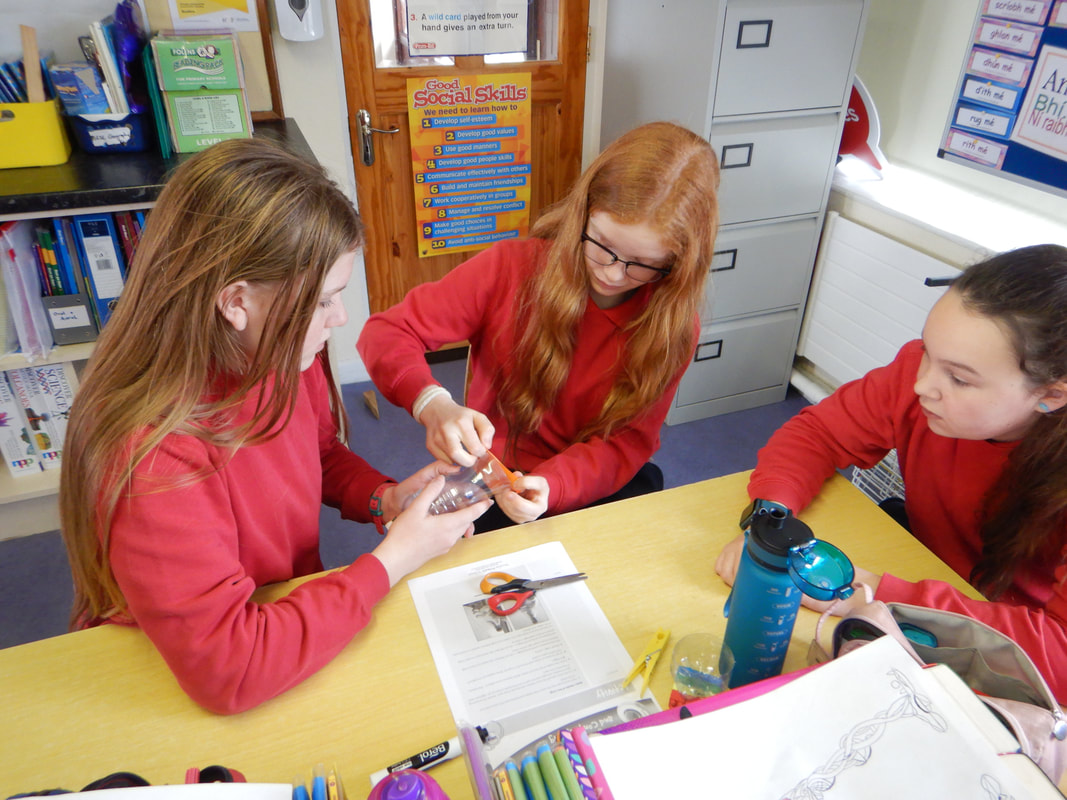
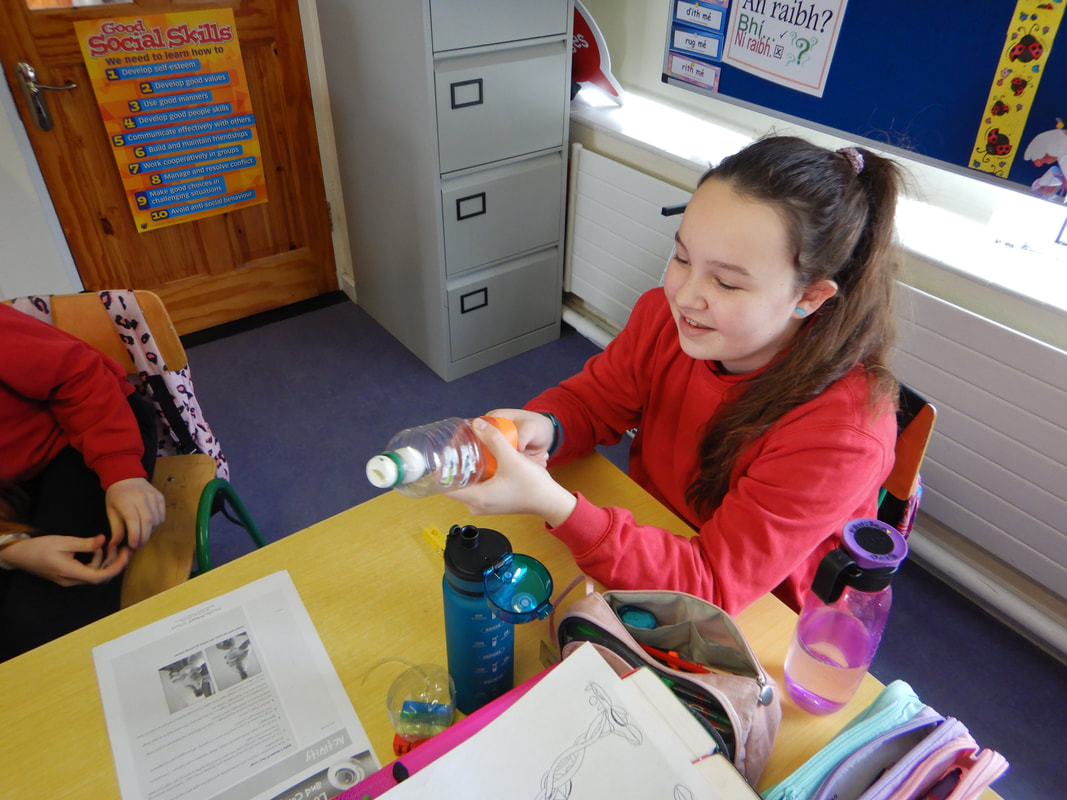
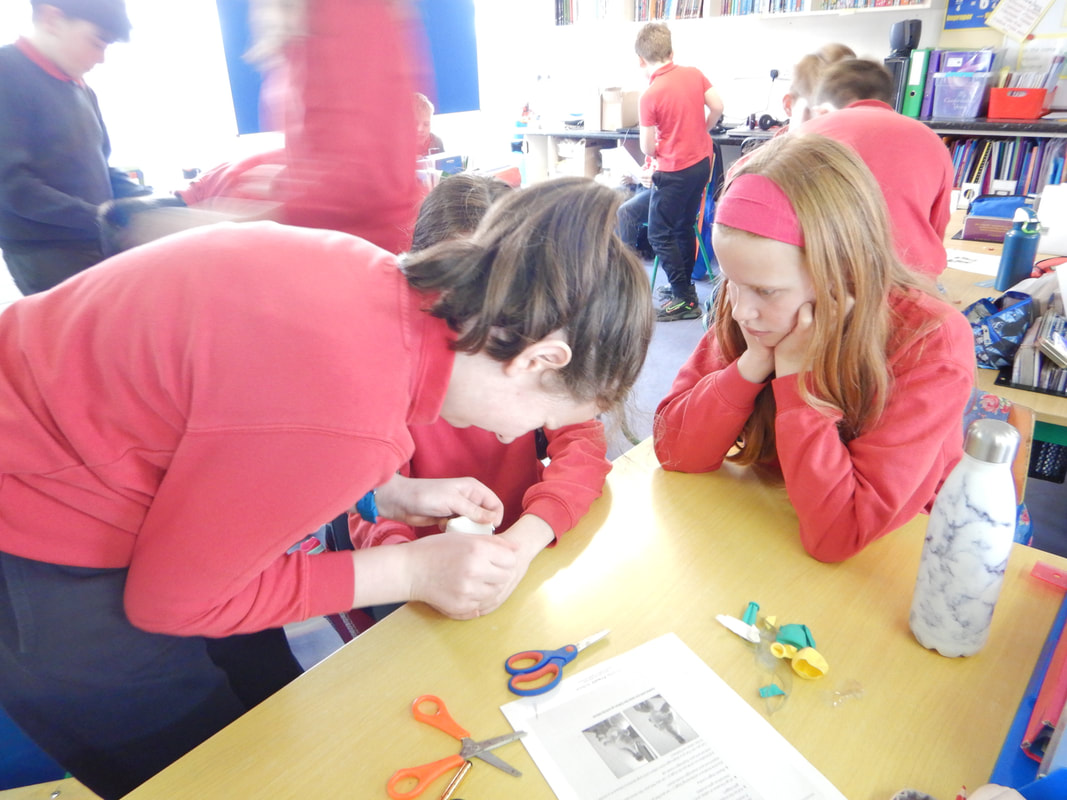
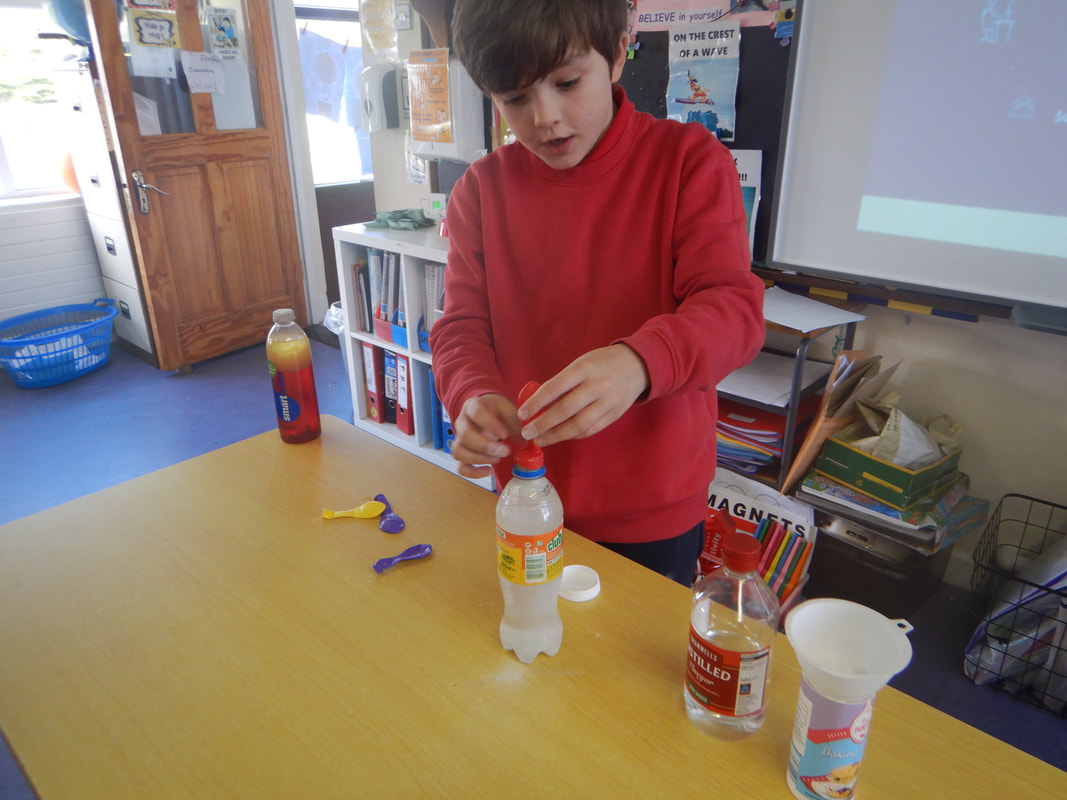
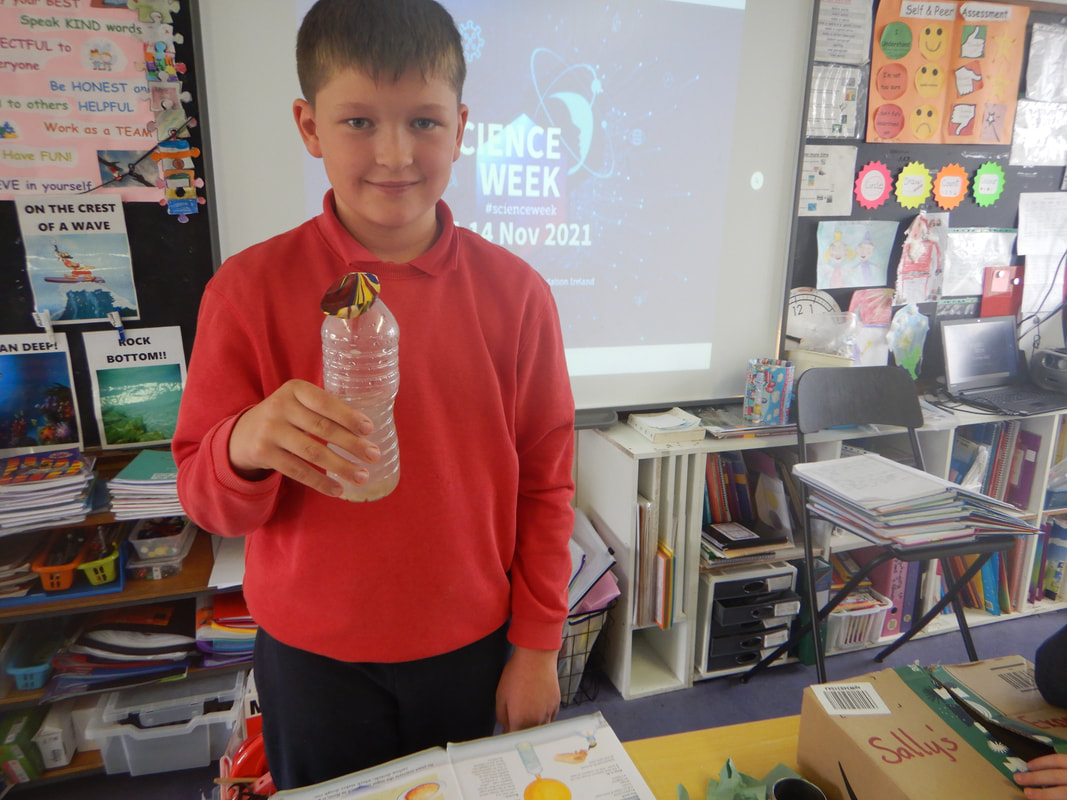
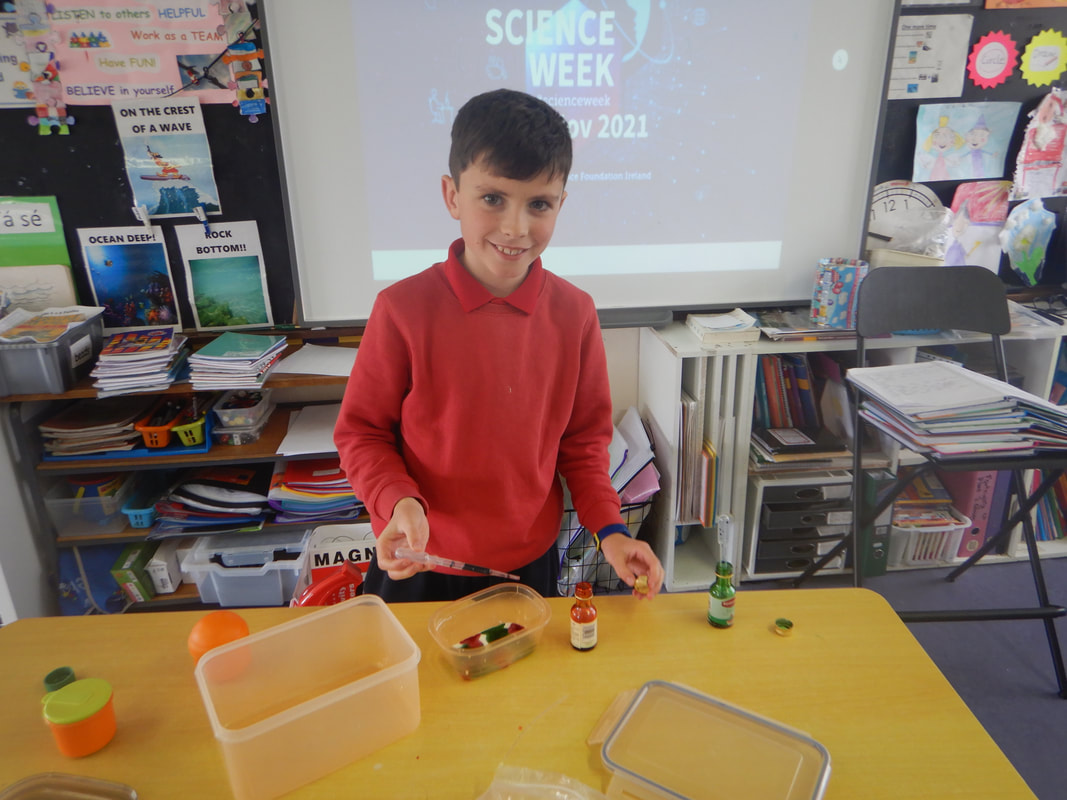
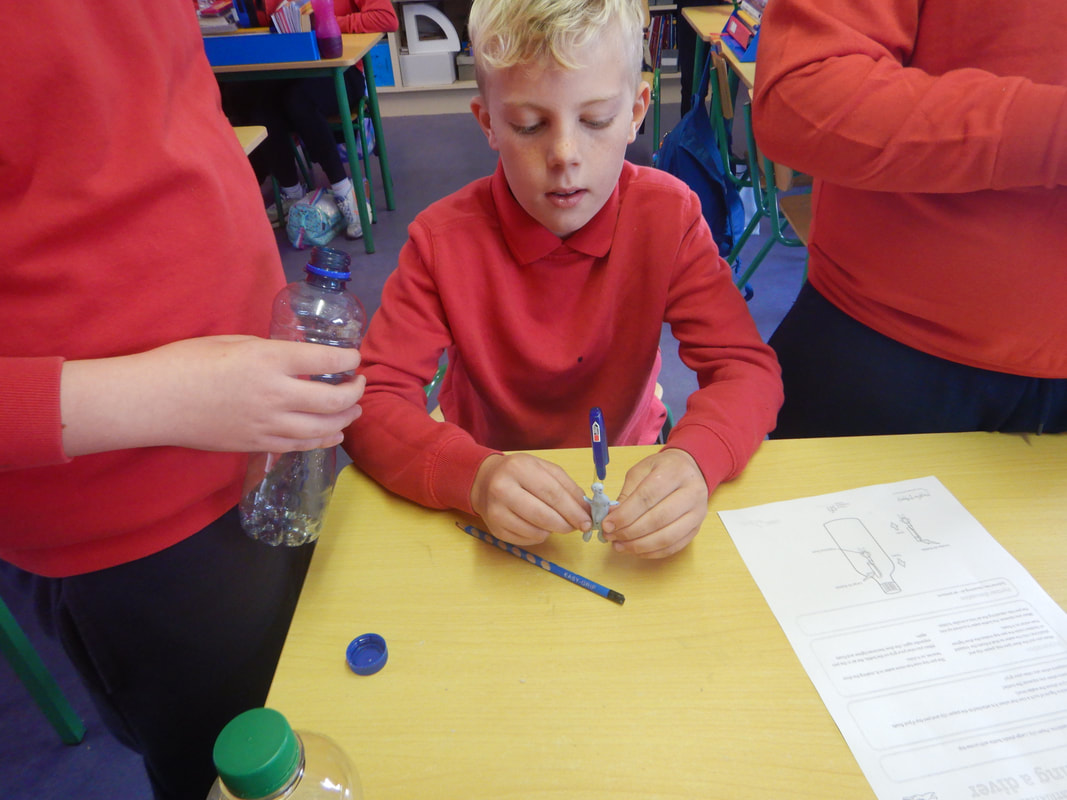
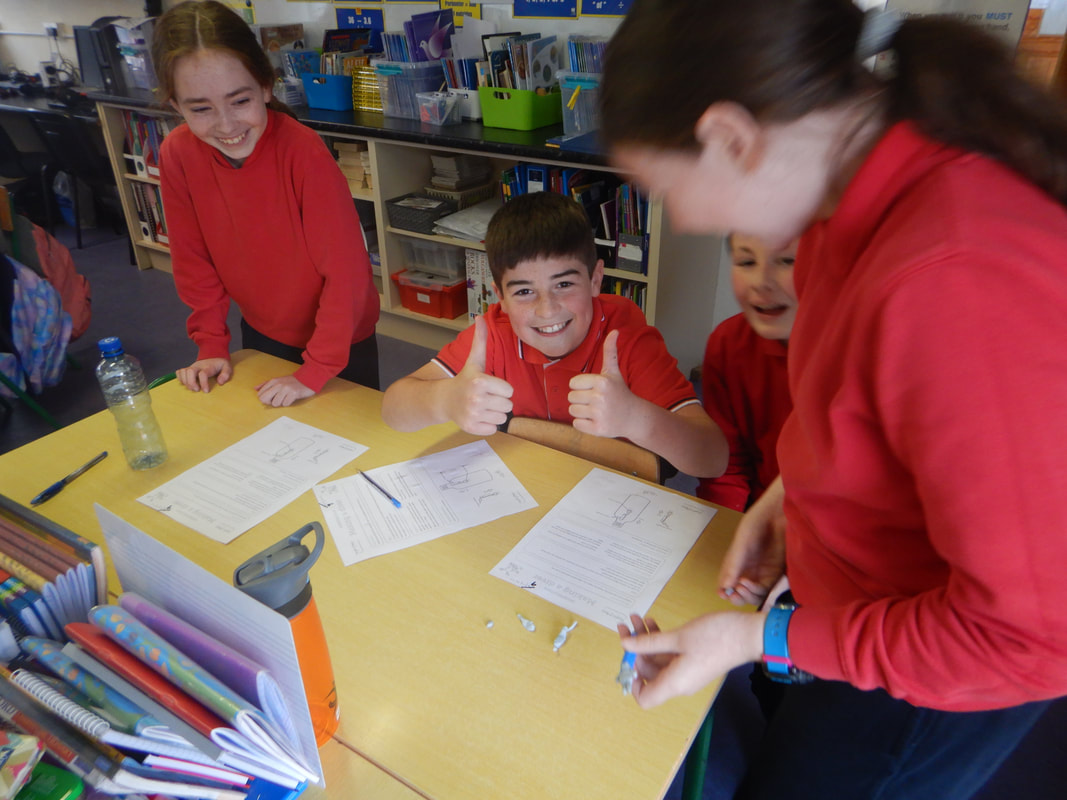
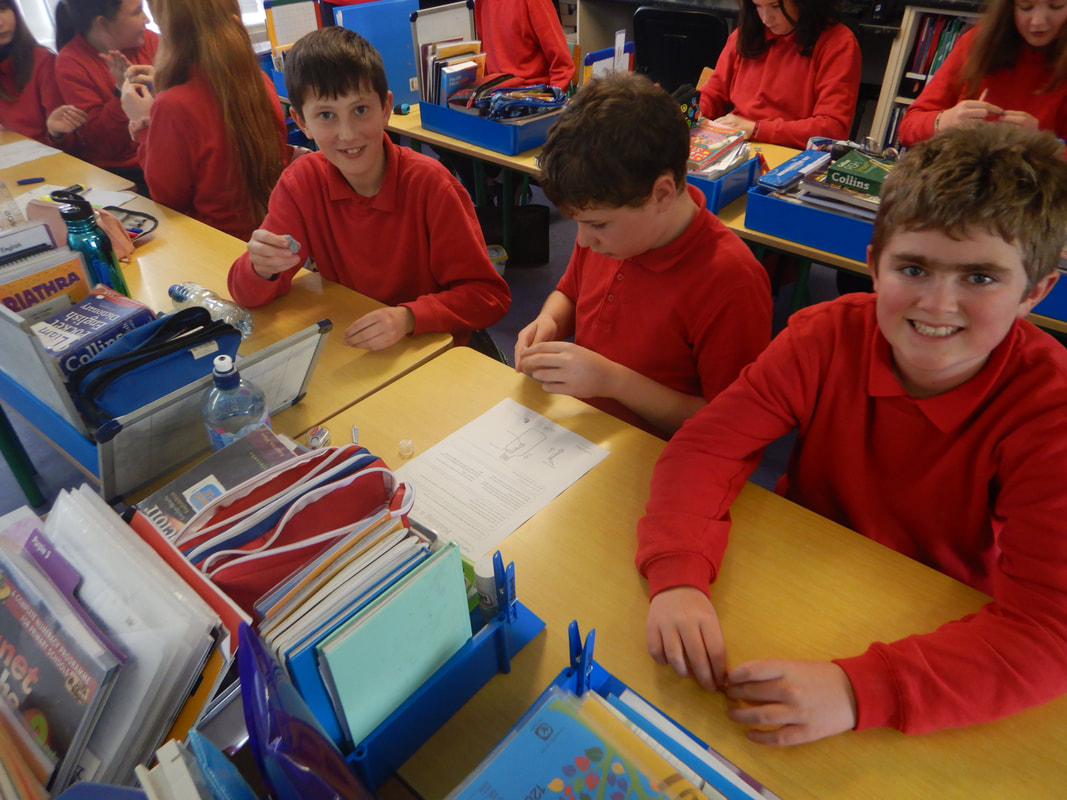
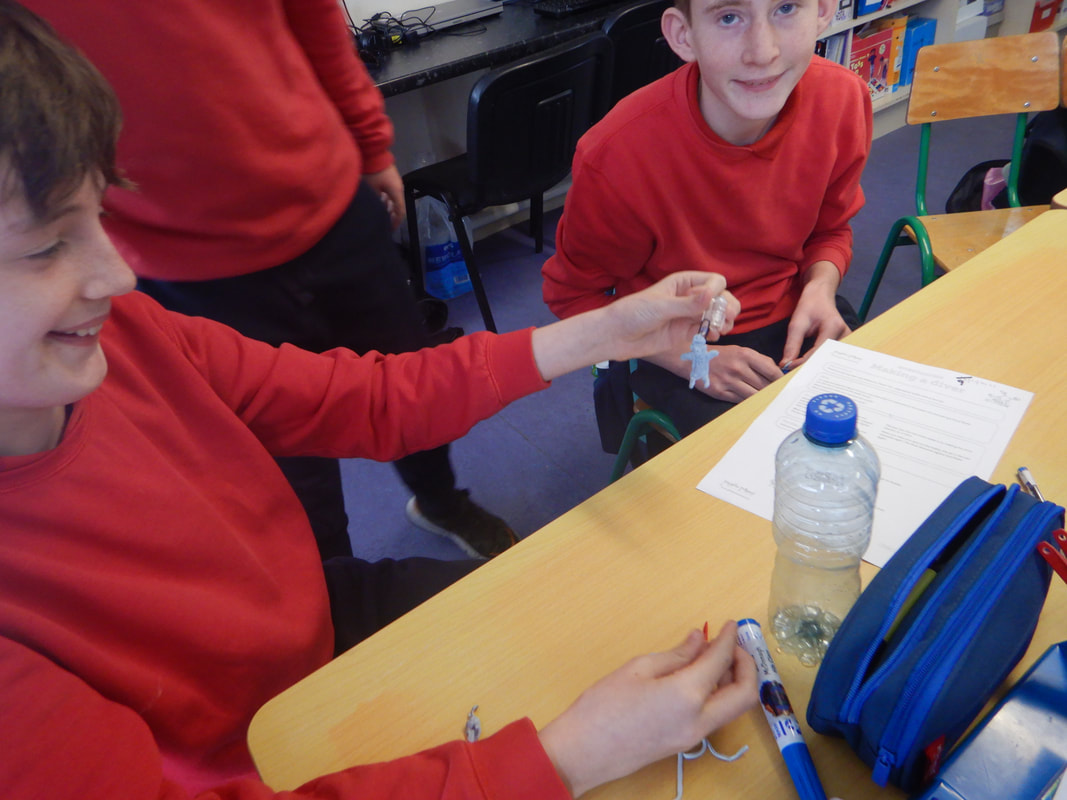
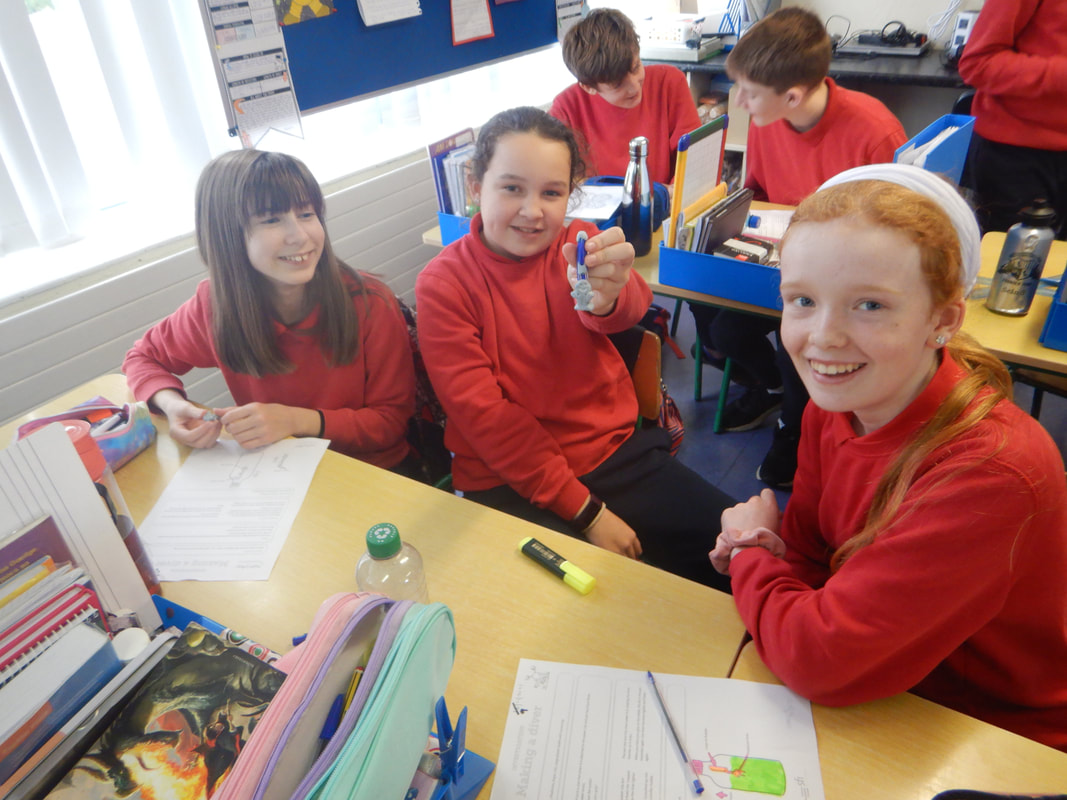
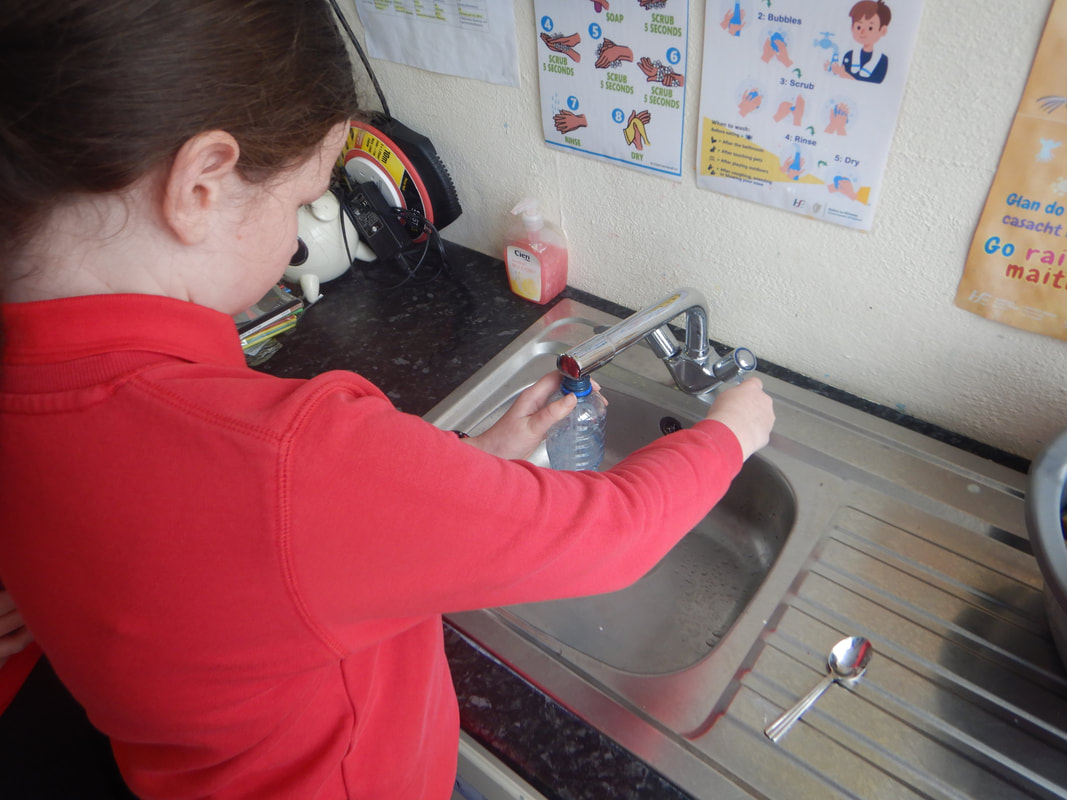
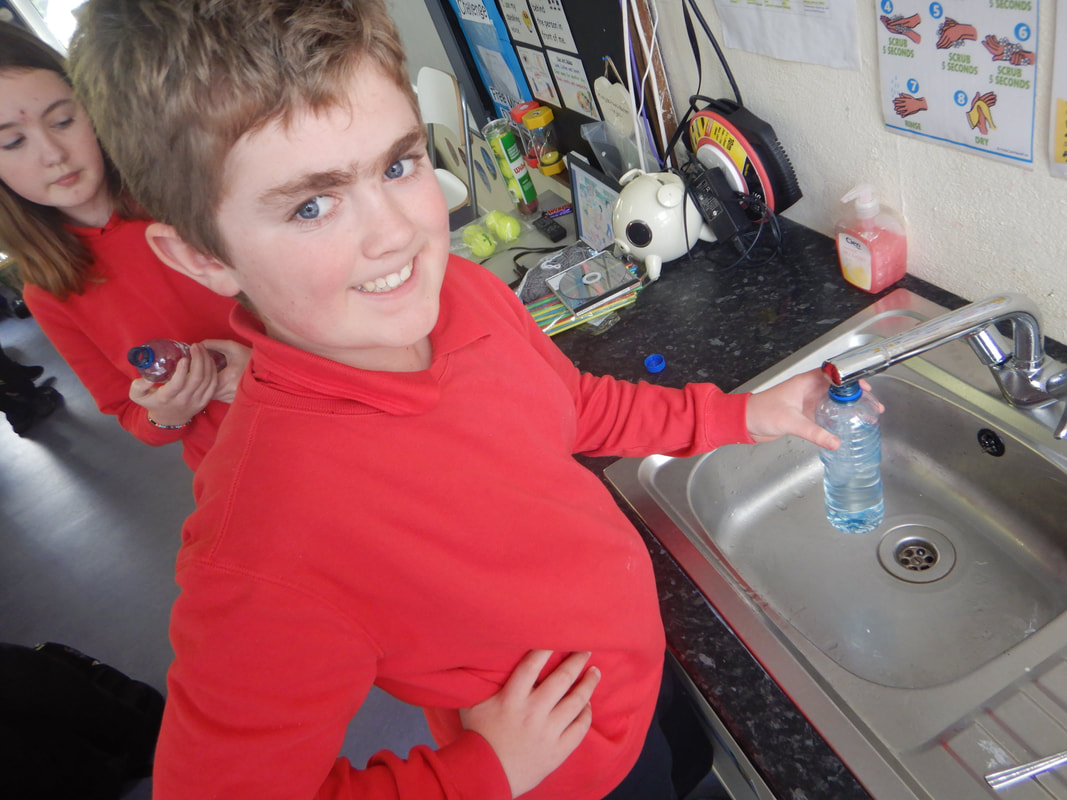
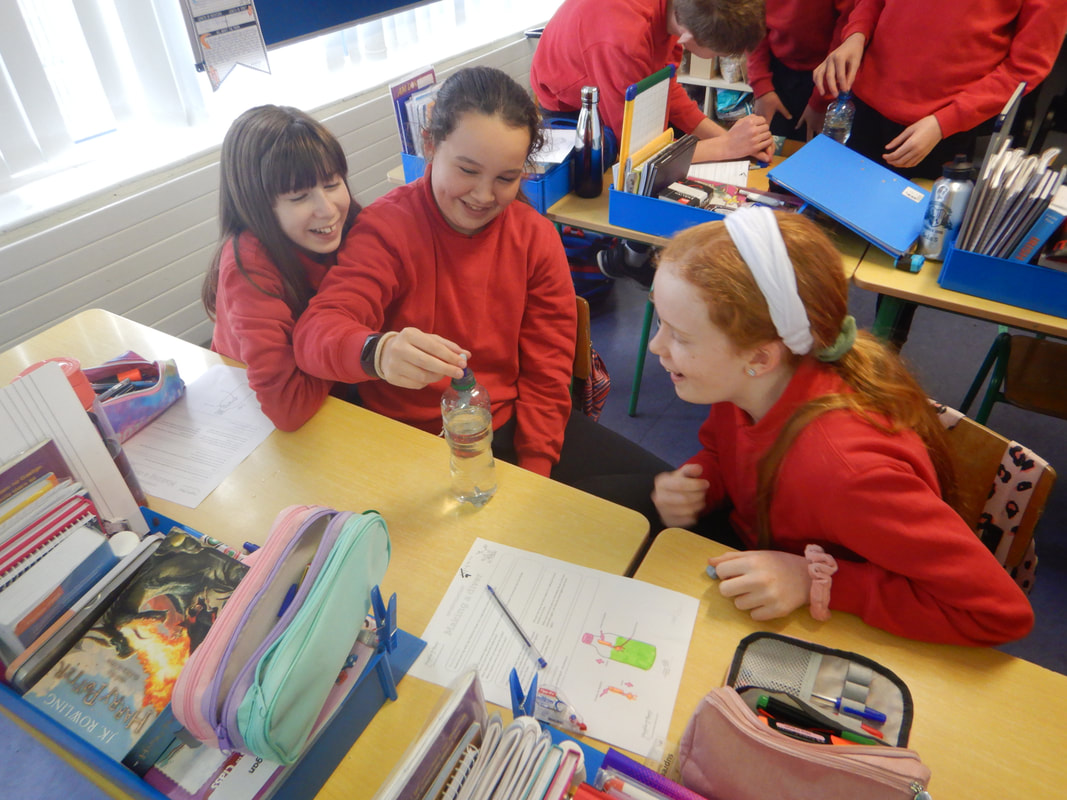
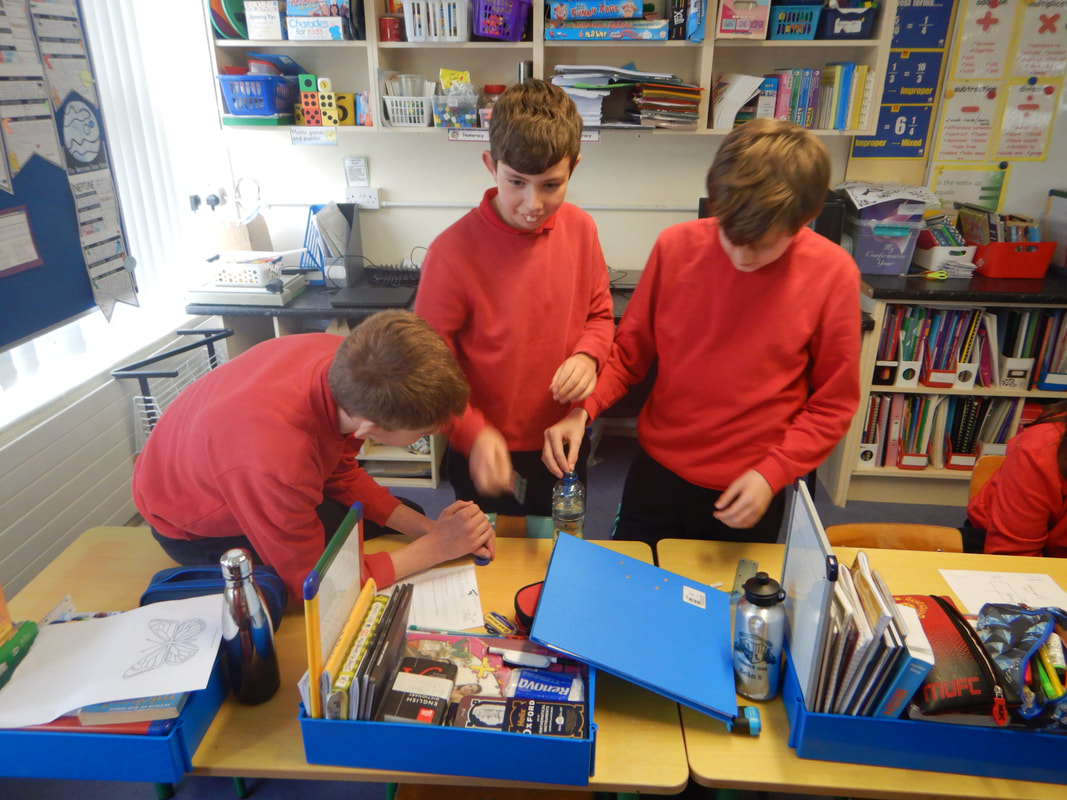
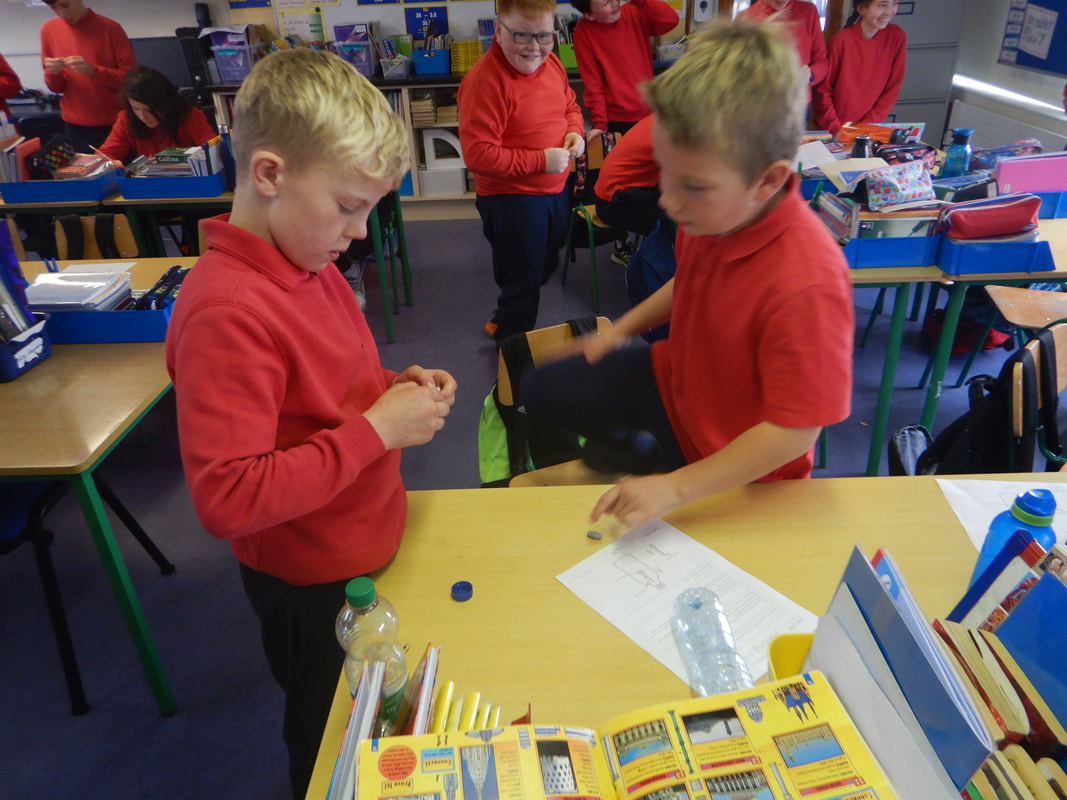
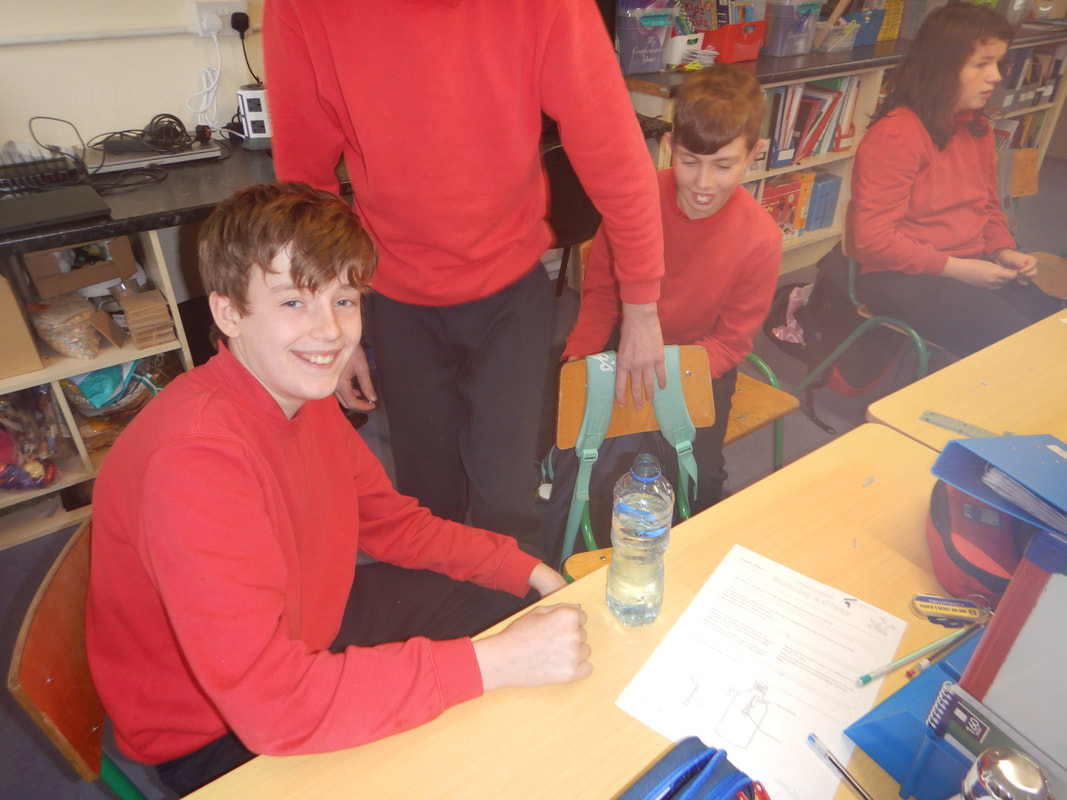
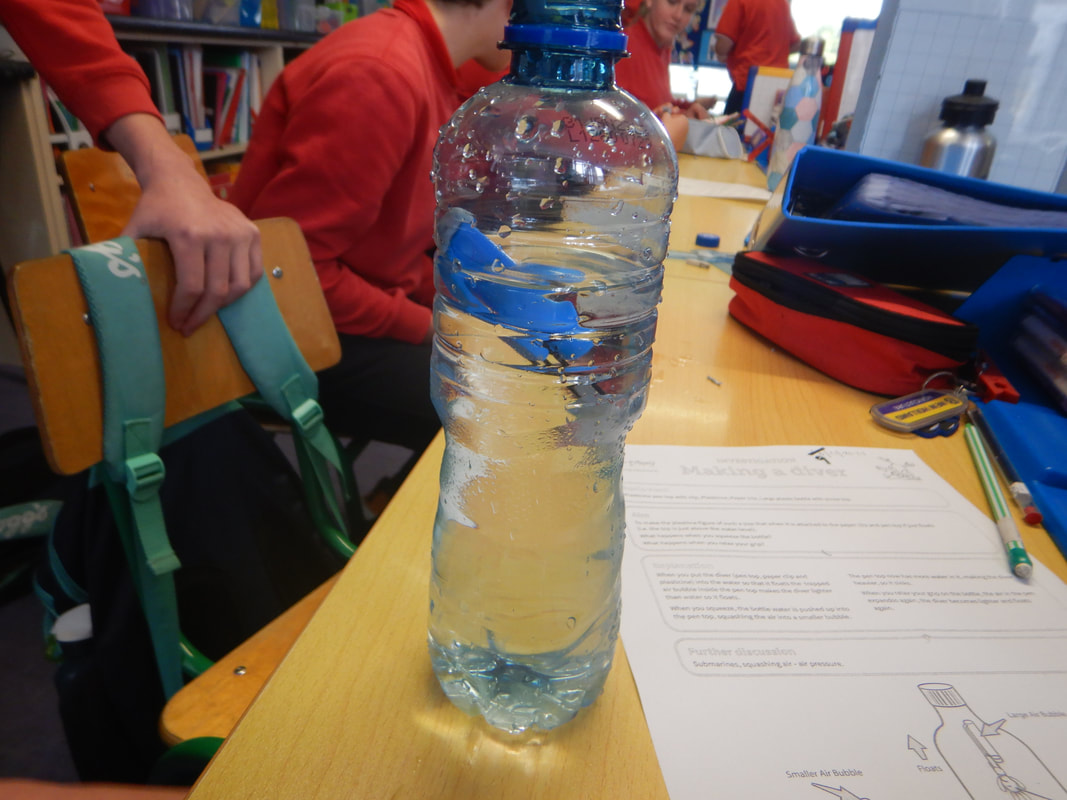
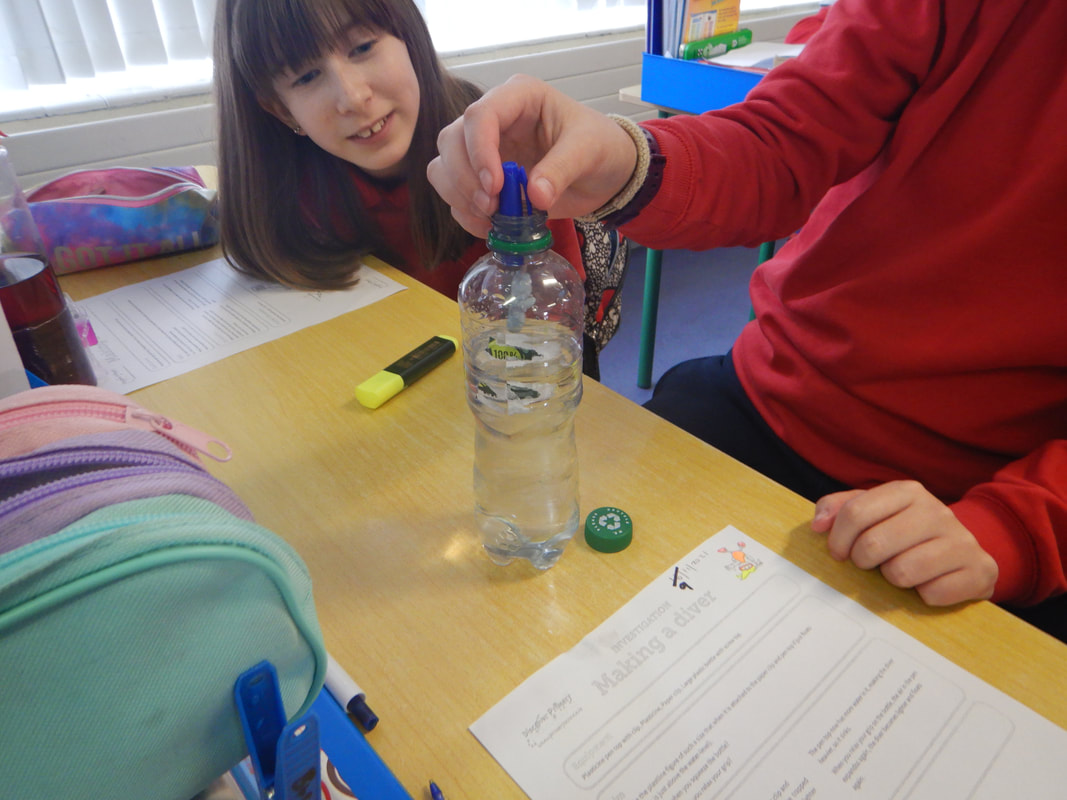
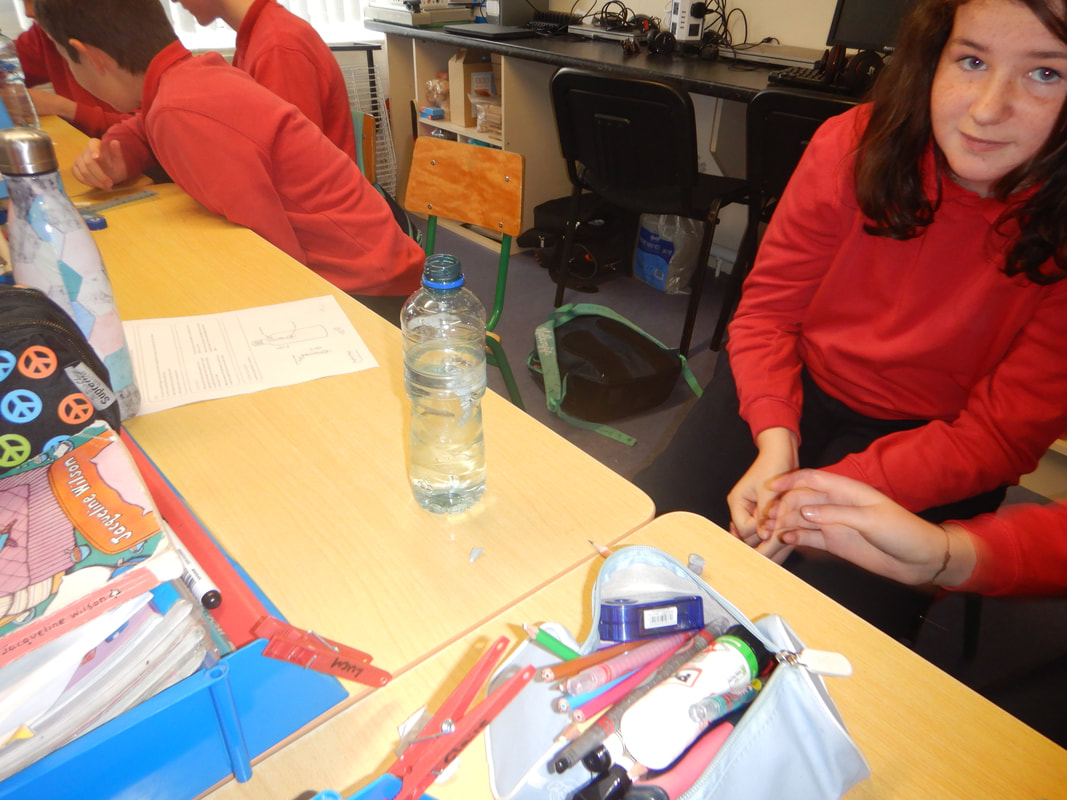
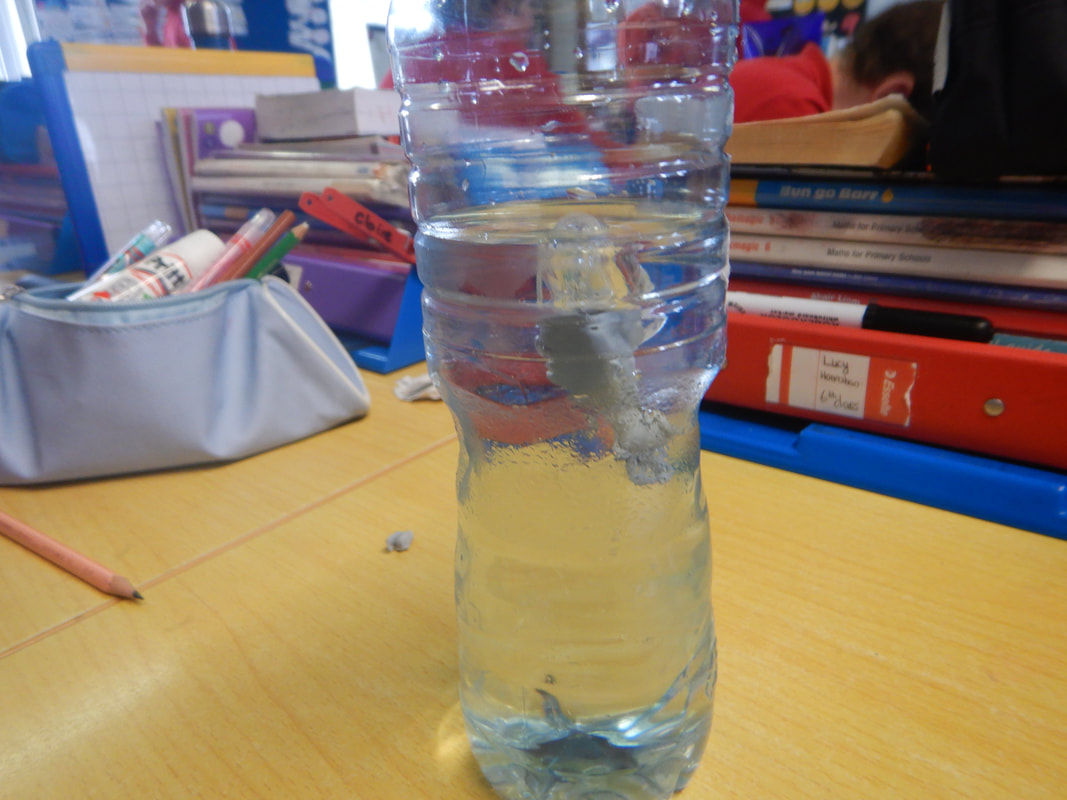
5th and 6th : Make a Diver Experiment
Objective: Investigating Density
Equipment:
A clear plastic soda bottle and cap
A ball point pen cap that does not have holes in it
Some modeling clay/blu-tak
Instructions:
1. Remove any labels from your bottle so that you can watch the action.
2. Fill the bottle to the very top with water.
3. Place a small pea-size piece of modeling clay at the end of the point on the pen cap.
4. Slowly place the pen cap into the bottle, modeling clay end first. (some water will spill out – that’s okay) It should just barely float. If it sinks take some clay away. If it floats too much add more clay.
5. Now screw on the bottle cap nice and tight.
6. Now for the fun part. You can make the pen cap rise and fall at your command. Squeeze the bottle hard – the pen cap sinks…stop squeezing and the pen cap rises. With a little practice, you can even get it to stop right in the middle.
Conclusion:
This experiment is all about DENSITY. When you squeeze the bottle, the air bubble in the pen cap compresses (gets smaller) and that makes it more dense than the water around it. When this happens, the pen sinks. When you stop squeezing, the bubble gets bigger again, the water is forced out of the cap, and the pen cap rises.
Questions we asked:
1. Does the size of the bottle affect how hard you have to squeeze the make the diver sink?
2. Does it matter if the bottle is not filled all the way with water?
3. Does the temperature of the water affect the density of the the diver?
Scientific skills: design and make, investigating, experimenting, questioning, analysing, hypothesising.
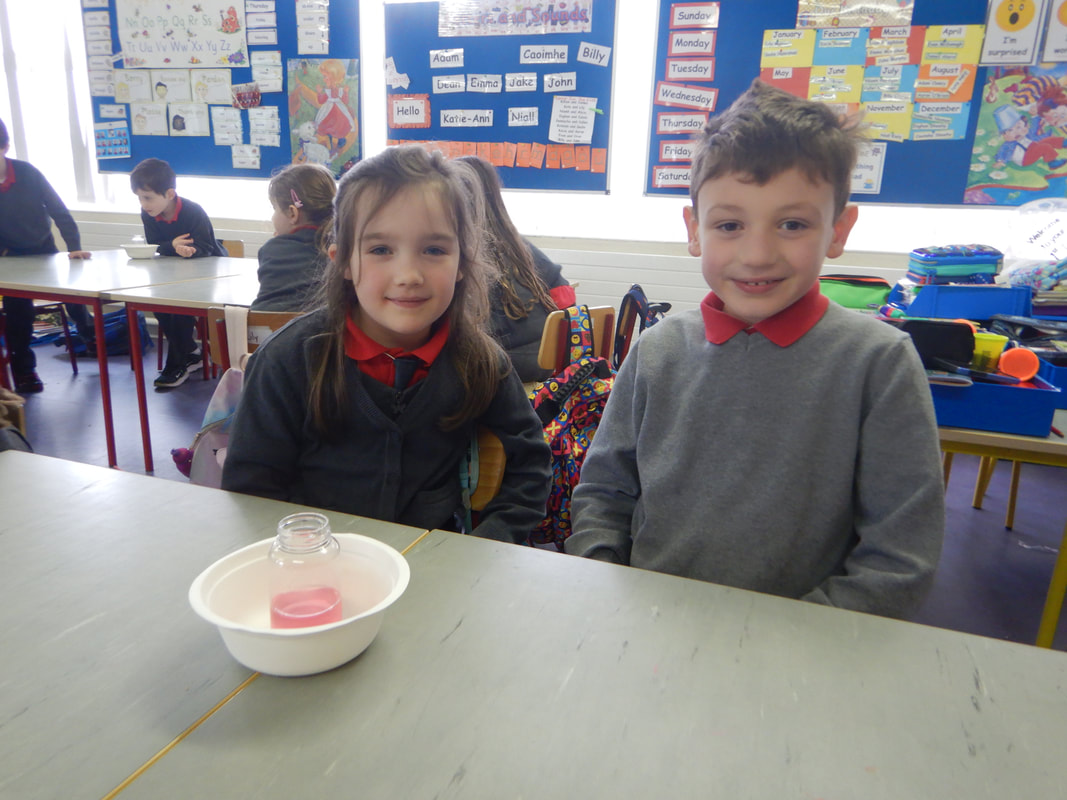
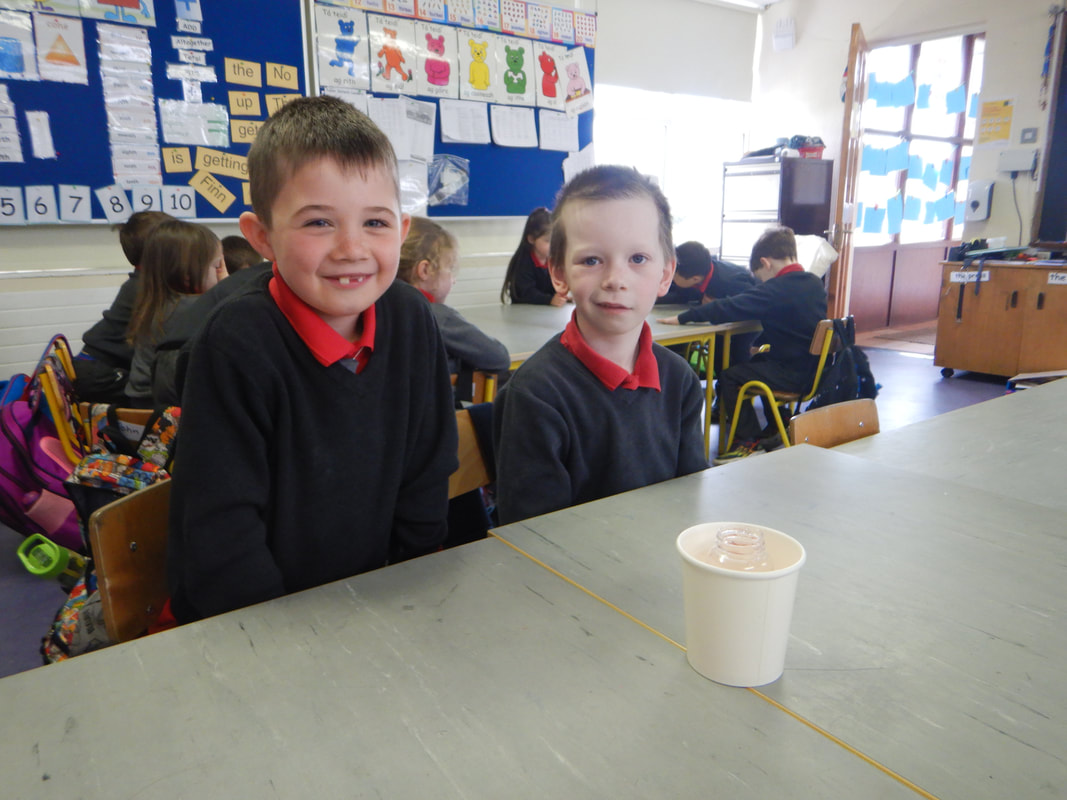
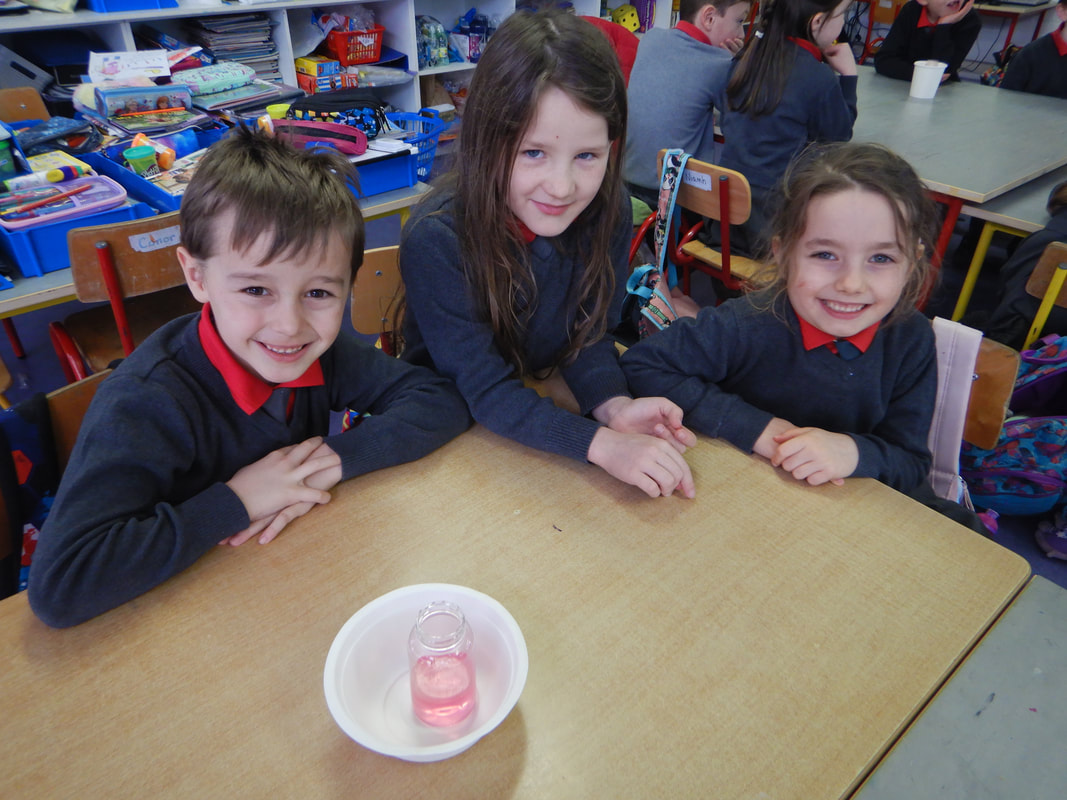
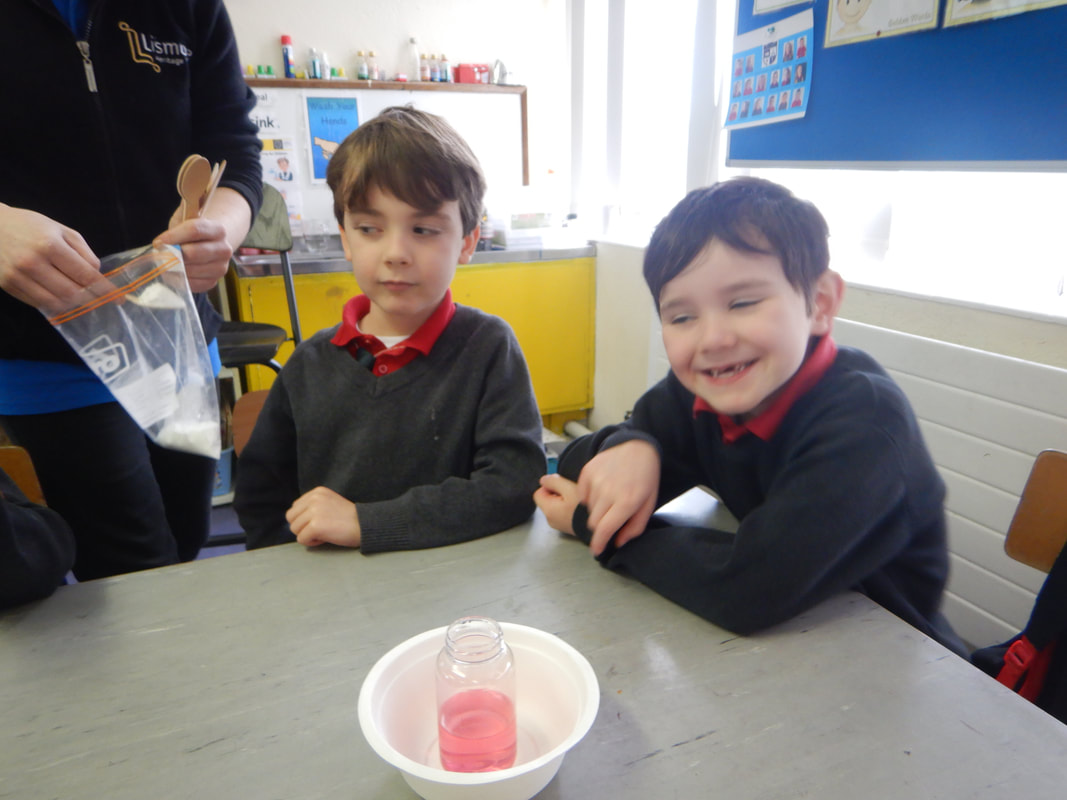
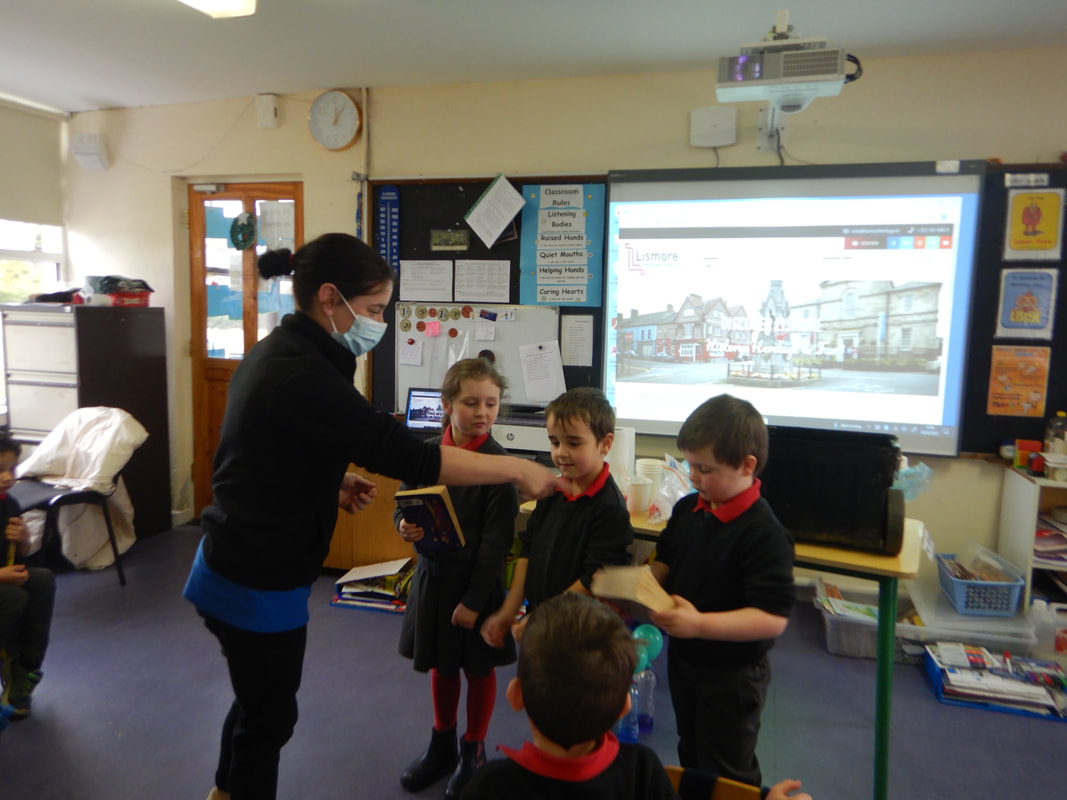
4. Visit from Lismore Heritage Centre - Science Workshops (SFI Discover Centre)
We were delighted to invite Lismore Heritage Centre to the school on Wednesday March 2nd. Each classroom had a workshop on Science and really enjoyed the experience.
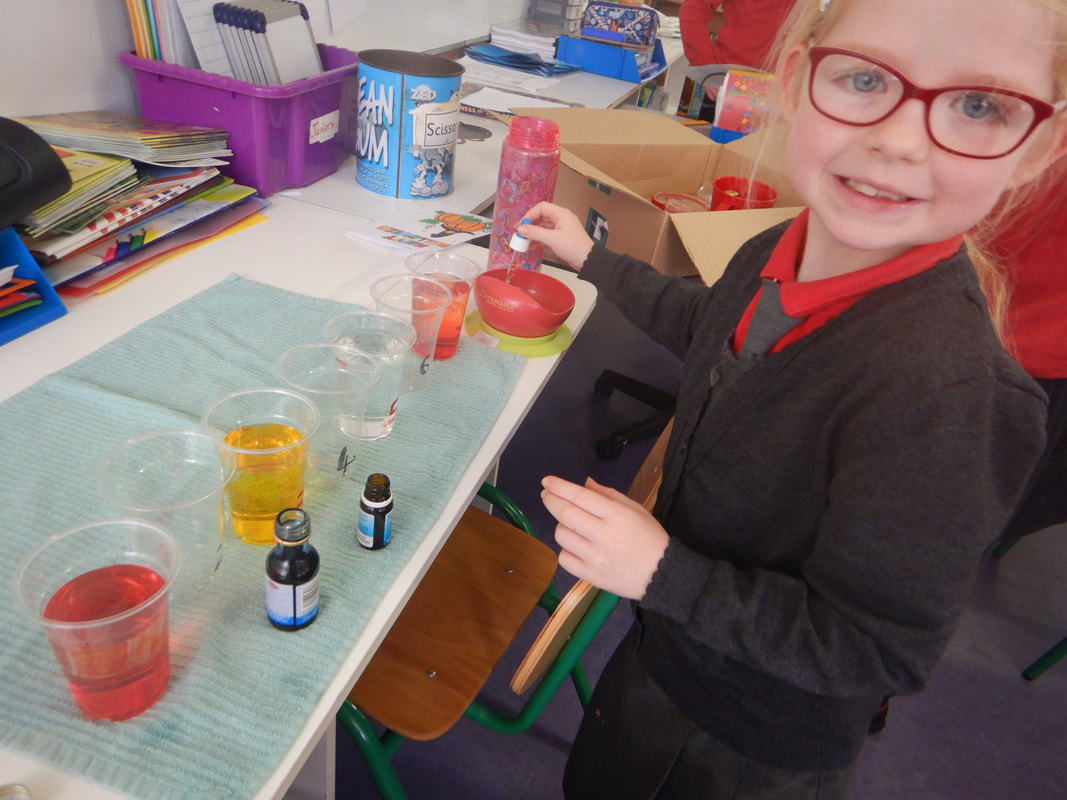
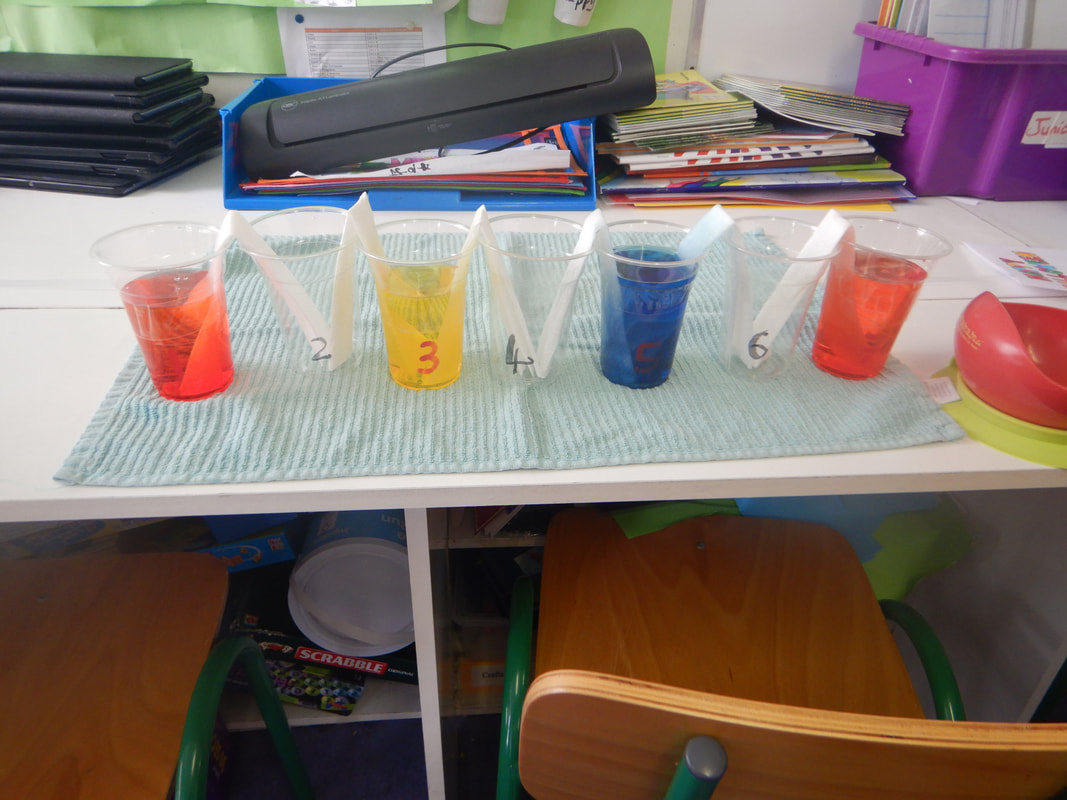
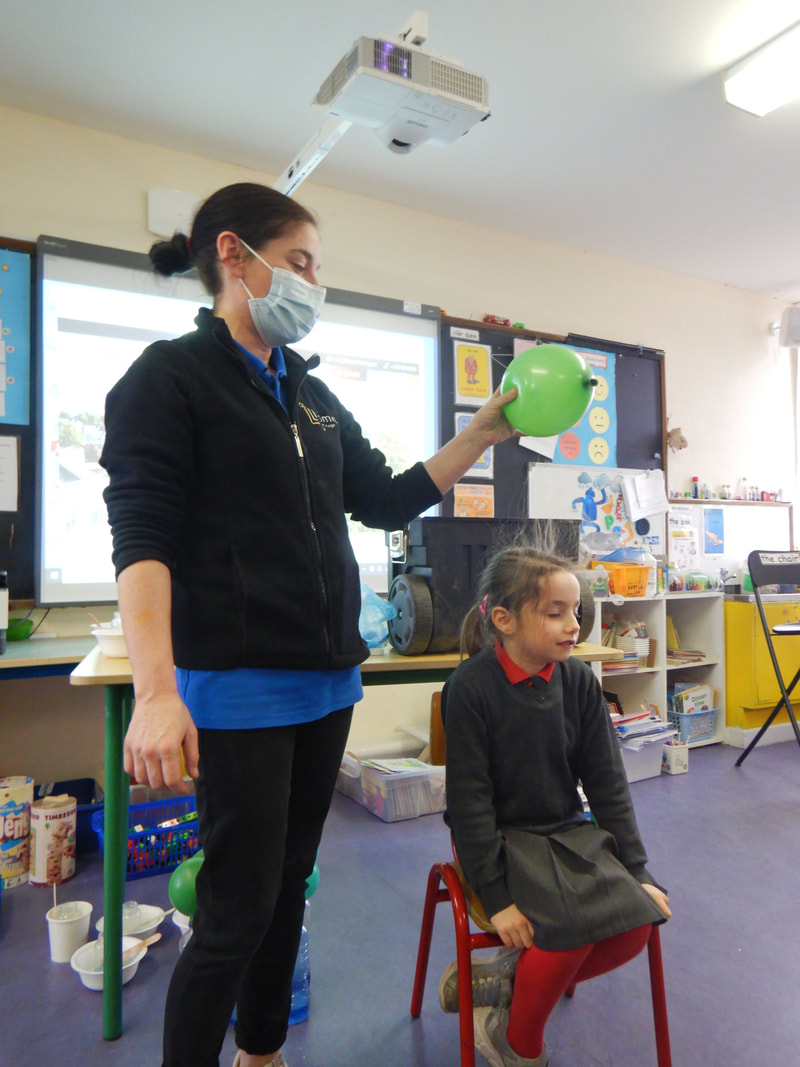
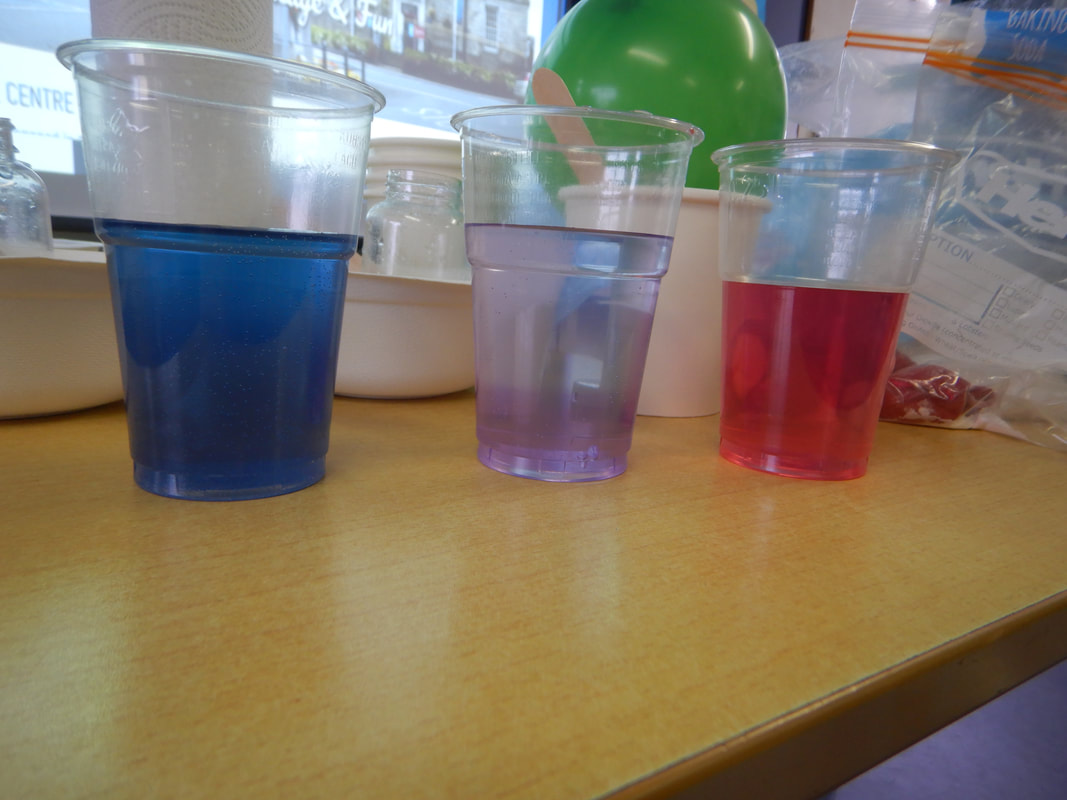
Junior and Senior Infants: Chemistry Kid Workshop
The pupils learned about acids, bases and the PH scales in this interactive workshop. They investigated how to inflate balloons using gases. They used red cabbage juice and litmus paper as an indicator to determine the PH of everyday levels.
Junior and Senior Infants: Chemistry Kid Workshop
The pupils learned about acids, bases and the PH scales in this interactive workshop. They investigated how to inflate balloons using gases. They used red cabbage juice and litmus paper as an indicator to determine the PH of everyday levels.
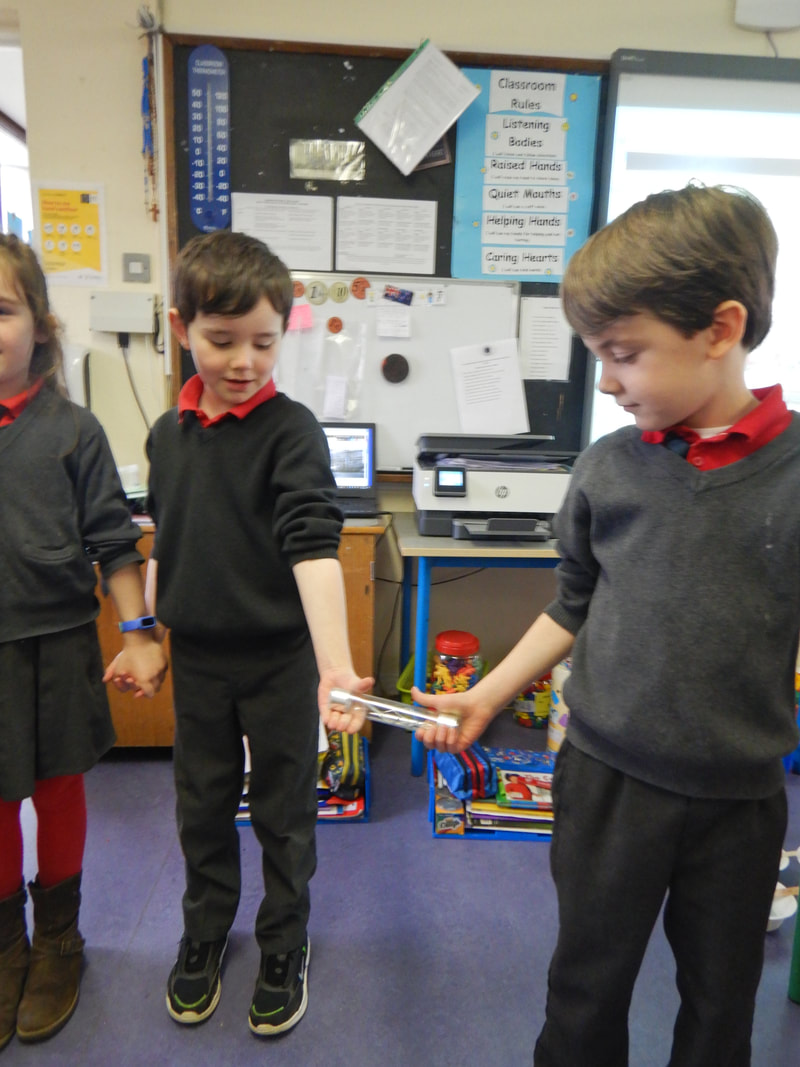
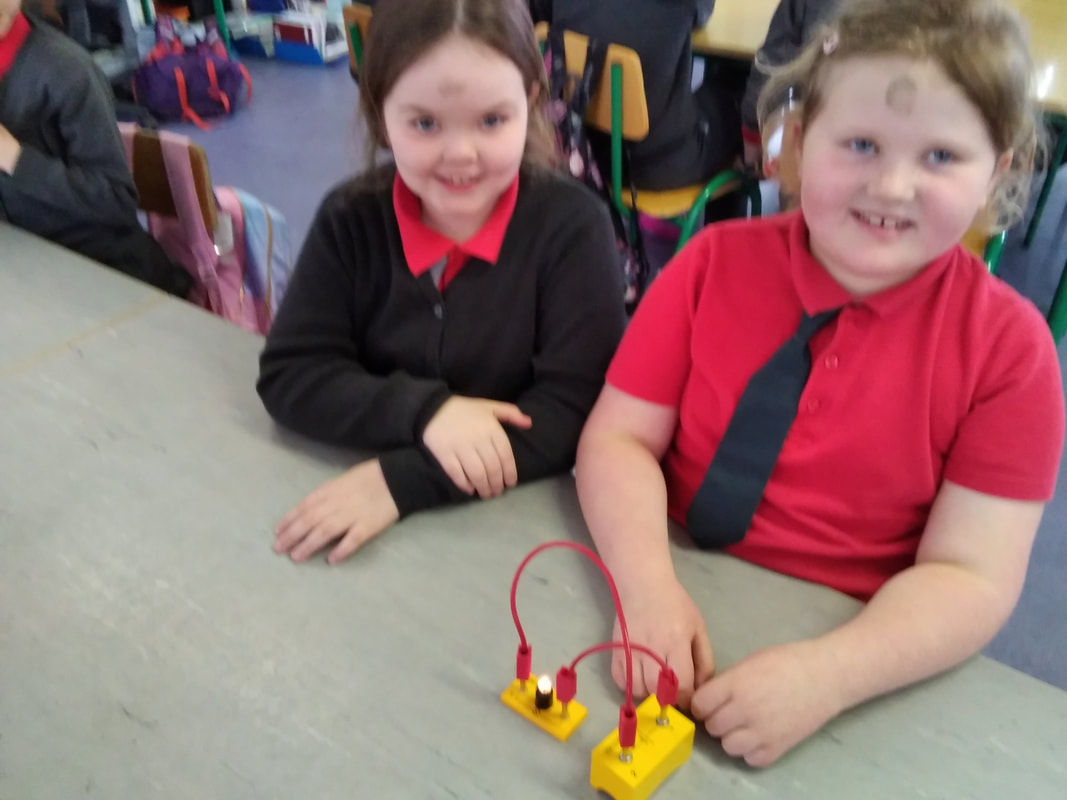
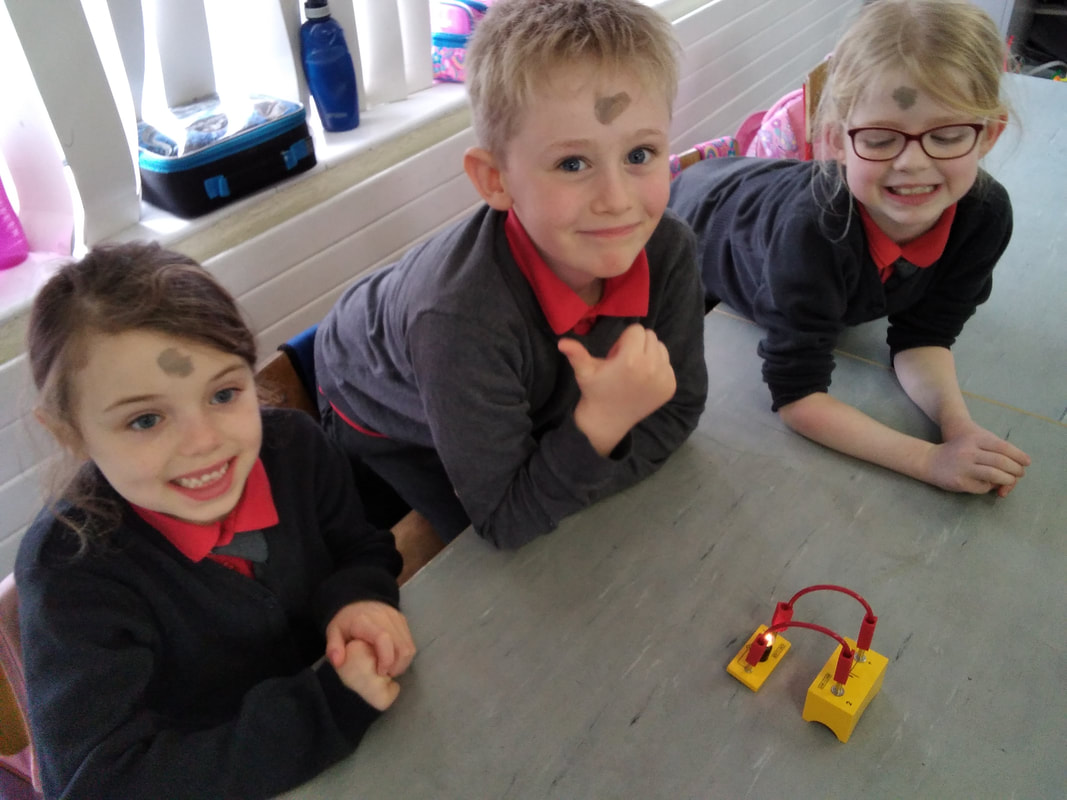
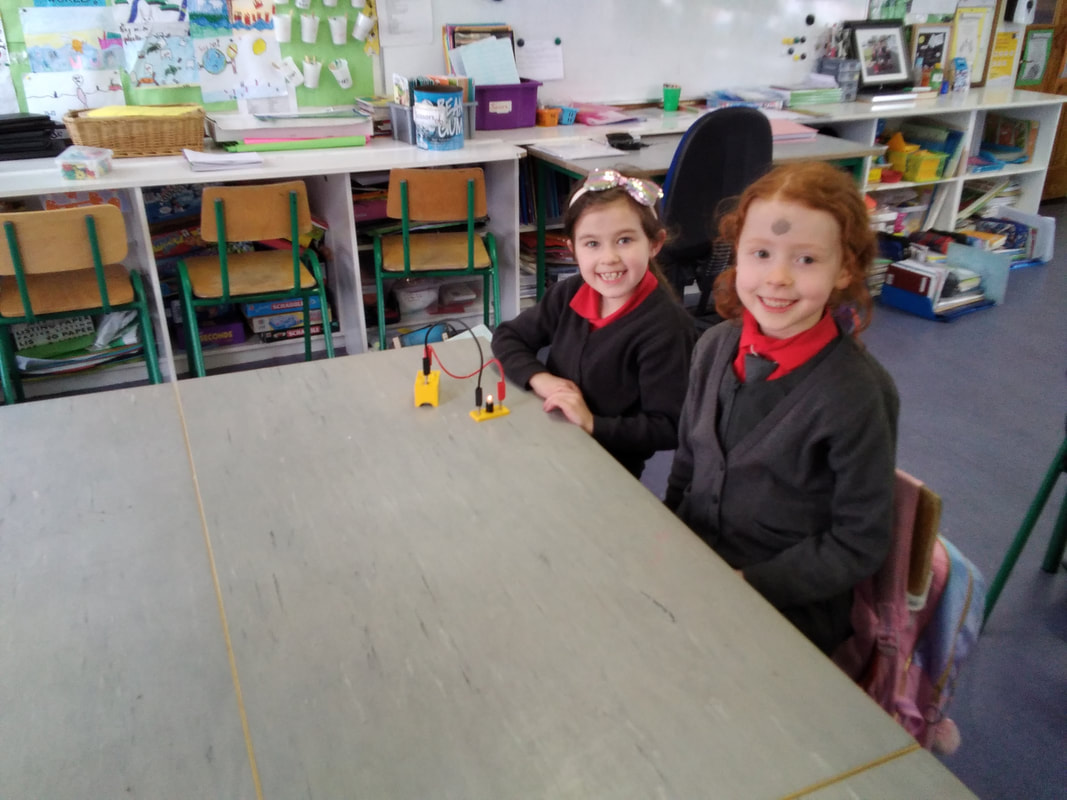
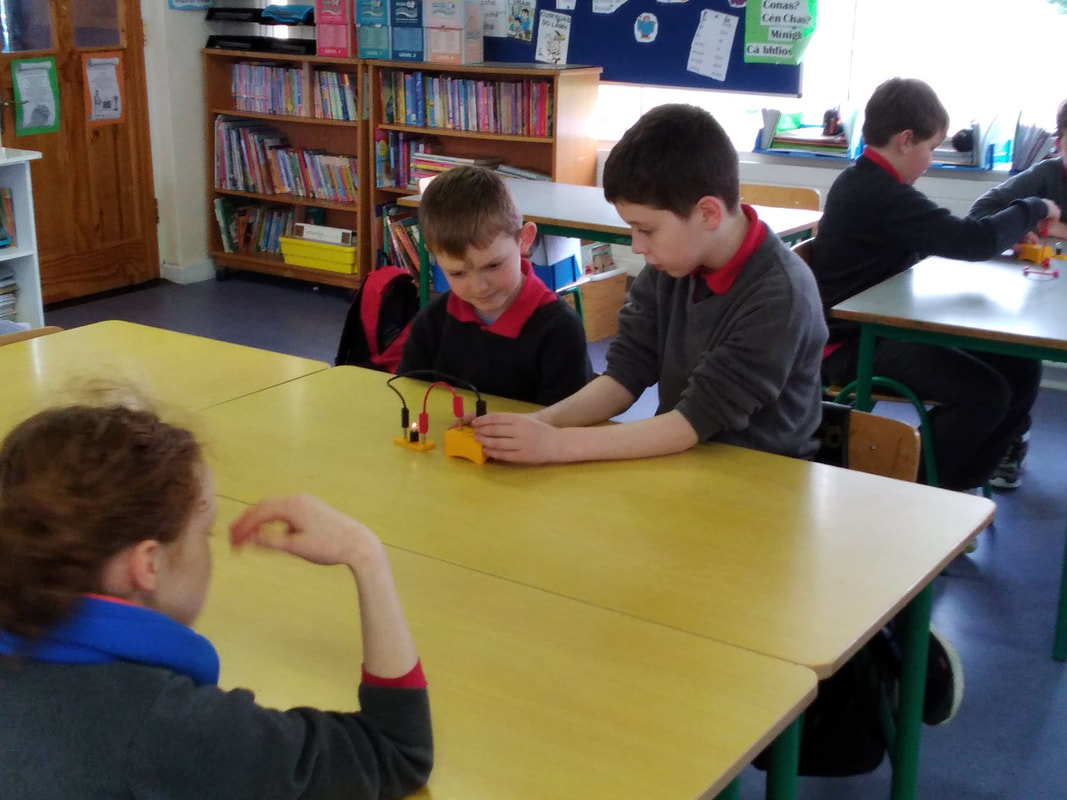
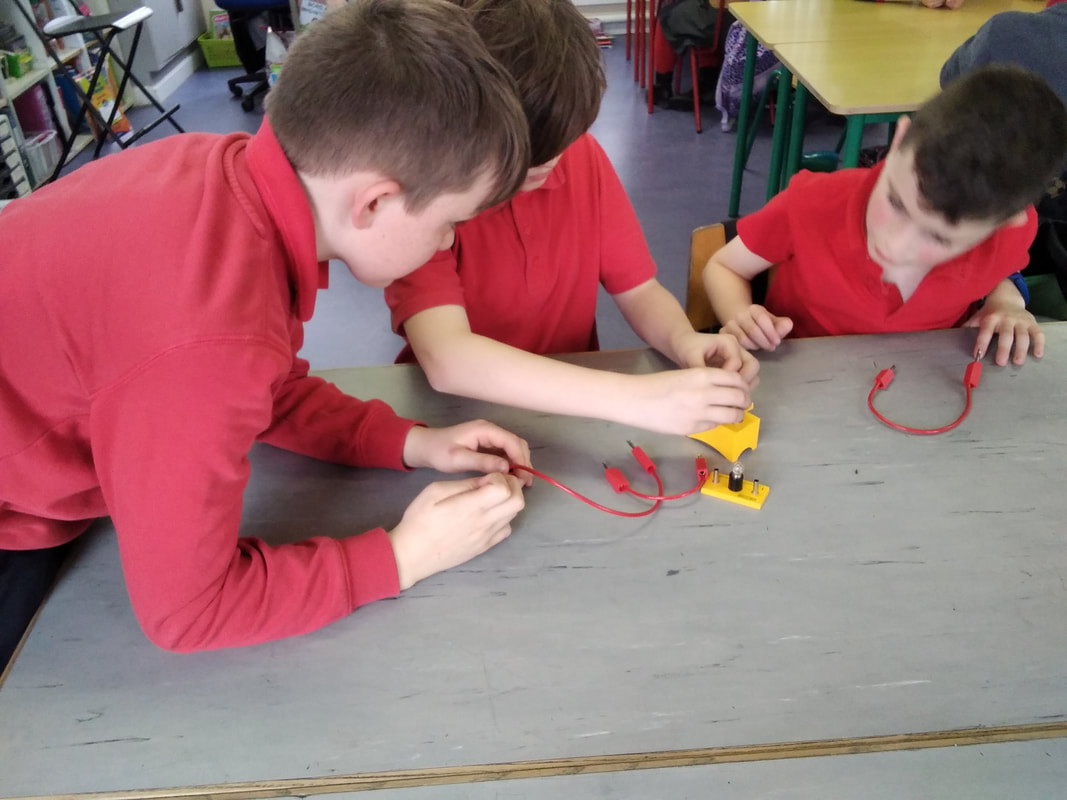
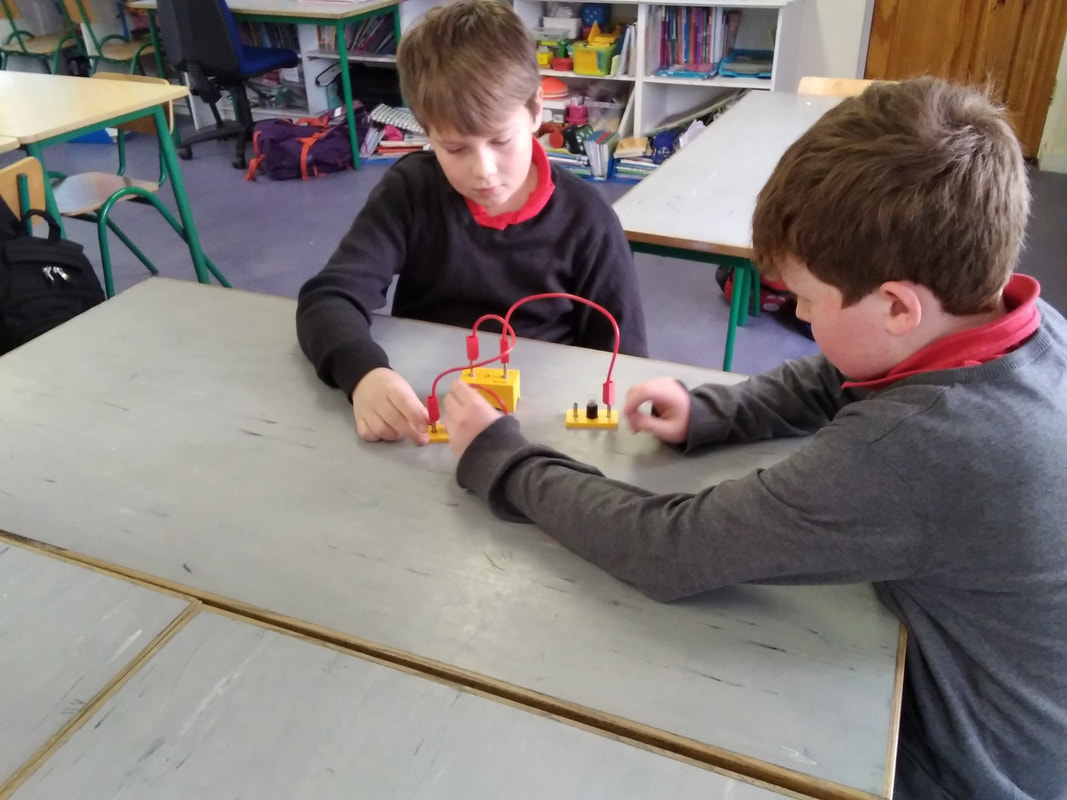
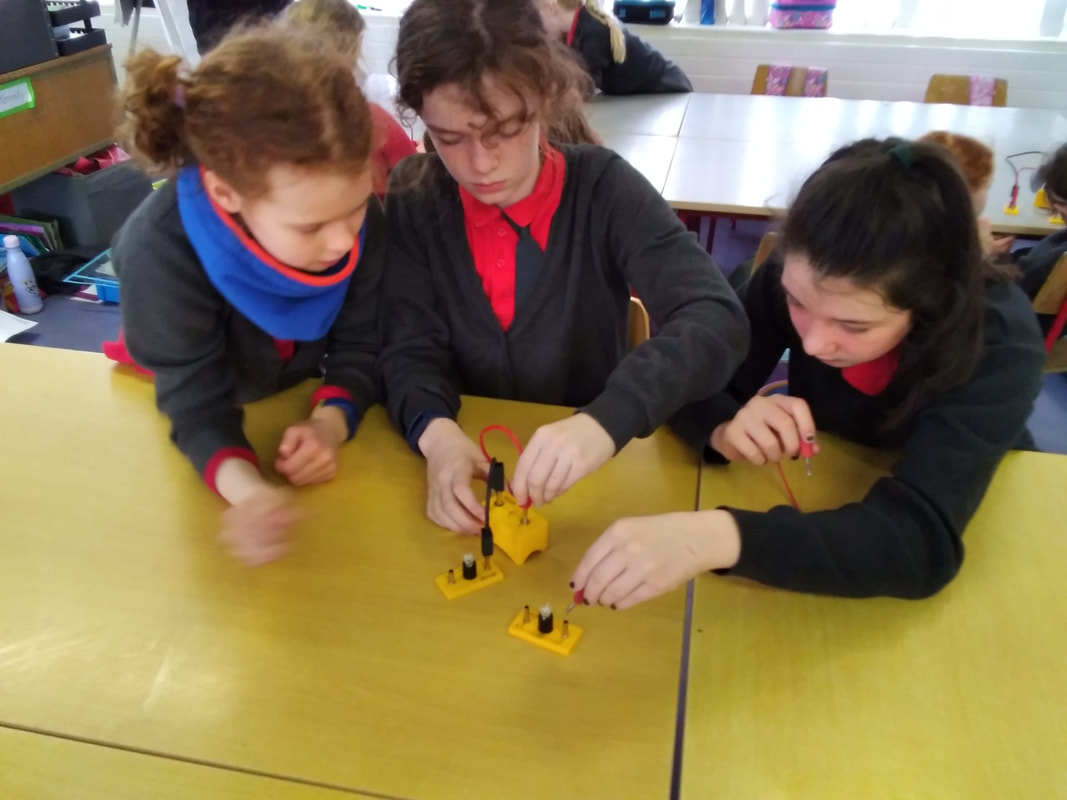
1st, 2nd, 3rd and 4th Class: Shocking Science
The pupils had some some hair-raising fun with Electricity before building circuits, adding switches, testing insulators and conductors and learning about all the Energy and Forces that contribute to it. Magnetism was also explored and they explored some Plasma Balls to discuss static electricity. Finally, they learned about fuses and electrical safety and the uses of the humble wire in everyday life. Students will be shockingly entertained!
The pupils had some some hair-raising fun with Electricity before building circuits, adding switches, testing insulators and conductors and learning about all the Energy and Forces that contribute to it. Magnetism was also explored and they explored some Plasma Balls to discuss static electricity. Finally, they learned about fuses and electrical safety and the uses of the humble wire in everyday life. Students will be shockingly entertained!
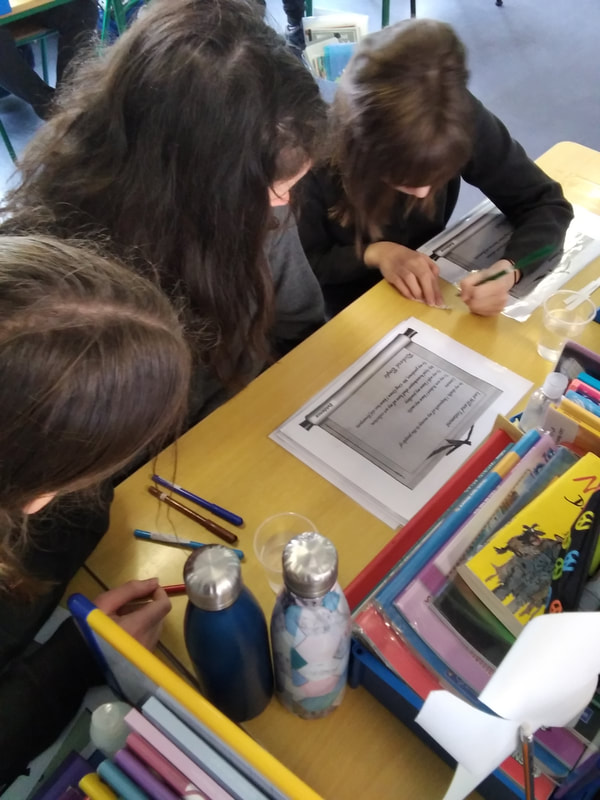
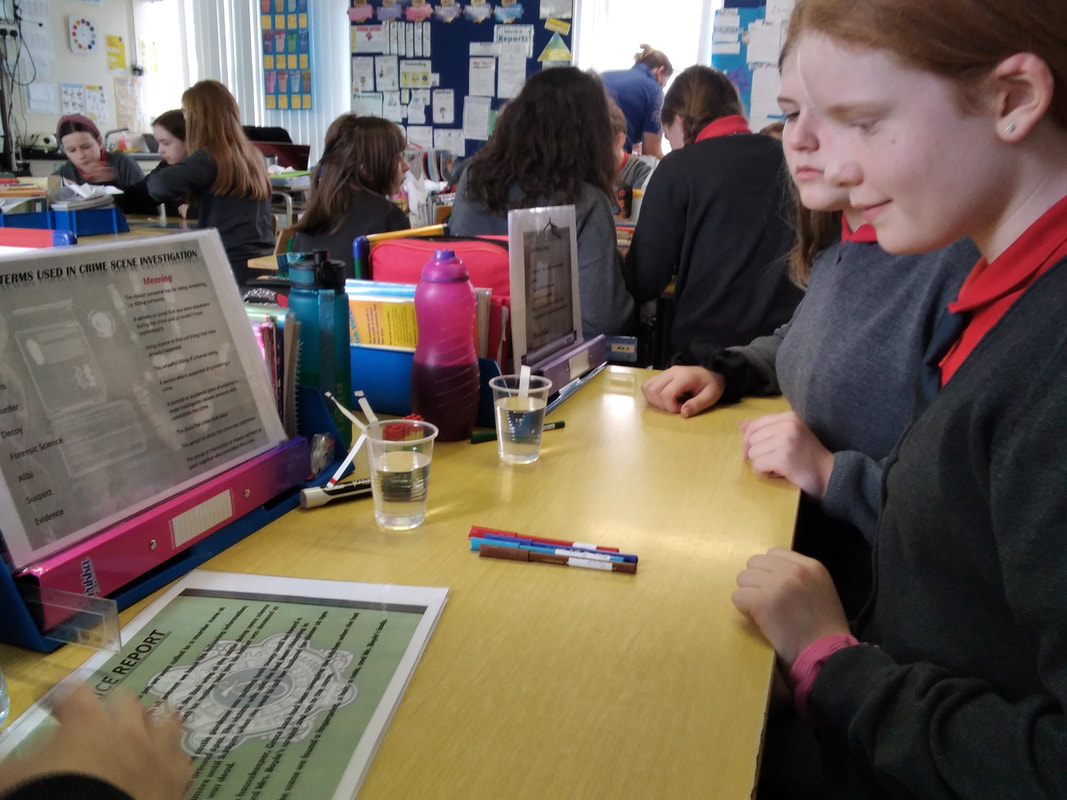
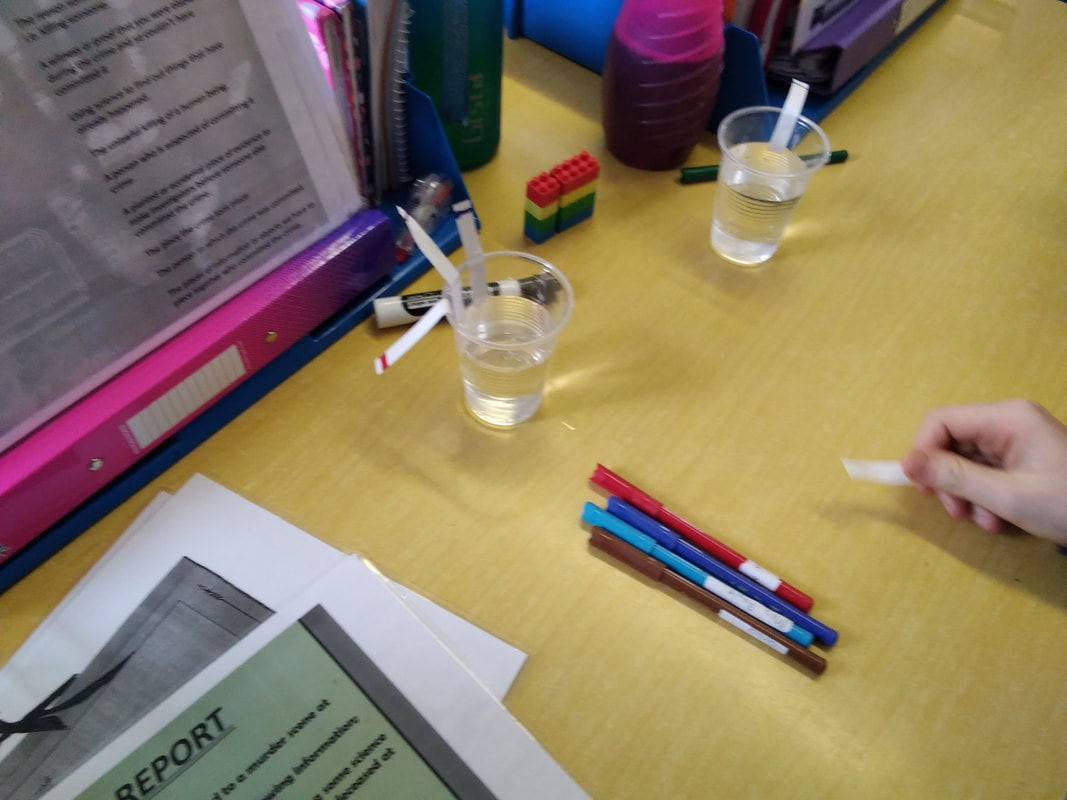
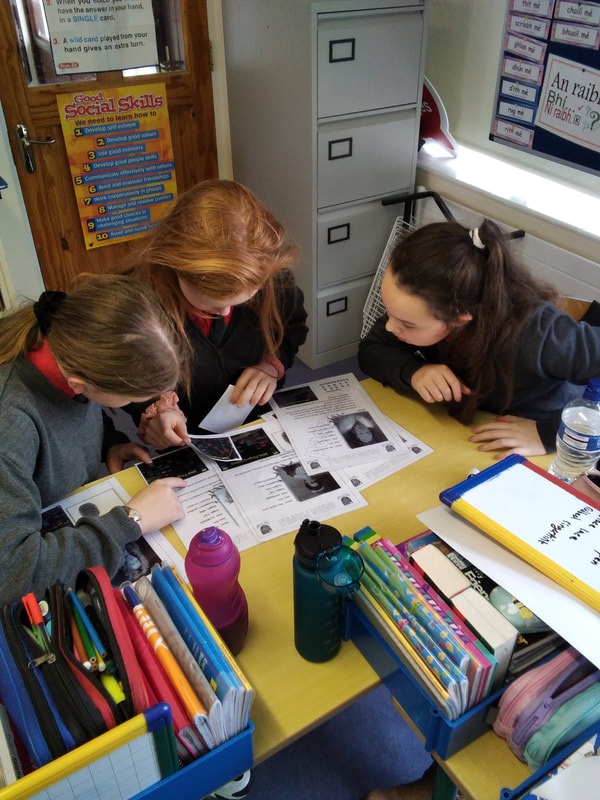
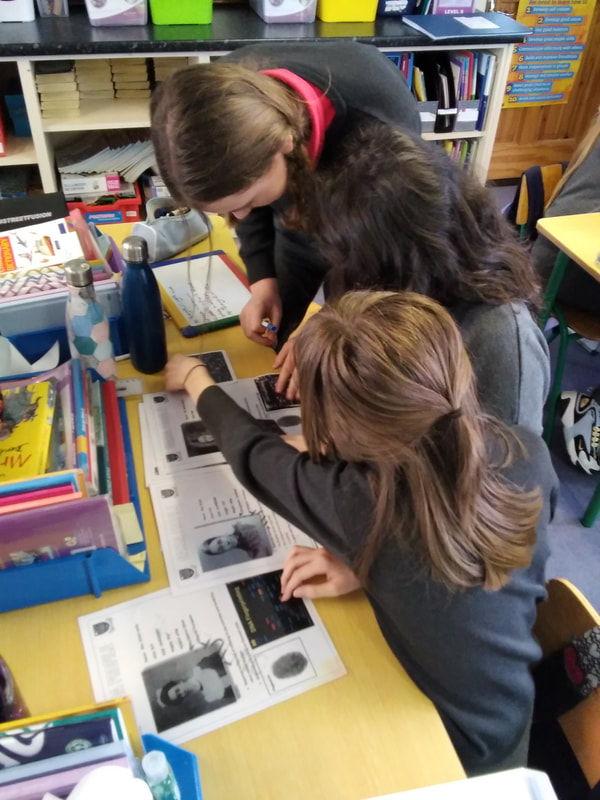
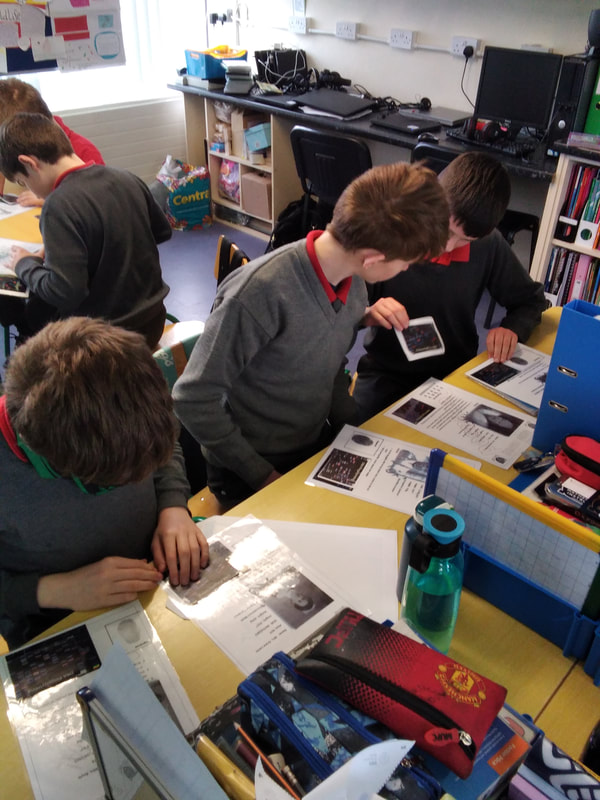
5th and 6th Class: CSI Investigation
During this workshop, everyone was a suspect. The pupils worked as part of a team to deduce, decide and discover the secrets and tricks of real life C.S.I. agents. They explored an application of science in everyday life and worked as a team to piece the clues together. Using real life scientific techniques and materials like paper chromatography and D.N.A. extraction students got hands-on a become a detective for a day!
During this workshop, everyone was a suspect. The pupils worked as part of a team to deduce, decide and discover the secrets and tricks of real life C.S.I. agents. They explored an application of science in everyday life and worked as a team to piece the clues together. Using real life scientific techniques and materials like paper chromatography and D.N.A. extraction students got hands-on a become a detective for a day!